1/32 Trumpeter Messerschmitt Bf 109G-2 Gunther Rall JG52

  • Thread starter Airfix Modeller Freak
  • Start date
A

Airfix Modeller Freak

Guest
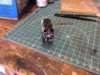
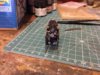
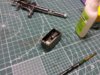
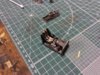
I have finally got around to doing this build. I am using a massive amount of aftermarket and have really piled it on this time. The kit is very nice in itself, with PE and very nice rivets and fit all round and a full engine and gunbay. However, most of the kit parts are going into the spares box and I am only keeping the main airframe and the undercarriage as I am using AM. I am also using an Aero Detail Walk around Book on the Bf 109G and the Squadron Signal Publication on the Bf 109G Walkaround.
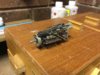
  • Eduard Brassin BF 109G-6 Engine (Will combine G-2 gunbay from kit with the engine to convert it into a full G-2 engine and gunbay)
  • RB Productions MG17 Turned Brass Barrels
  • Eduard Fabric Bf 109G Seatbelts
  • Eduard Bf 109G-6 Zoom (will only use parts appropriate for the G-2)
  • Airscale Luftwaffe placards (will use for the engine)
  • Aires Bf 109G-2 Cockpit for Trumpeter
Cheers, John
IMG_2897.JPG
IMG_2898.JPG
IMG_2907.JPG
 
A

Airfix Modeller Freak

Guest
First update. I have done 95% of the Aires cockpit, just need to do the control stick and the control panel, but the main panel will be easy to do as I am using the eduard PE which has fantastic dial detail. I sprayed the cockpit RLM 66, then hand painted everything, using some PE to brighten some areas and to add some placards. I then ran a wash throughout the sidewalls in order to give a sense that the aircraft is being currently used. It produced a suitable dirty effect. It was also weathered using metallic drybrushing in order to give the worn to metal look as well
The Eduard Fabric seatbelts have driven me mad so far, but they produce stunning results. I will do the lap belts next session.
Cheers, John
IMG_2899.JPG
IMG_2900.JPG
IMG_2901.JPG IMG_2902.JPG
IMG_2904.JPG
IMG_2905.JPG
 

Attachments

  • IMG_2906.JPG
    IMG_2906.JPG
    154.8 KB · Views: 3
  • IMG_2903.JPG
    IMG_2903.JPG
    153.4 KB · Views: 2

colin m

Moderator
Staff member
Moderator
SMF Supporter
Joined
Dec 26, 2008
Messages
8,595
Points
113
Location
Stafford, UK
First Name
Colin
Looks like this is going to get every mod' on the market. I'll look forward to seeing it develop. The cockpit looks great, top marks.
 
A

Airfix Modeller Freak

Guest
Thanks, next update will be in shortly
Cheers, John
 
Joined
Jan 8, 2011
Messages
4,990
Points
113
Location
Essex
First Name
Dave
Nice work John. If the 1/32 seat belts have driven you mad,you want to try them in 1/48!.
 
A

Airfix Modeller Freak

Guest
Cockpit is all finished now and 70% of the engine is completed. The eduard resin engine is very finicky, but in the end it is looking very detailed
IMG_2918.JPG
IMG_2917.JPG
IMG_2916.JPG
IMG_2909.JPG
 
A

Airfix Modeller Freak

Guest
Most of the engine built up.
btw, The fuel line in the above pic has been corrected.
IMG_2926.jpg
IMG_2929.jpg
IMG_2930.jpg
IMG_2931.jpg
IMG_2923.jpg
IMG_2924.jpg IMG_2925.jpg
 

Attachments

  • IMG_2922.jpg
    IMG_2922.jpg
    128.4 KB · Views: 2
  • IMG_2928.jpg
    IMG_2928.jpg
    115.5 KB · Views: 3
Last edited by a moderator:
A

Airfix Modeller Freak

Guest
the main firewall is not attached yet, but being dry fitted. So far, the fit to the kit parts is looking really good, a good thing since this was designed for REvell
Cheers
IMG_2932.jpg
IMG_2933.jpg
IMG_2934.jpg
 
A

Airfix Modeller Freak

Guest
Have out the main airframe together with lots of sawing and sanding to get the plastic parts to fit. However, no major gaps have been encountered. I also sawed open the slat struts in preparation to pose them open
Cheers, John
IMG_2948.JPG
IMG_2950.JPG
IMG_2952.JPG
 
Top