72 Gustav

Magneto

Oberleutnant
SMF Supporter
Joined
Oct 25, 2023
Messages
299
Points
63
Location
Sky
First Name
Paul
Bringing this one back from oblivion. Several years ago I went to a modelling club we have on the grounds, just down the road. It’s a bit ad lib but there was a bunch of new kits that you could just help yourself to! I decided to show a little (rare) restraint and picked the little Revell Gustav.
This was during my 3 decade ‘lull’ where I sat at a table and put most of it together. I tried to free mask the canopy, got impatient and hand painted over the top (It turned out not too excellent. I cleaned off paint and re-masked a few weeks ago) Never used any primer and obviously just used a brush. Then I took it home, never went back to club and put it away in a box.

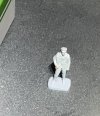
Recently whilst doing another build I added the primer.

So here we are with a retro build…

IMG_3656.jpeg

IMG_3666.jpeg
 

Magneto

Oberleutnant
SMF Supporter
Joined
Oct 25, 2023
Messages
299
Points
63
Location
Sky
First Name
Paul
So I’ve done some reading up (despite my earlier rant the Aircraft FAQ seems pretty useful:smiling4:) in this new landscape of those wonderful flying machines…

Learnt a few things. What I will attempt now is some general surgery. So maybe I’ve jumped a few steps but this is really just a learning platform but going live. So here goes!
 

Magneto

Oberleutnant
SMF Supporter
Joined
Oct 25, 2023
Messages
299
Points
63
Location
Sky
First Name
Paul
Cutting and sawing require much more care than I thought - not to mention we need to keep our digits as part of our hand in order to be of use - the urge to hack away must be resisted!

First of all I needed a reference to make my plan. This little gem is a cheap and available AFAIK - and it’s a Feist!

IMG_3672.jpeg

so I found these very quickly

IMG_3675.jpegIMG_3673.jpeg

I made a slight over cut so that must be repaired later. This was no mean task - this would normally be done before any construction- I had to scribe and saw more than I’d like and then use a de bonder which took off the primer. No dramas. It will have to be redone anyway.

It was still impossible to separate the split flaps so I tore them off - trying to keep at least one side in good condition to use as a template for scratching a new set.
Next session I will address the damage and scatch away into the unknown - yet again! I will probably try to cut of the tail flaps as well

IMG_3678.jpegIMG_3689.jpeg
 

Magneto

Oberleutnant
SMF Supporter
Joined
Oct 25, 2023
Messages
299
Points
63
Location
Sky
First Name
Paul
Hope you all had a great Christmas break!
inside flaps done - angles are irregular so cutting becomes an exercise in persistence. The outer flaps have been cut. I didn’t realise there were outer outer flap plus the slats at the front - this aircrafts wings is about 40% flaps lol

Im not sure yet about adding any details on the insides. I’ll wait and see to see if I can wing it :smiling5:

IMG_3842.jpegIMG_3841.jpeg
 

Magneto

Oberleutnant
SMF Supporter
Joined
Oct 25, 2023
Messages
299
Points
63
Location
Sky
First Name
Paul
I’ve added the mid flaps. I will leave the tail, slats and flaps alone as this really was just an exercise in sawing with a bit of scratch.
I may have to add some raised ‘bevels’ (?) to the outside trailing flaps.
Drilled holes on rear fuselage for the push bar. Centreline rack was missing 2 bolt holes so drilled them in. Supercharger intake had none. So drilled that. Only some slight filling needed otherwise it seems an ok kit

IMG_3885.jpegIMG_3882.jpegIMG_3864.jpeg
 

Magneto

Oberleutnant
SMF Supporter
Joined
Oct 25, 2023
Messages
299
Points
63
Location
Sky
First Name
Paul
Another prime after some filling and sanding. Small pieces added, the brass df loop I made fell off and I’ve yet to make a new one, I kind of forgot but no worries. New 3rd gen paints used. The scheme I’m going for is the standard RLM 74,75 & 76.

I didn’t realise that the primer is almost an exact RLM 76 so that was a bit tricky. I’m still learning to get to grips with my ’training’ airbrush. Thing is I think I’m pushing the boundaries a little with the Neo - I think it maxes out (or minimums out) at about 1/48. 1/72 may be a Bridge too Far.

The 74 will go on tomorrow hopefully

IMG_3895.jpegIMG_3893.jpegIMG_3894.jpeg
 

Magneto

Oberleutnant
SMF Supporter
Joined
Oct 25, 2023
Messages
299
Points
63
Location
Sky
First Name
Paul
It’s been too long! An update is well in order. I have 2 more unfinished kits to do plus this one that hopefully will be finished by weekend.
I had a tough time with canopy - free masking on a 1/72 is a tough scale to cut one’s teeth on - especially the Erla canopy. The flap rebuild has gone reasonably well. I dug out another Erla canopy and tried using masking fluid. That was not brilliant at least at this scale.

IMG_3969.jpeg

Anyway this kit (which isn’t very specific on the box) will try to represent the ‘Mtt Regensburg’ factory build.

There are two small bumps (or jowls) up front - to make room for some cylinder head covers on a slightly different engine: DB605ASM
Also this plane has the cheeks by the cowling (for whatever reason). In fact there is a dizzying array of versions and ‘cross breeding’ between the G6/G10 and G14.

The fighter group is JG 27 - donated by the green band. Incidentally I have rarely been so thwarted when trying to mask the fuselage of this 109. It really is a head banger due to the tapering of the fuselage and reduction in diameter - perhaps it will be the same on all future kits?

Also to note is the df loop (made from wire) has no ariel - sometimes these were dropped. (I actually knocked it off when trying to decide yea or nay - thus it was decided!) The tail wheel is a fixed short based one that was occasionally used instead of a fixed long one.


IMG_3964.jpeg

You will note the slightly unusual paint scheme underneath - I haven’t looked into it at all but there were some unpainted panels.

IMG_3965.jpegIMG_3968.jpeg

I thought I would also attempt to get a figure painted up so summoned up this pilot.

IMG_3964.jpeg

so whilst painting pilot;
scalloping?
exhausts
coat of varnish
decals
weather
antenna wire

then finished - back up to 1/48
 
Last edited:

Magneto

Oberleutnant
SMF Supporter
Joined
Oct 25, 2023
Messages
299
Points
63
Location
Sky
First Name
Paul
Hello Gentlemen! Thanks for the interest!

Some progress made. The decals are much more time consuming than I initially thought. I have done the main ones - now just the stencils to do.
Ive attempted the scallops.


IMG_3984.jpegIMG_3983.jpeg
The crosses under the wing had to be adjusted as they were the full Balkenkreuz with the white border and black outline. I managed to cut them off and apply
IMG_3982.jpeg
The canopies still need fixing - I have an idea I will try out.
IMG_3985.jpeg


The Luftwaffe pilot…I had to scour the net and my own sources (I’ll probably buy a ref book on uniforms). The pilot seems to be wearing a SNCO summer flight suit but wearing his officer cap.
There looks to be a strap across his body - I think this is wrong. It should be a zip of some kind. I also have no idea what he is carrying. Maybe a pack-lunch?

IMG_3971.jpeg
Exhausts done. Nothing doing really but the exhaust streaks will be done in due course

IMG_3986.jpeg

So the timing for this kit will most likely slip a few days - but that’s okay.
 

Attachments

  • IMG_3964.jpeg
    IMG_3964.jpeg
    69 KB · Views: 6
Last edited:

Magneto

Oberleutnant
SMF Supporter
Joined
Oct 25, 2023
Messages
299
Points
63
Location
Sky
First Name
Paul
Just finished the figure. Wow! This little kit is taking more time than I could imagine.

Close up will show all the issues…IMG_3989.jpeg


IMG_3987.jpeg

…but a little further back (and a more likely view) and the impression is ok
IMG_3992.jpeg
 

Magneto

Oberleutnant
SMF Supporter
Joined
Oct 25, 2023
Messages
299
Points
63
Location
Sky
First Name
Paul
That’s the build over. At the last hurdle I kind of messed up. A little too much artistic flair - I used some oils then decided to use an acrylic (pin) wash that I just could not clean up.
I won’t go on - I was a little disappointed but despite the investment in time am happy for the experience gained which will surely serve me well in future! Thanks for watching :cool:
 
Top