B

Builder

Guest
That's looking good so far Bob,it's always tough to show the pre-shading in photos.


As for your choice of a plain colour... well, it's your build but Panthers never served in North Africa - using Airfix box art isn't the most accurate source of information! ;)


The photo you've used probably depicts a group of Panthers outside the MAN factory prior to having their camo paint added. There's an oft-repeated myth that German tanks were painted by their individual crews. The truth is that it was done by the factory or at field workshops many miles away from the front lines.


Keep the updates coming! :smiling3:


Hi Bob


Patrick is correct with regards to Panthers never being used in the desert (I have no idea what Airfix were thinking about with that boxart!) That said, it is possible for a Panther 'A' (your model is a late 'A


View attachment 260970


View attachment 260971


very nice work Bob,nice coating,I do the preshade as well,as you say hard to see with pics some time,s,


then what I  do is the same paint ,I used for the base coat,add some off white,to make a shade a few tones,


liter,and use were,the most sun would hit,giving that bit of molting to it,looks great so far liking it, :D

Thanks Patrick and Paul for the colour scheme camo info. Will keep that in mind for a future build. 


Thanks Monica, the preshade does give it a nice affect. I think I will preshade more often from now on. Its my second attempt at it and this time it worked out nicely. 


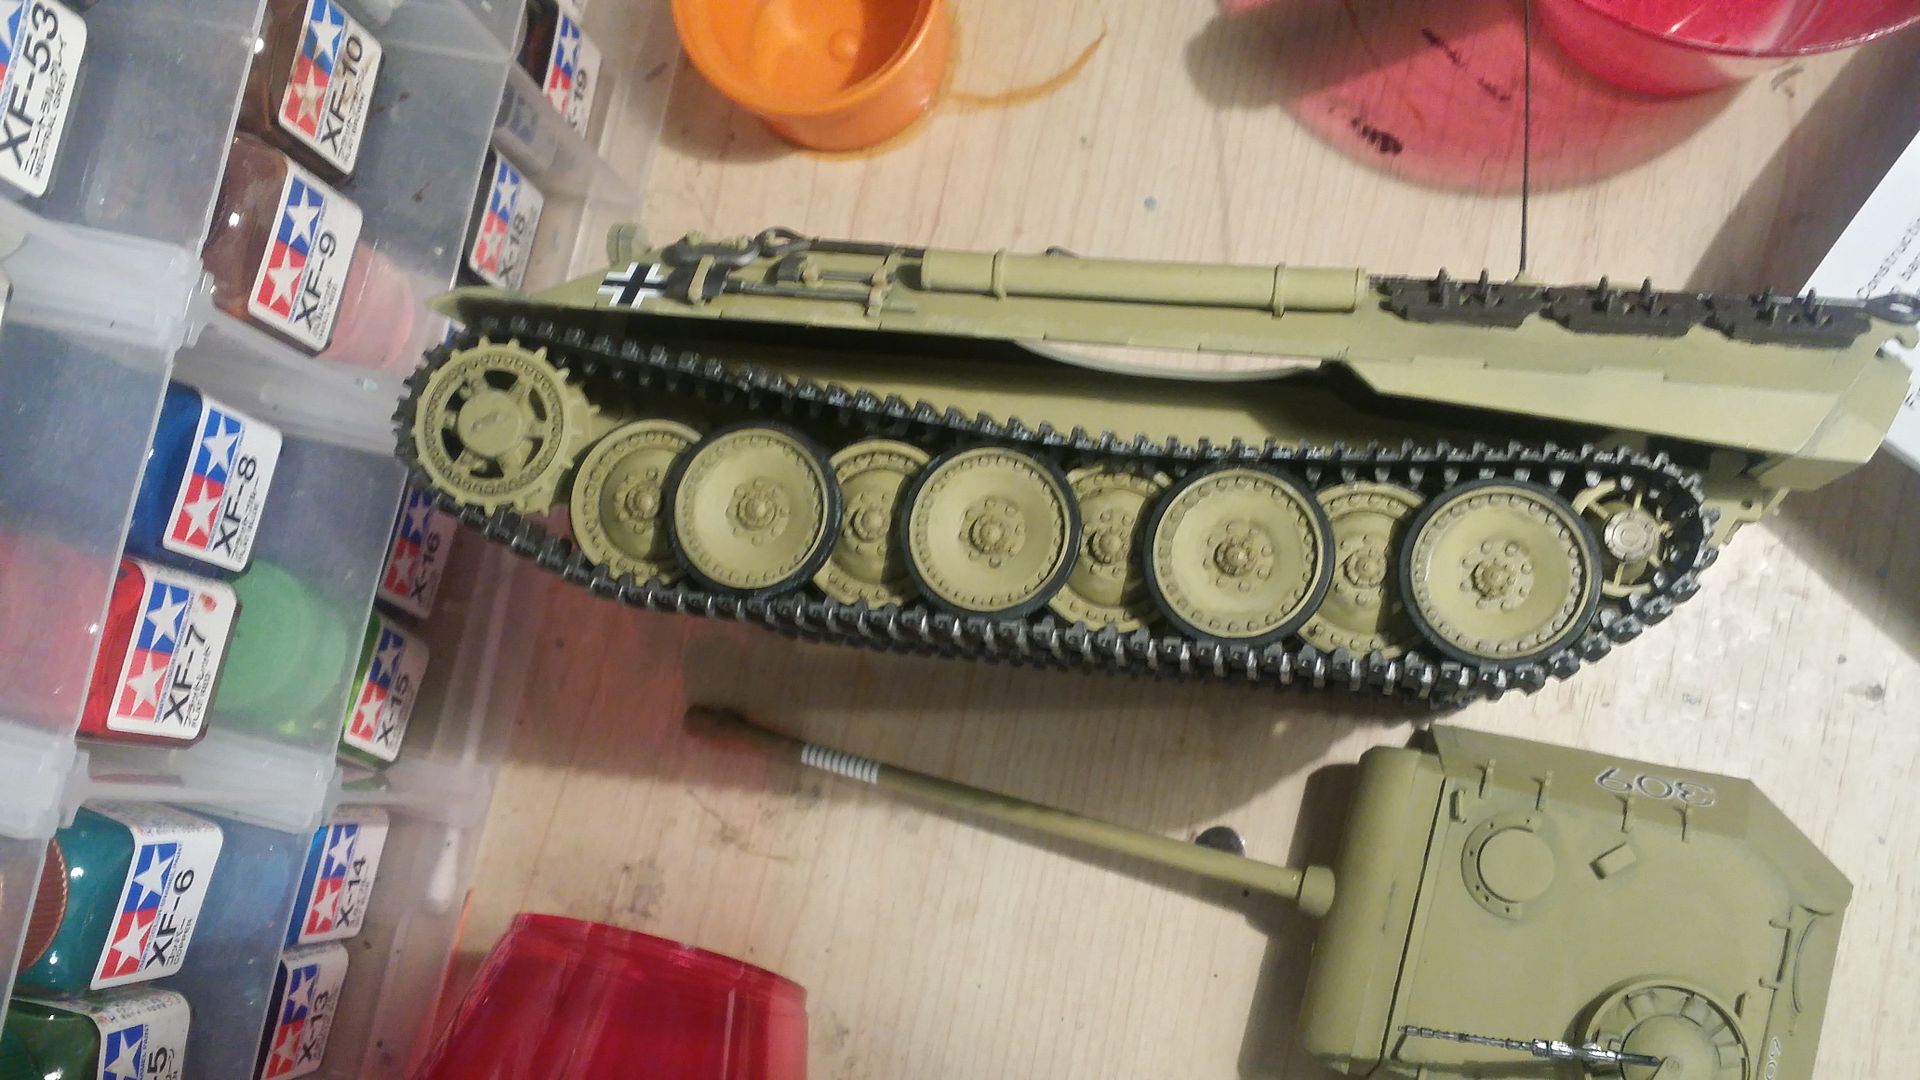
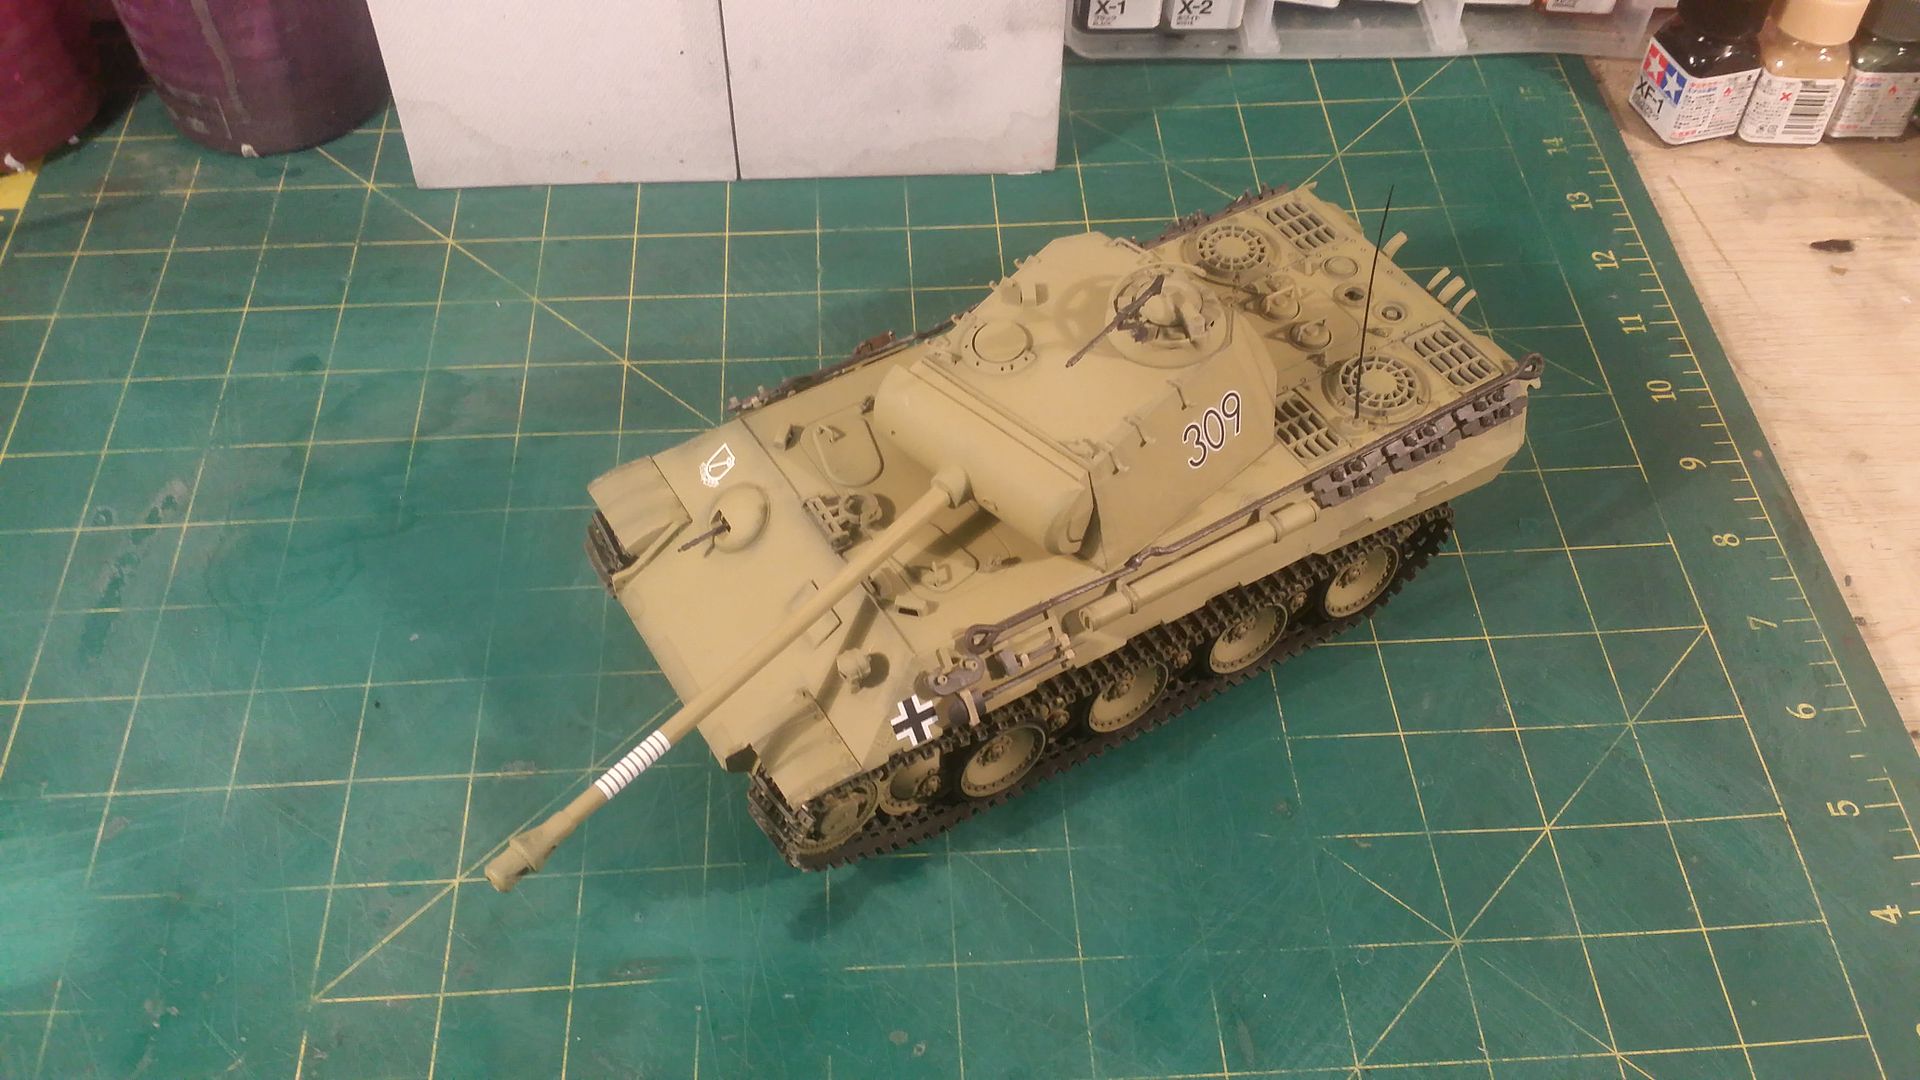
Well heres another build update


So super glueing the tracks worked. It did cause some frosting from the superglue drying but this was painted over. Detail painting is also complete. 


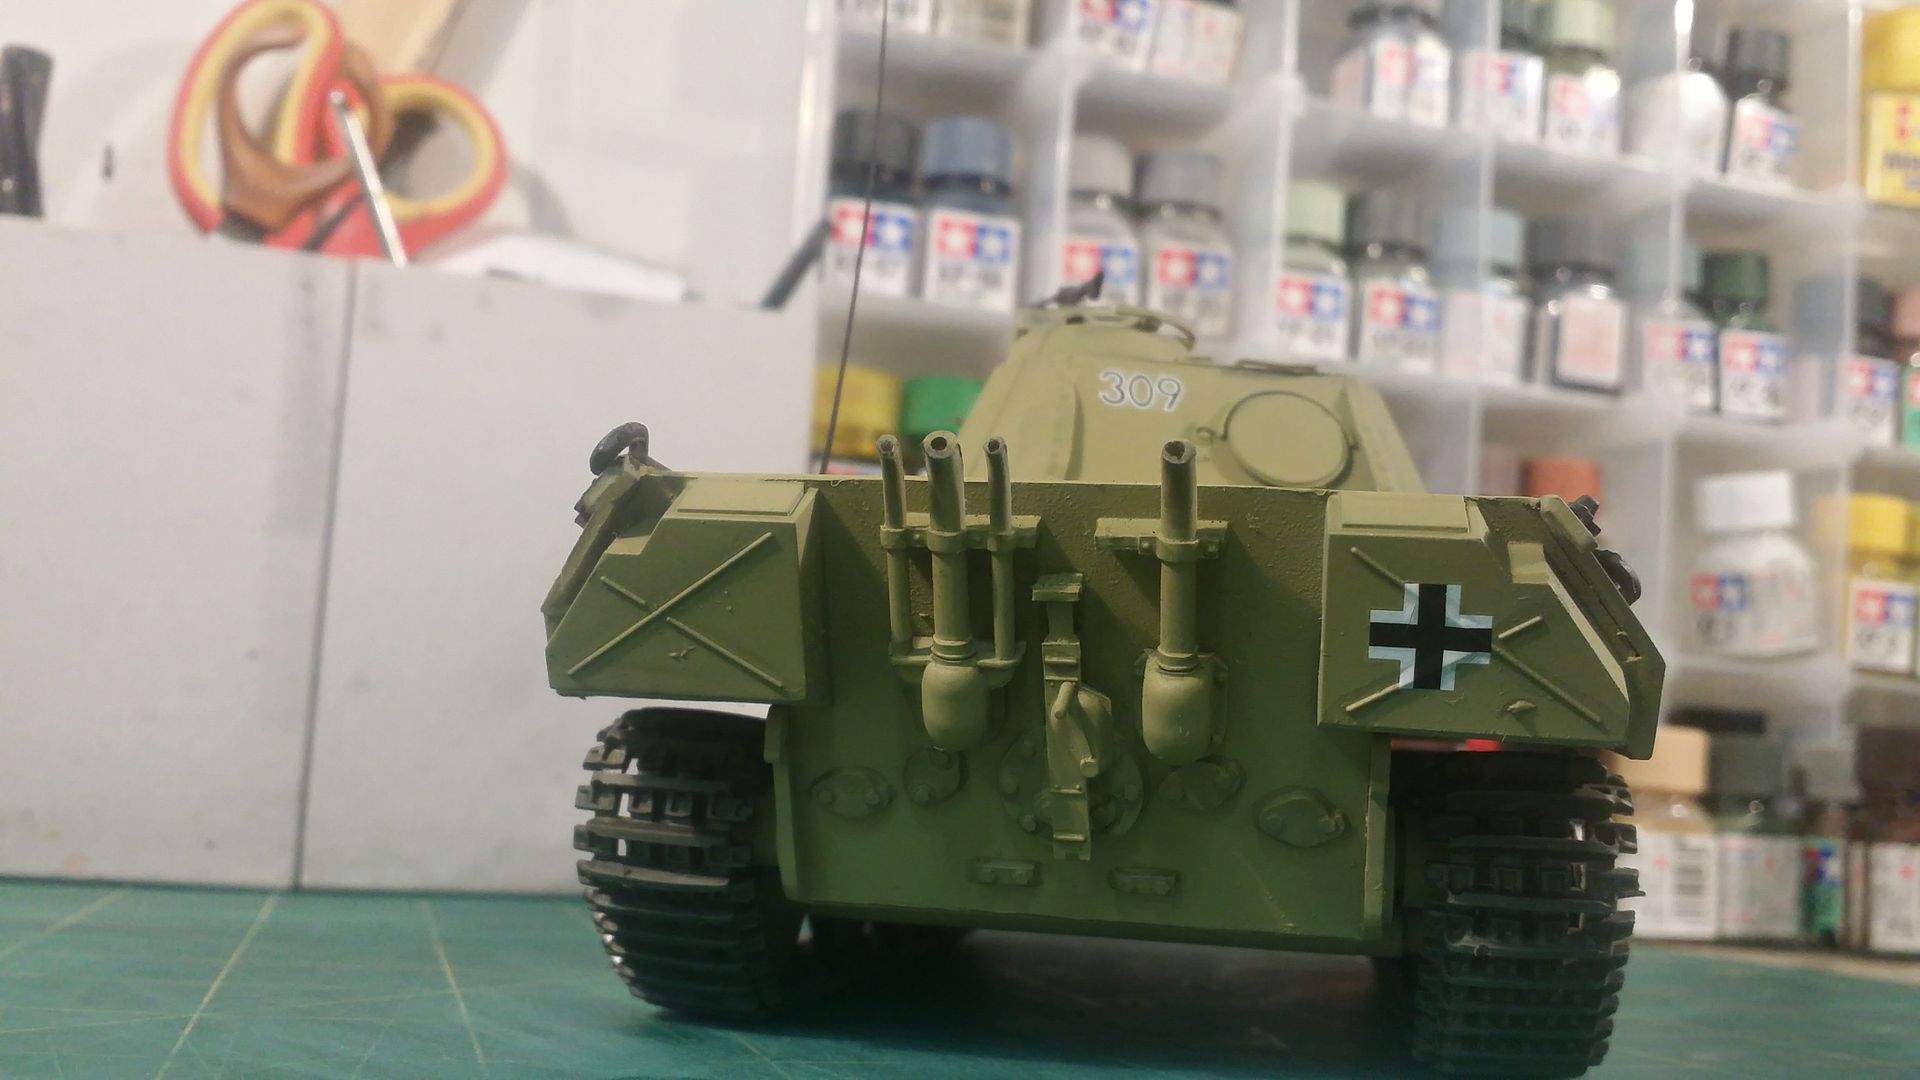
These holes need to he drilled again


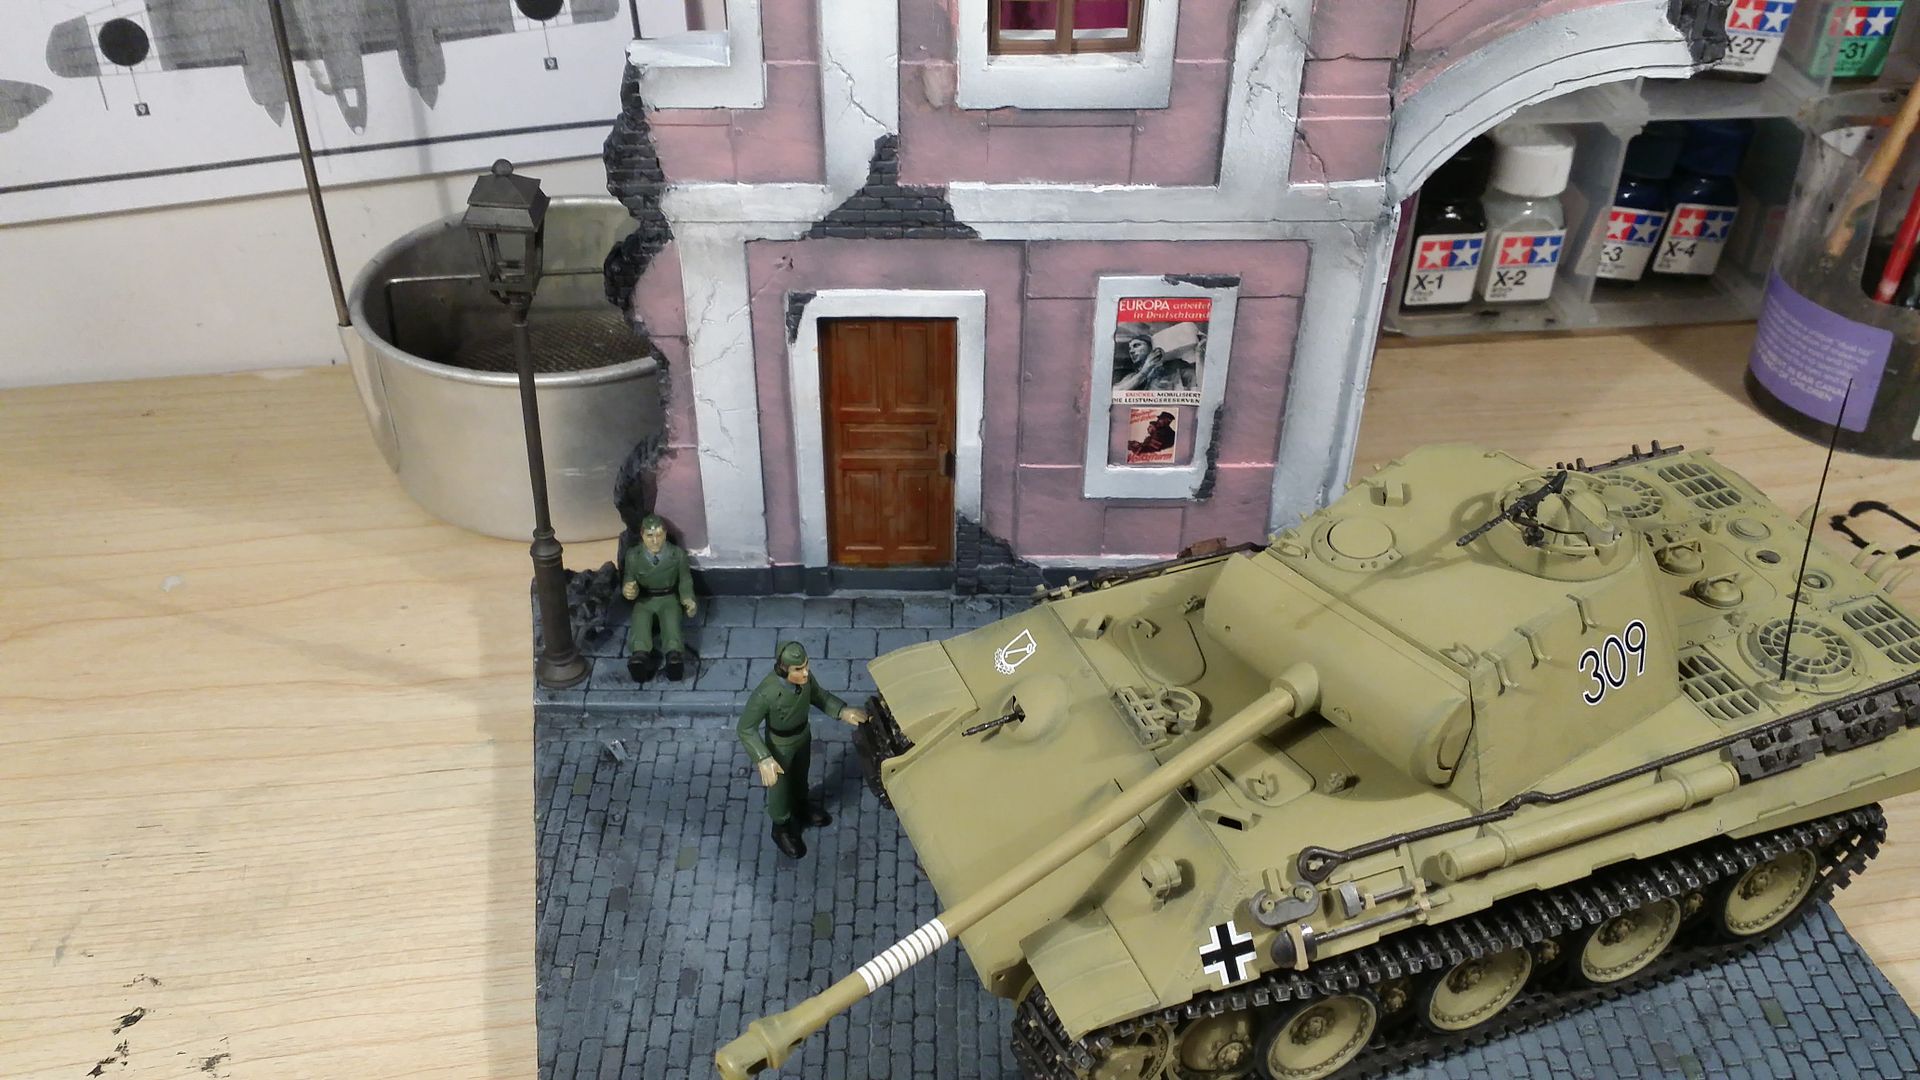
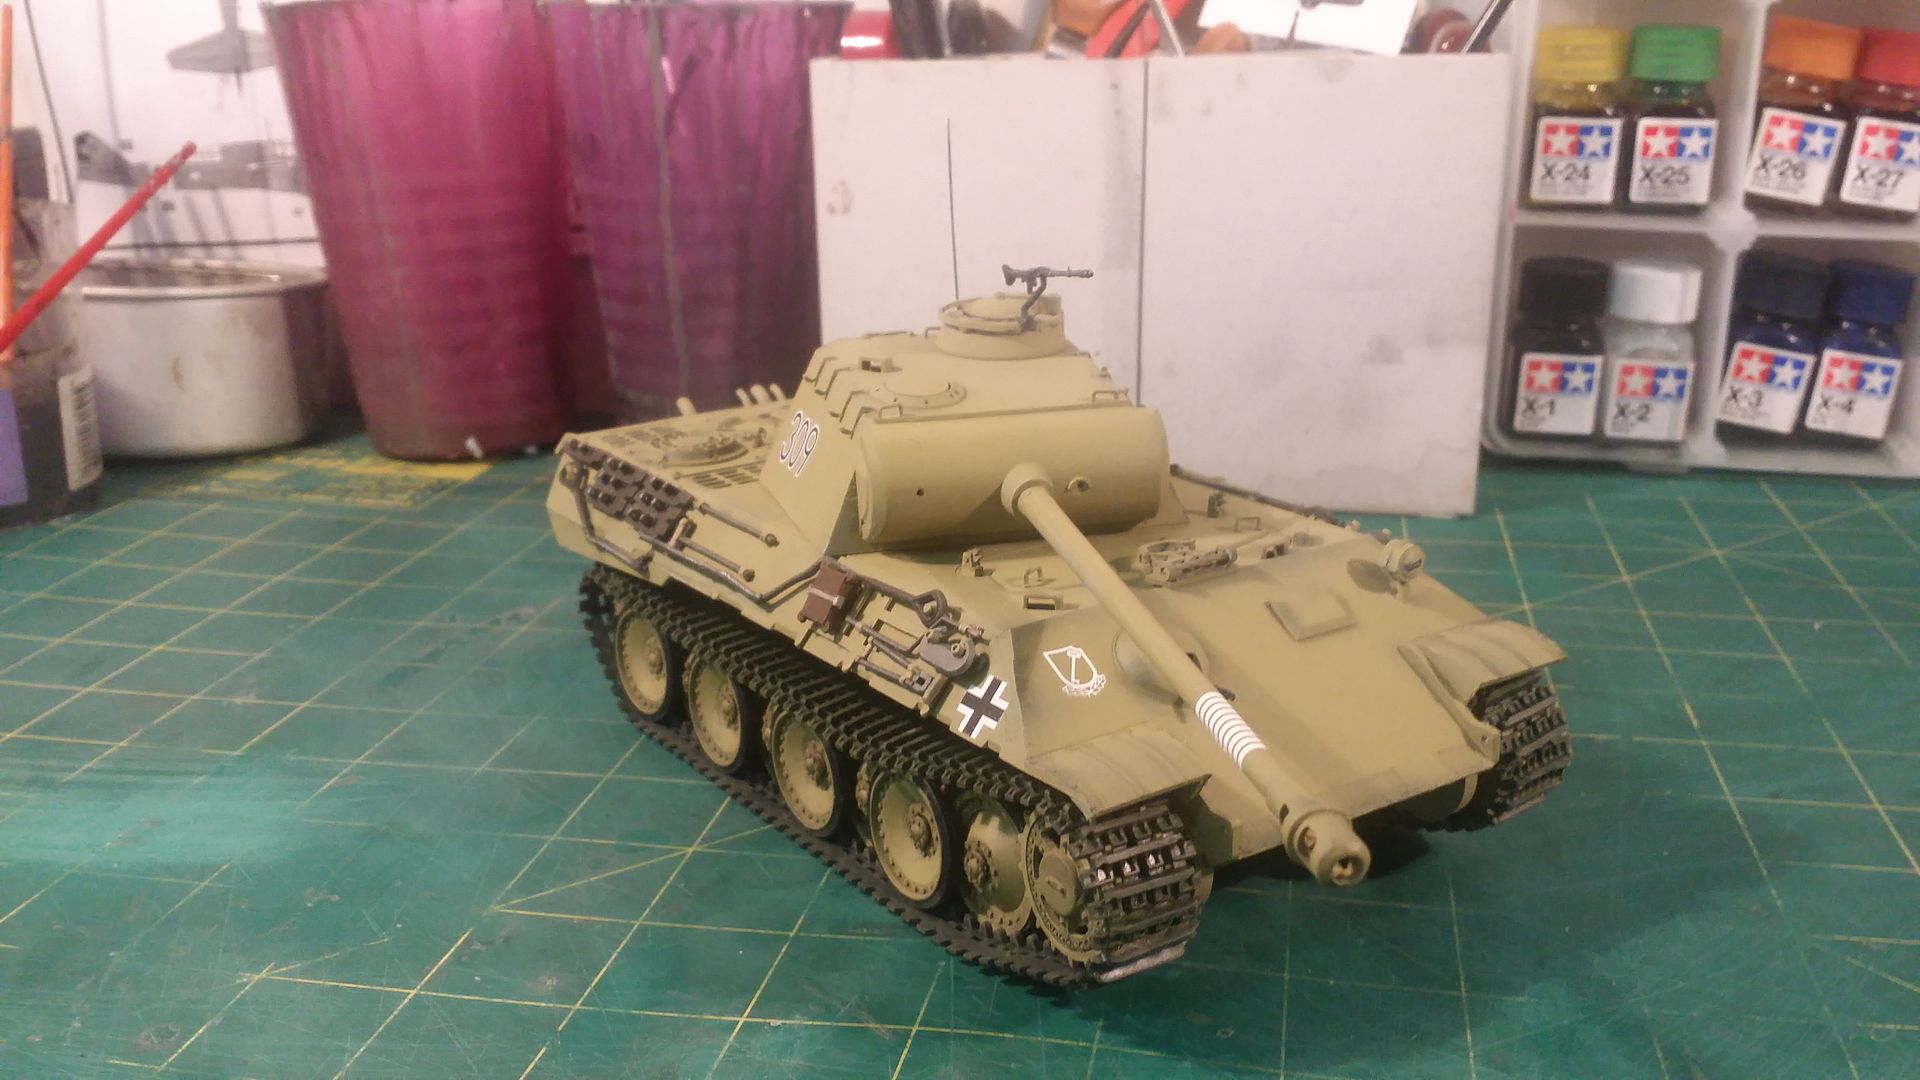
Decaling then begun.


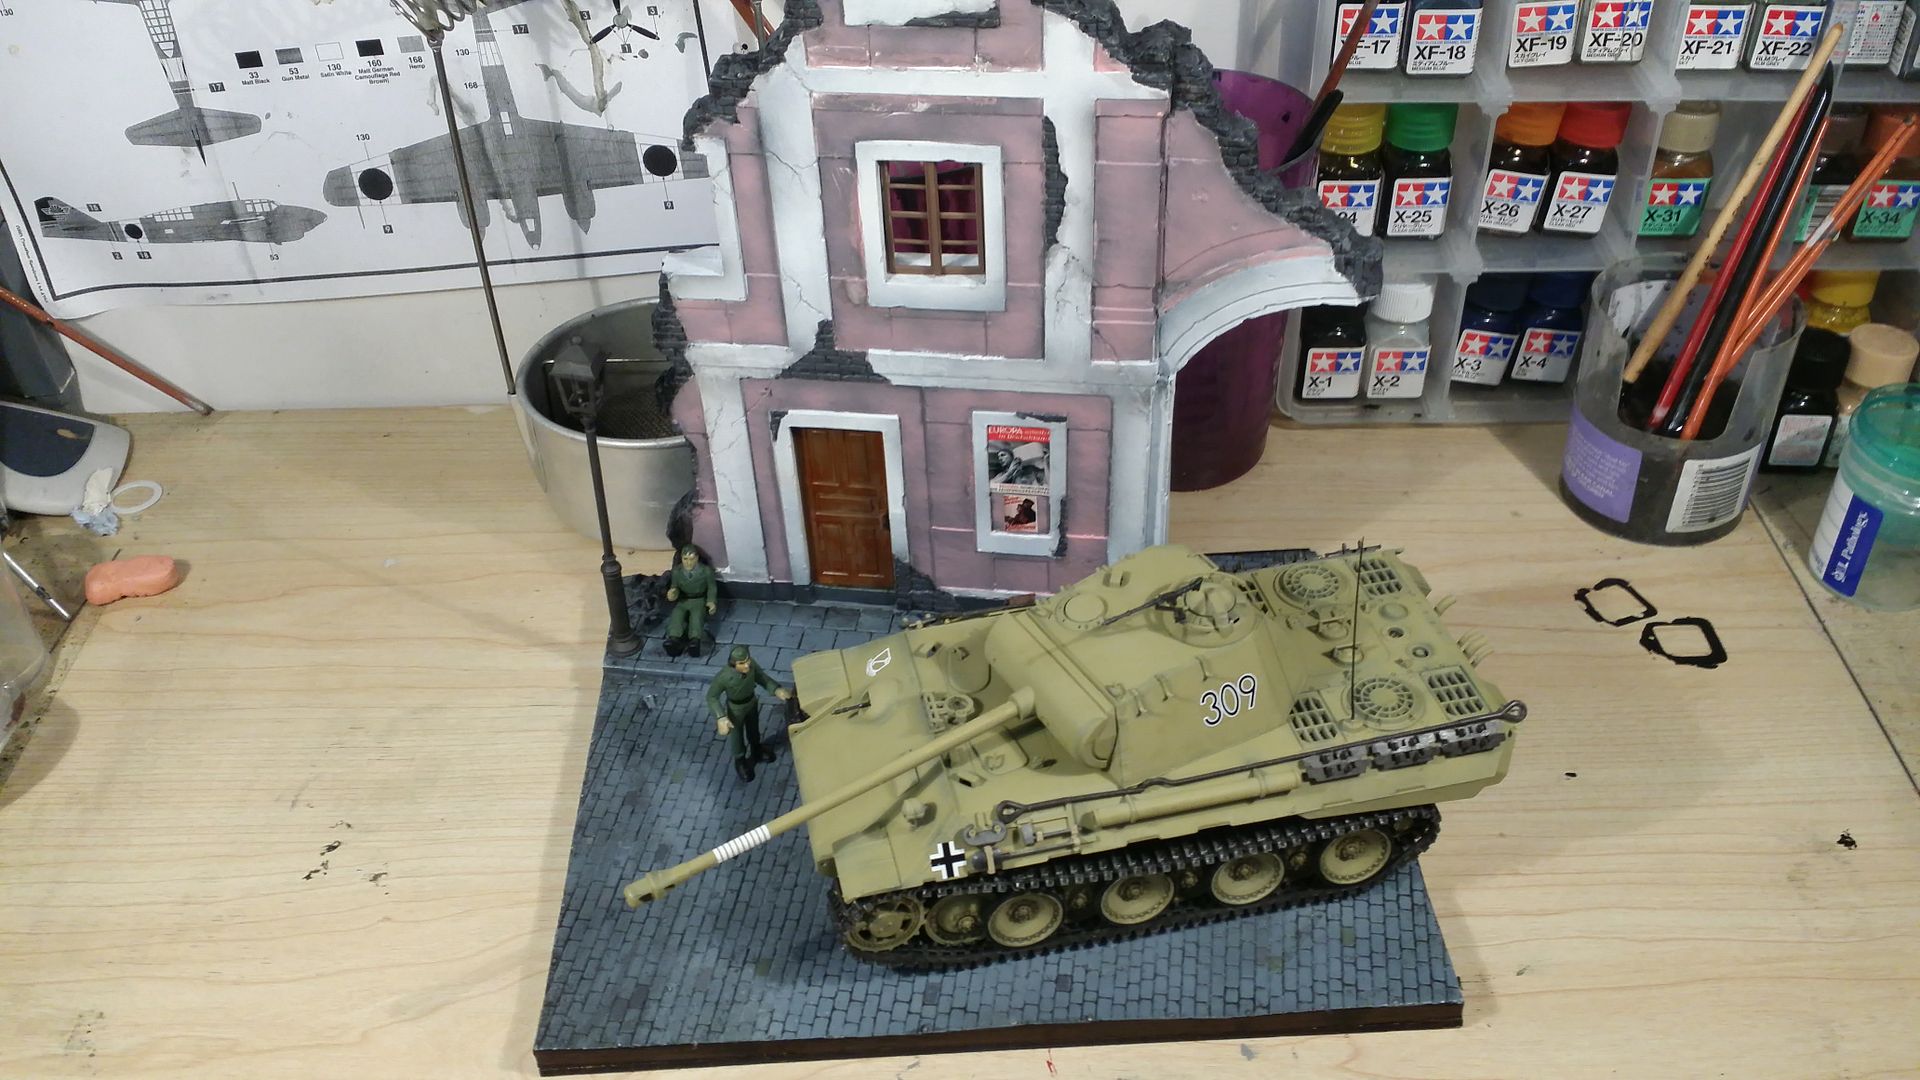
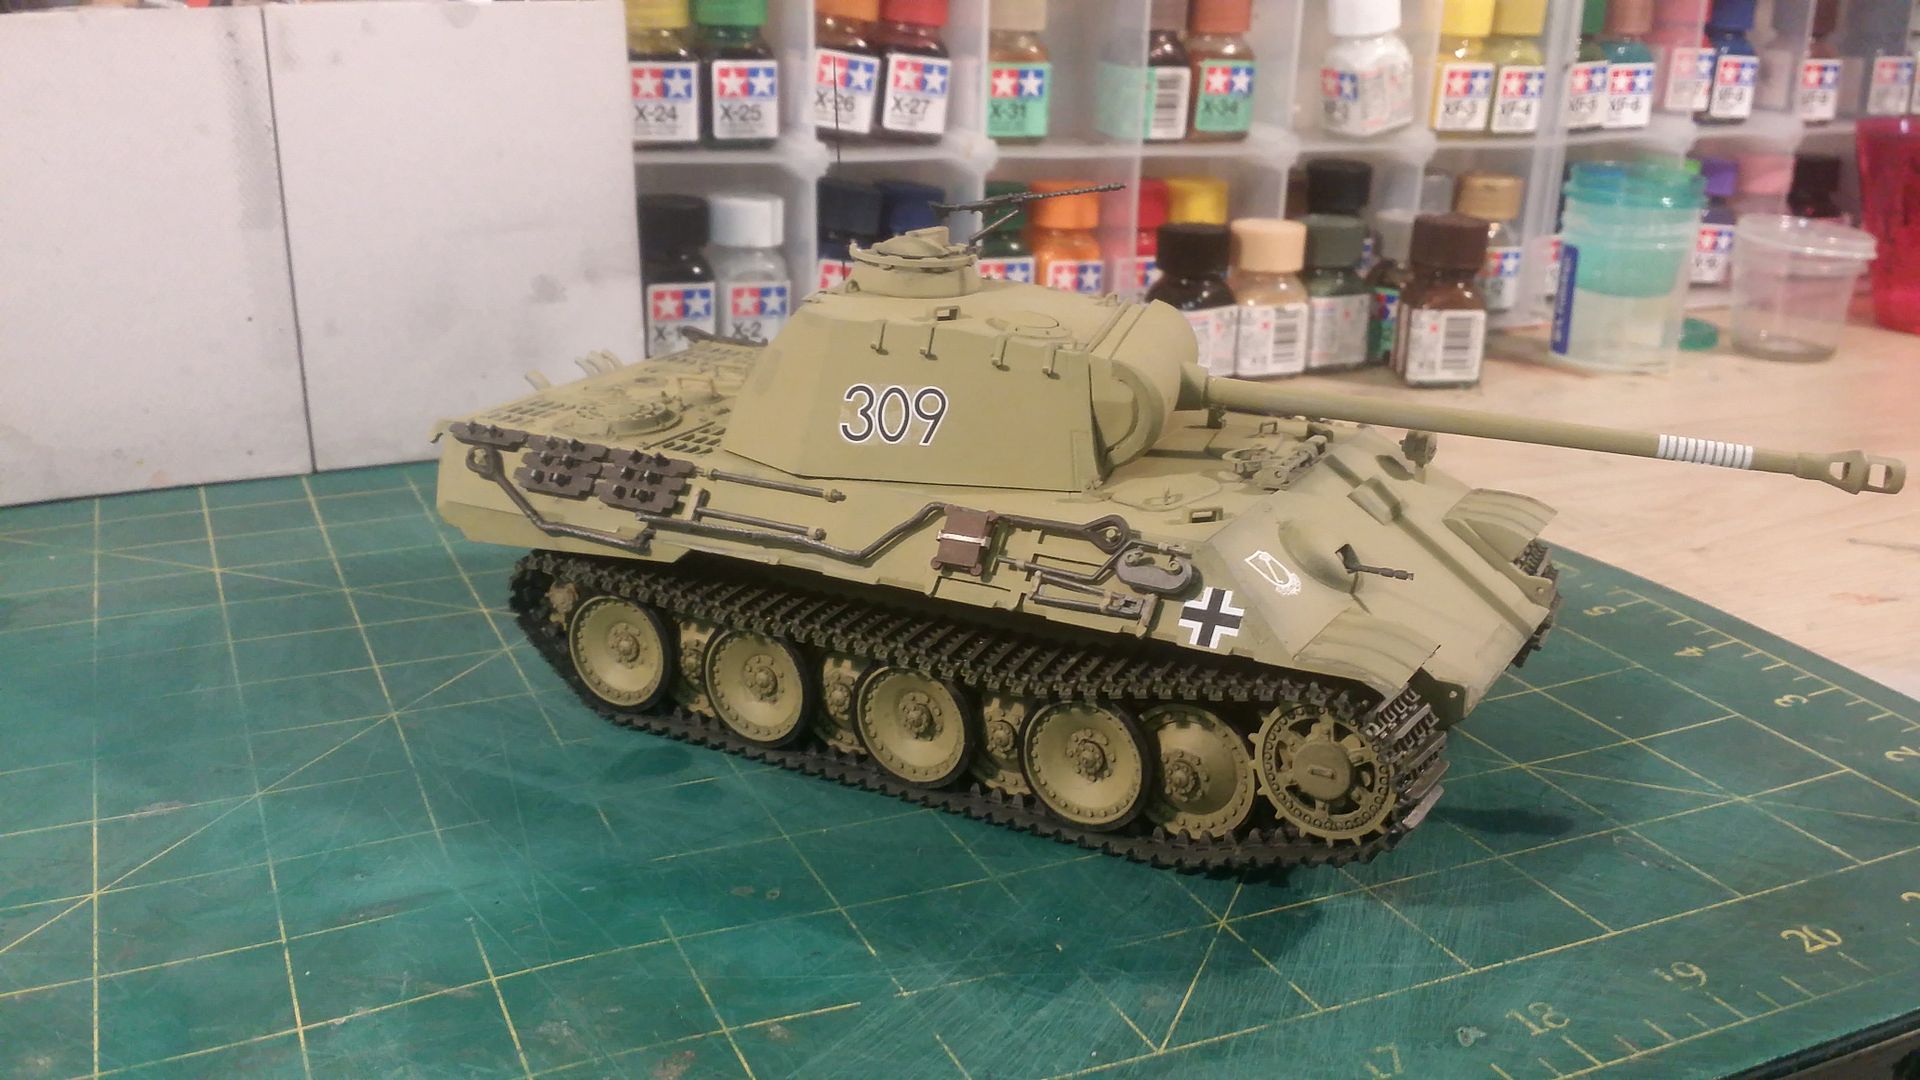
All decalled up and complete.


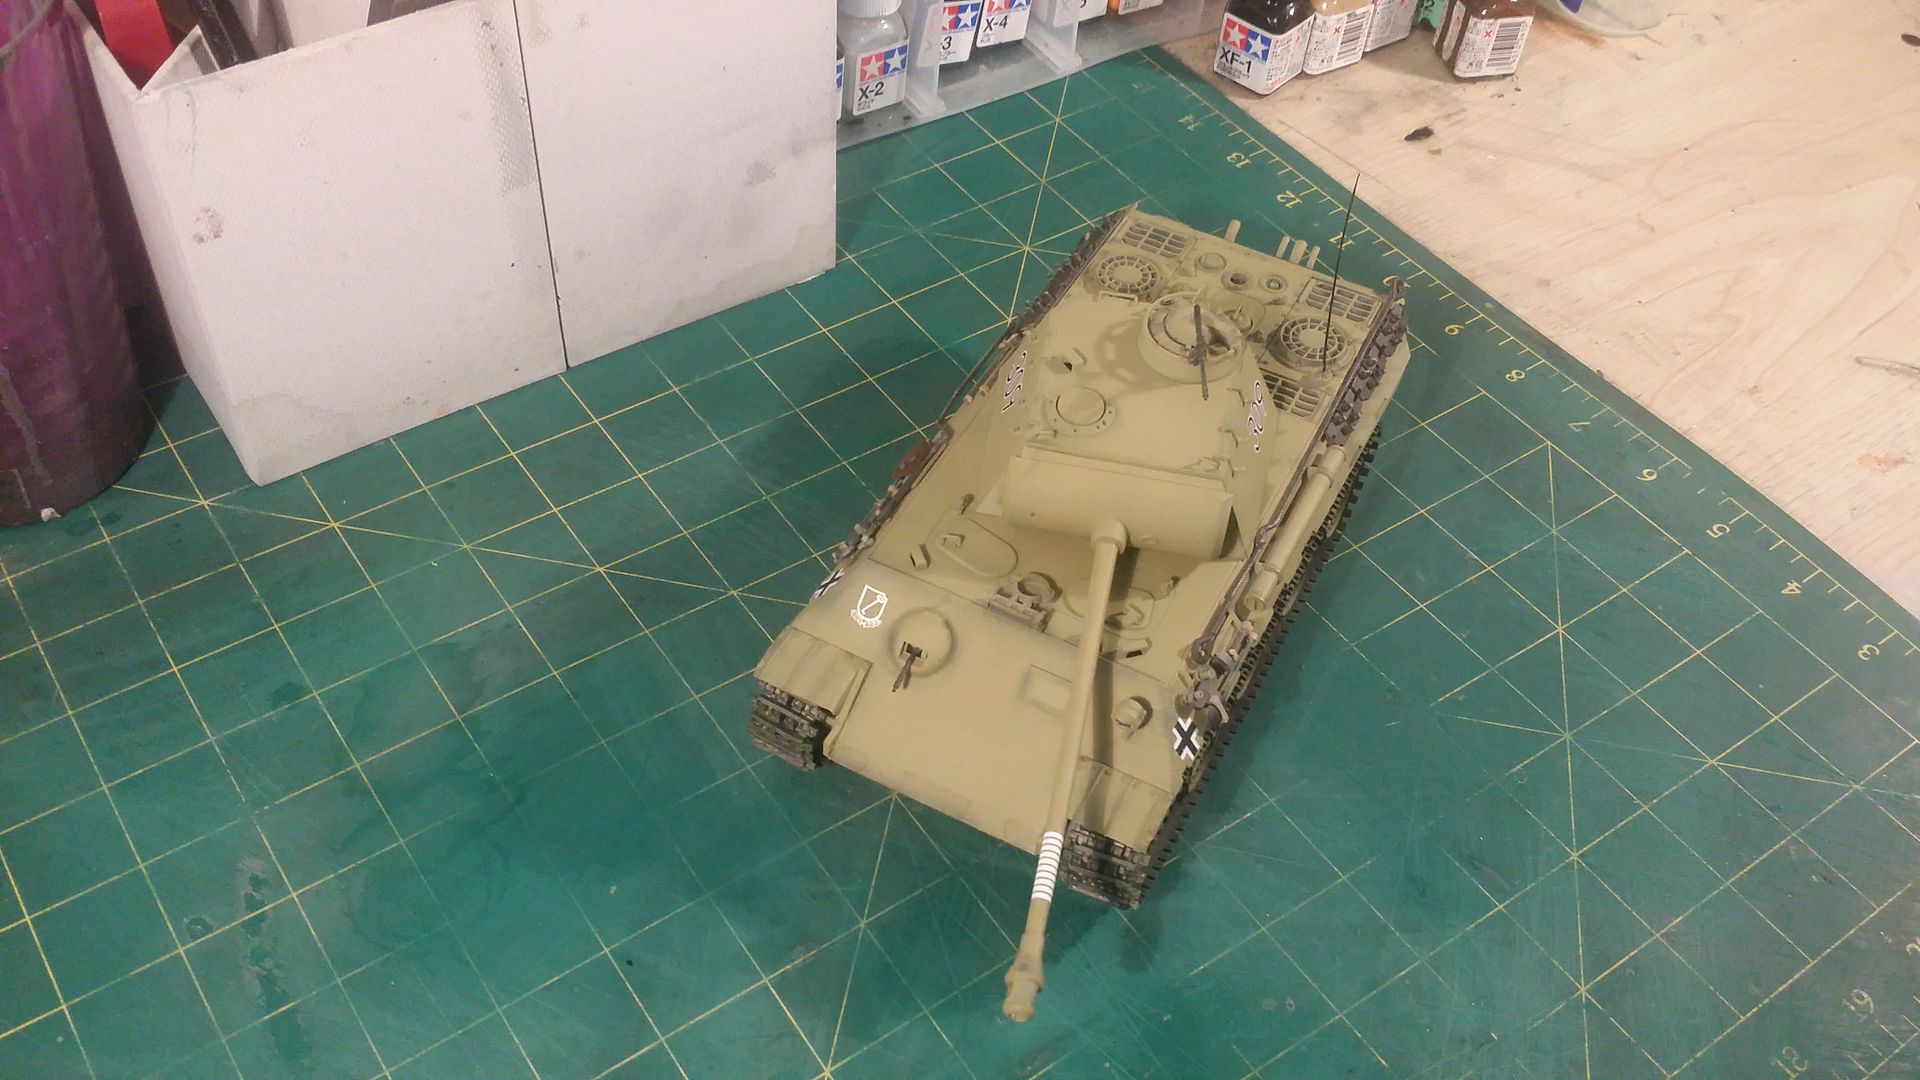
Will wait now for everything to dry. I have ordered Alclad II Flat coat and once that gets here I will flat coat it. As the matte coat I have usually produces a sheen affect.


After flat coating I will do some light weathering. 


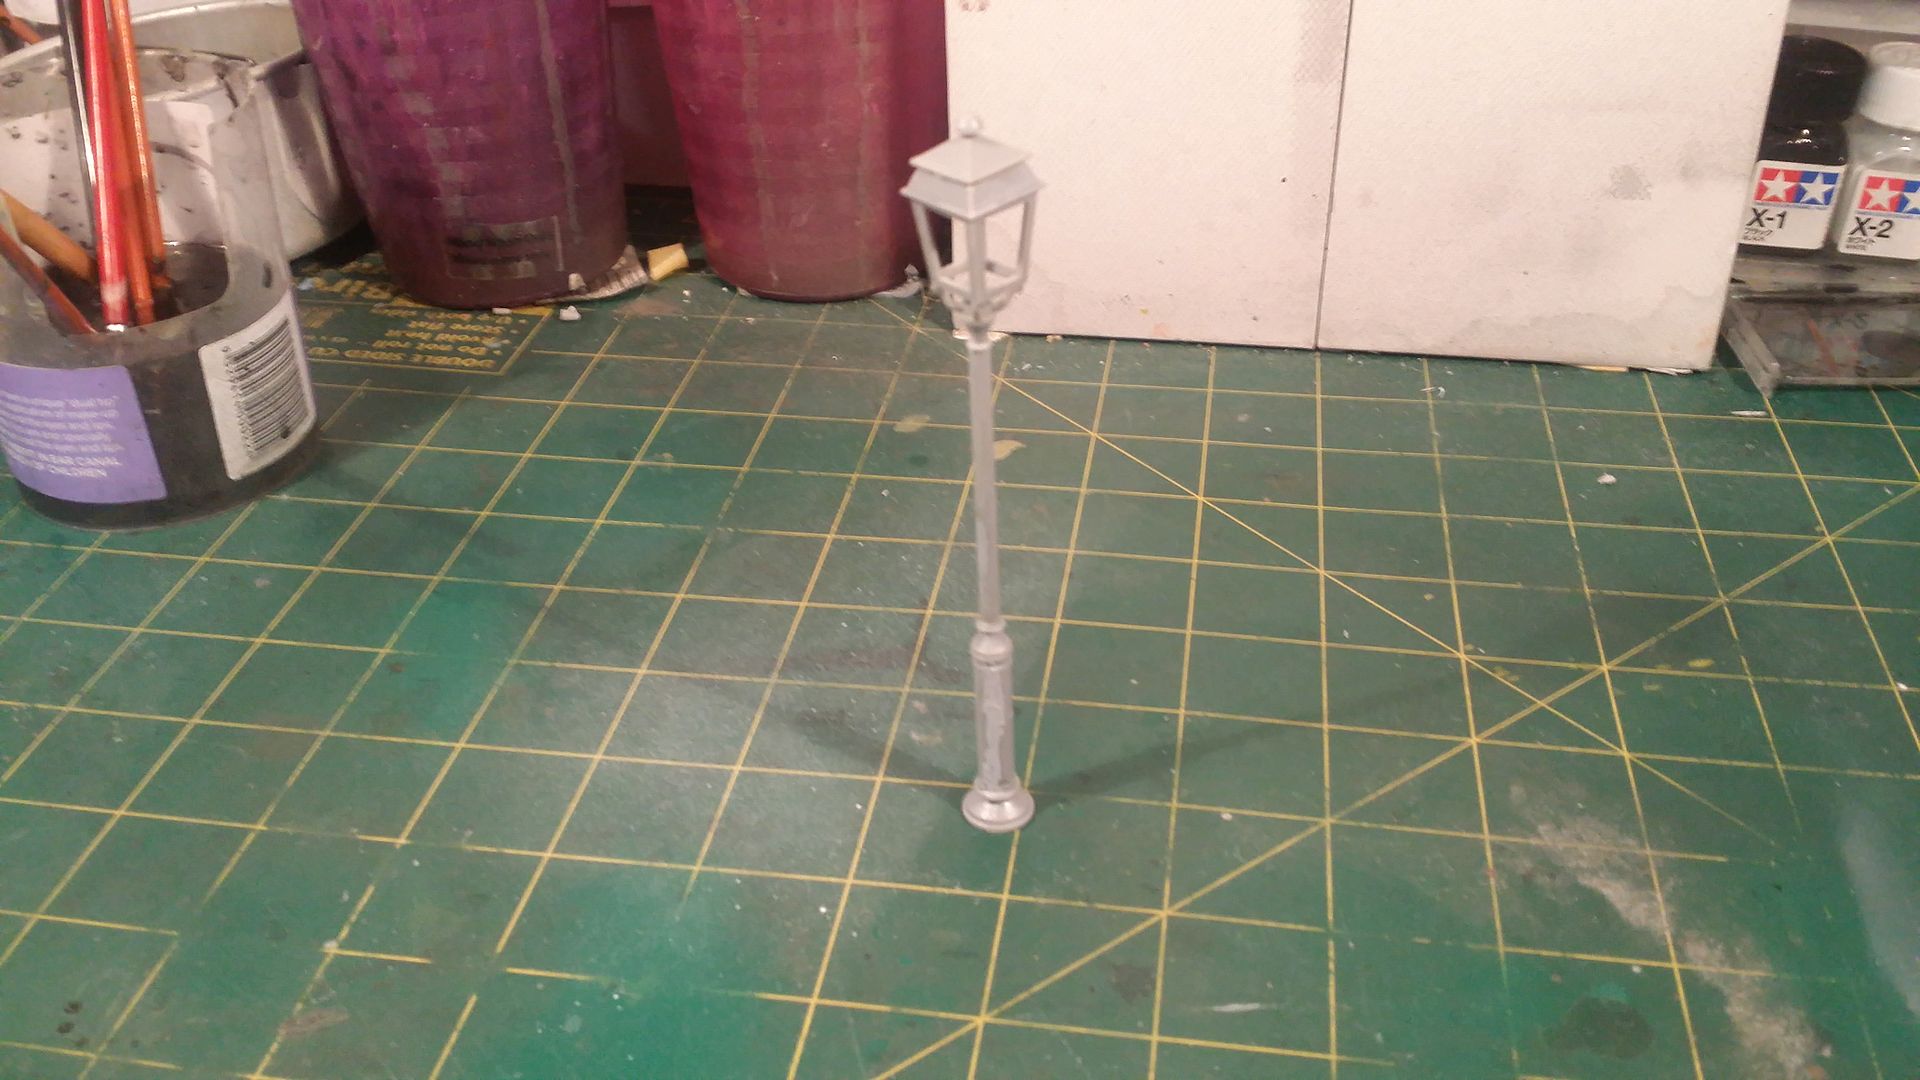
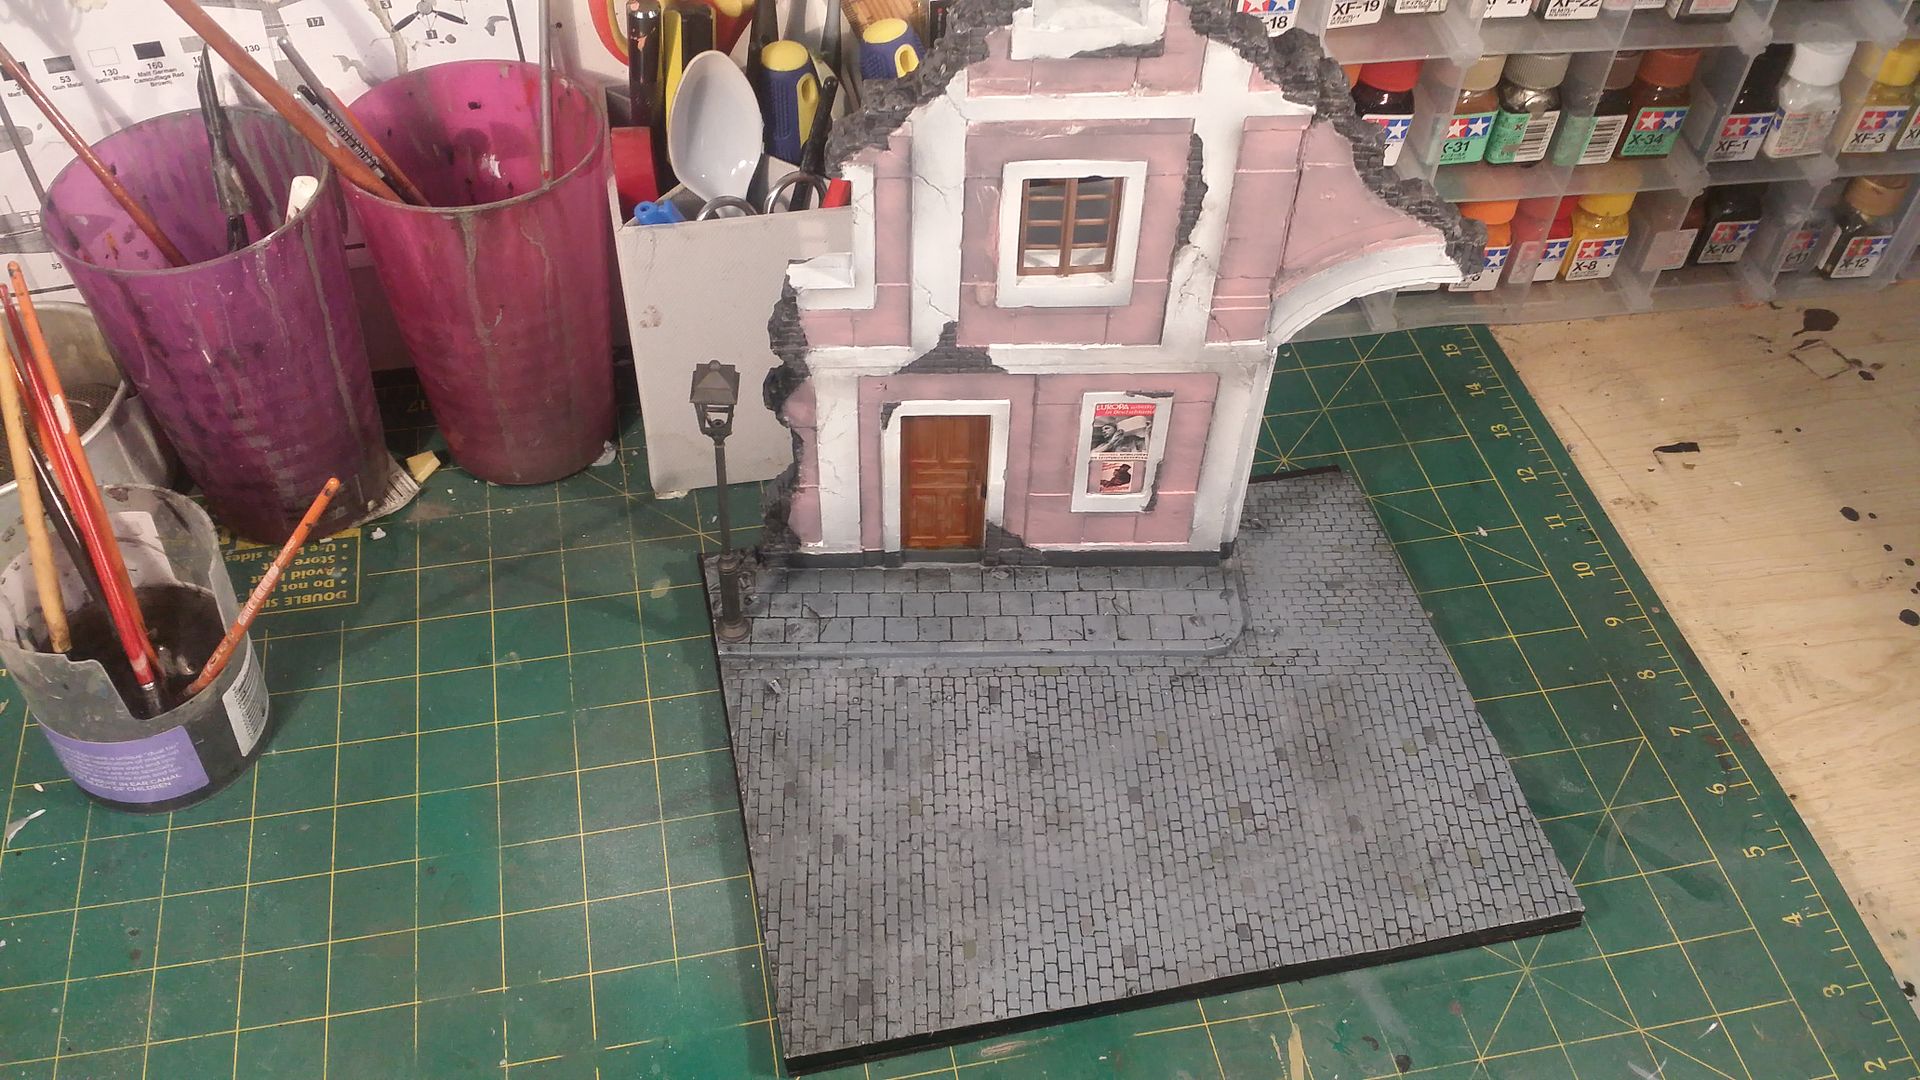
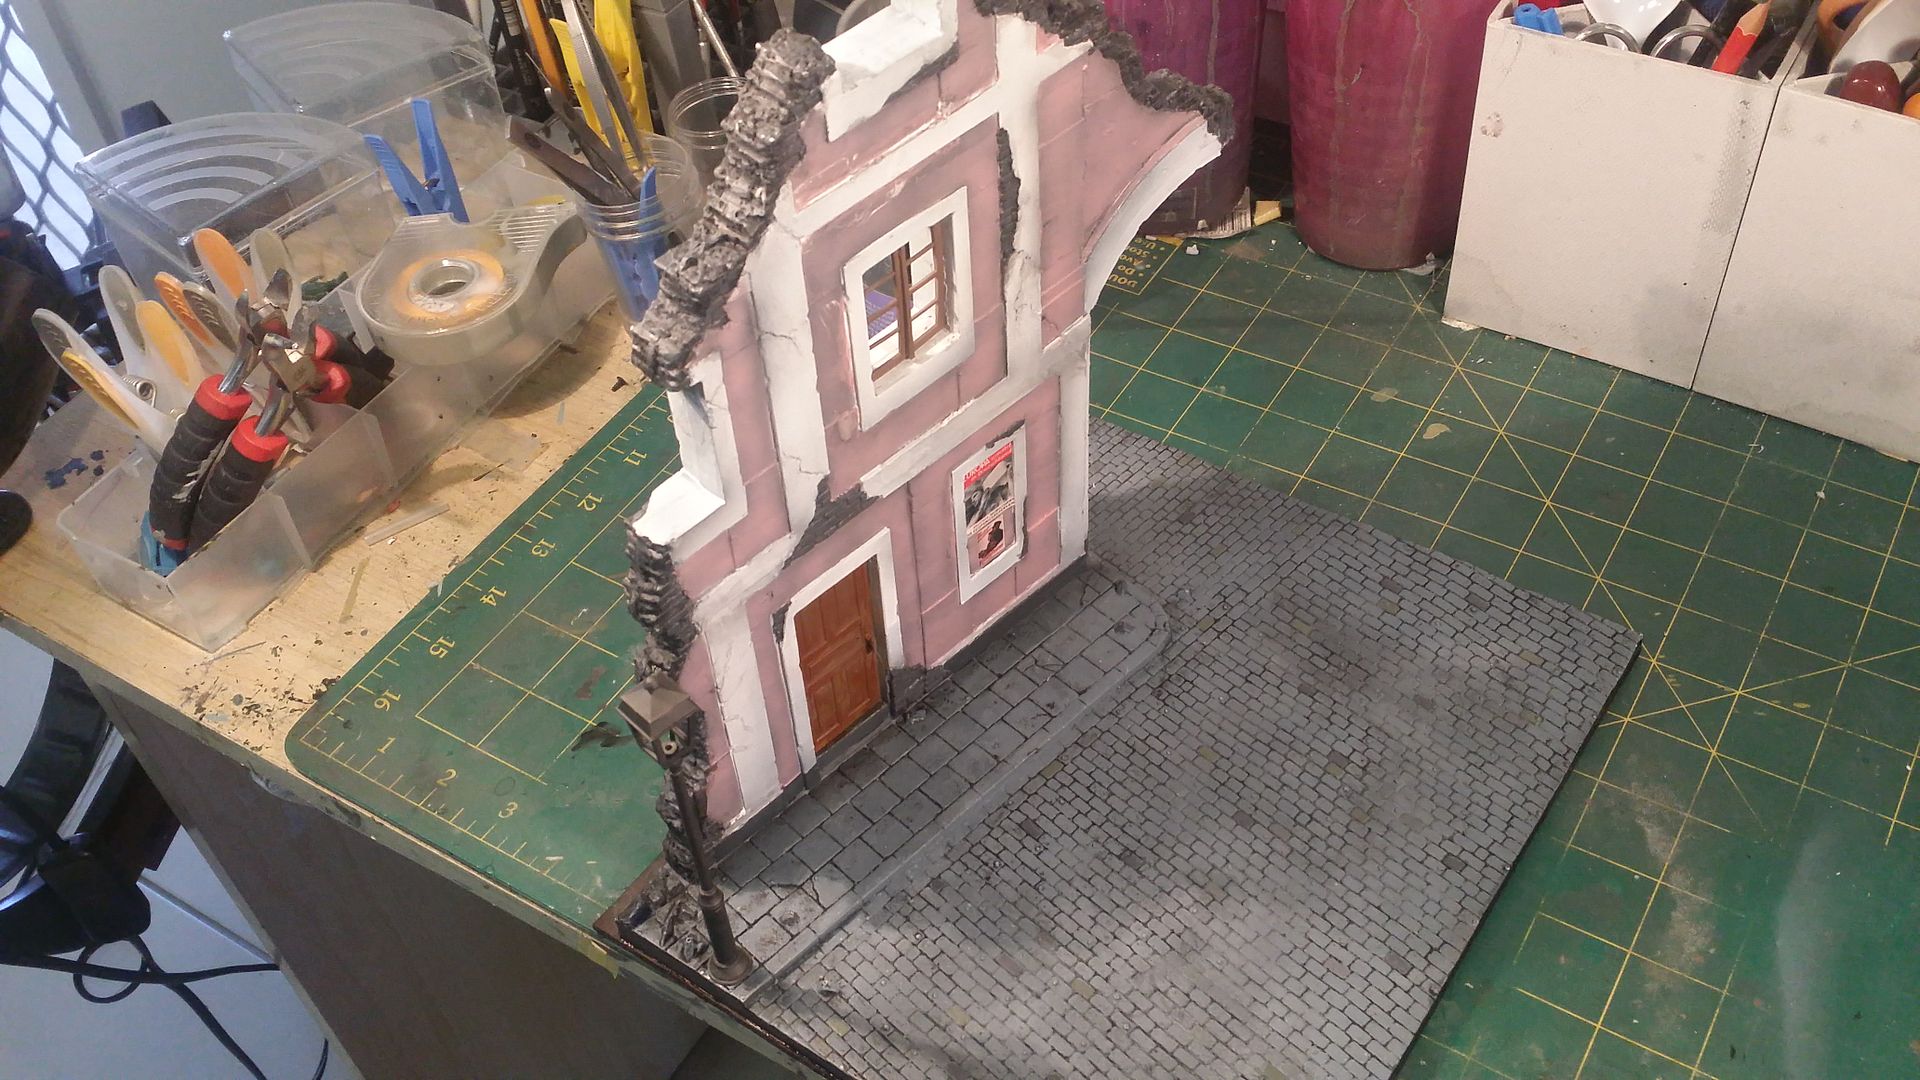
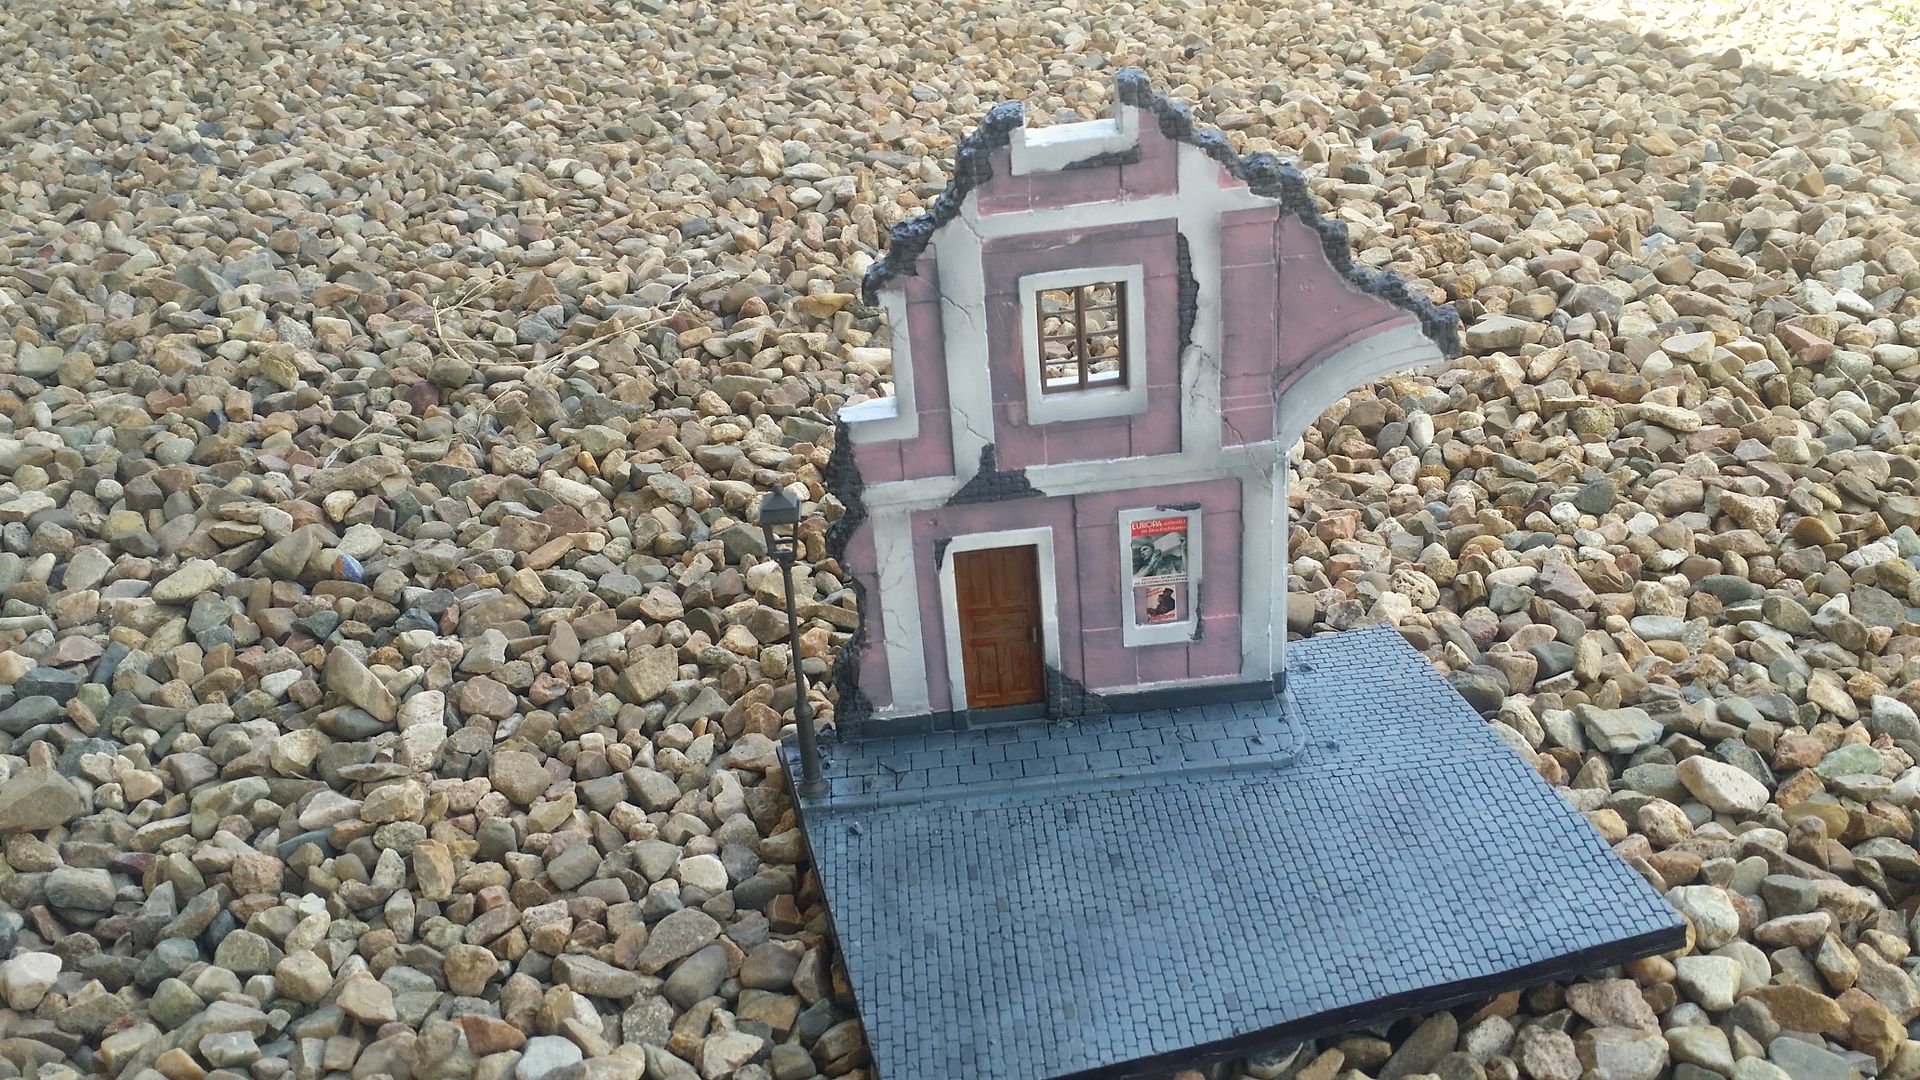
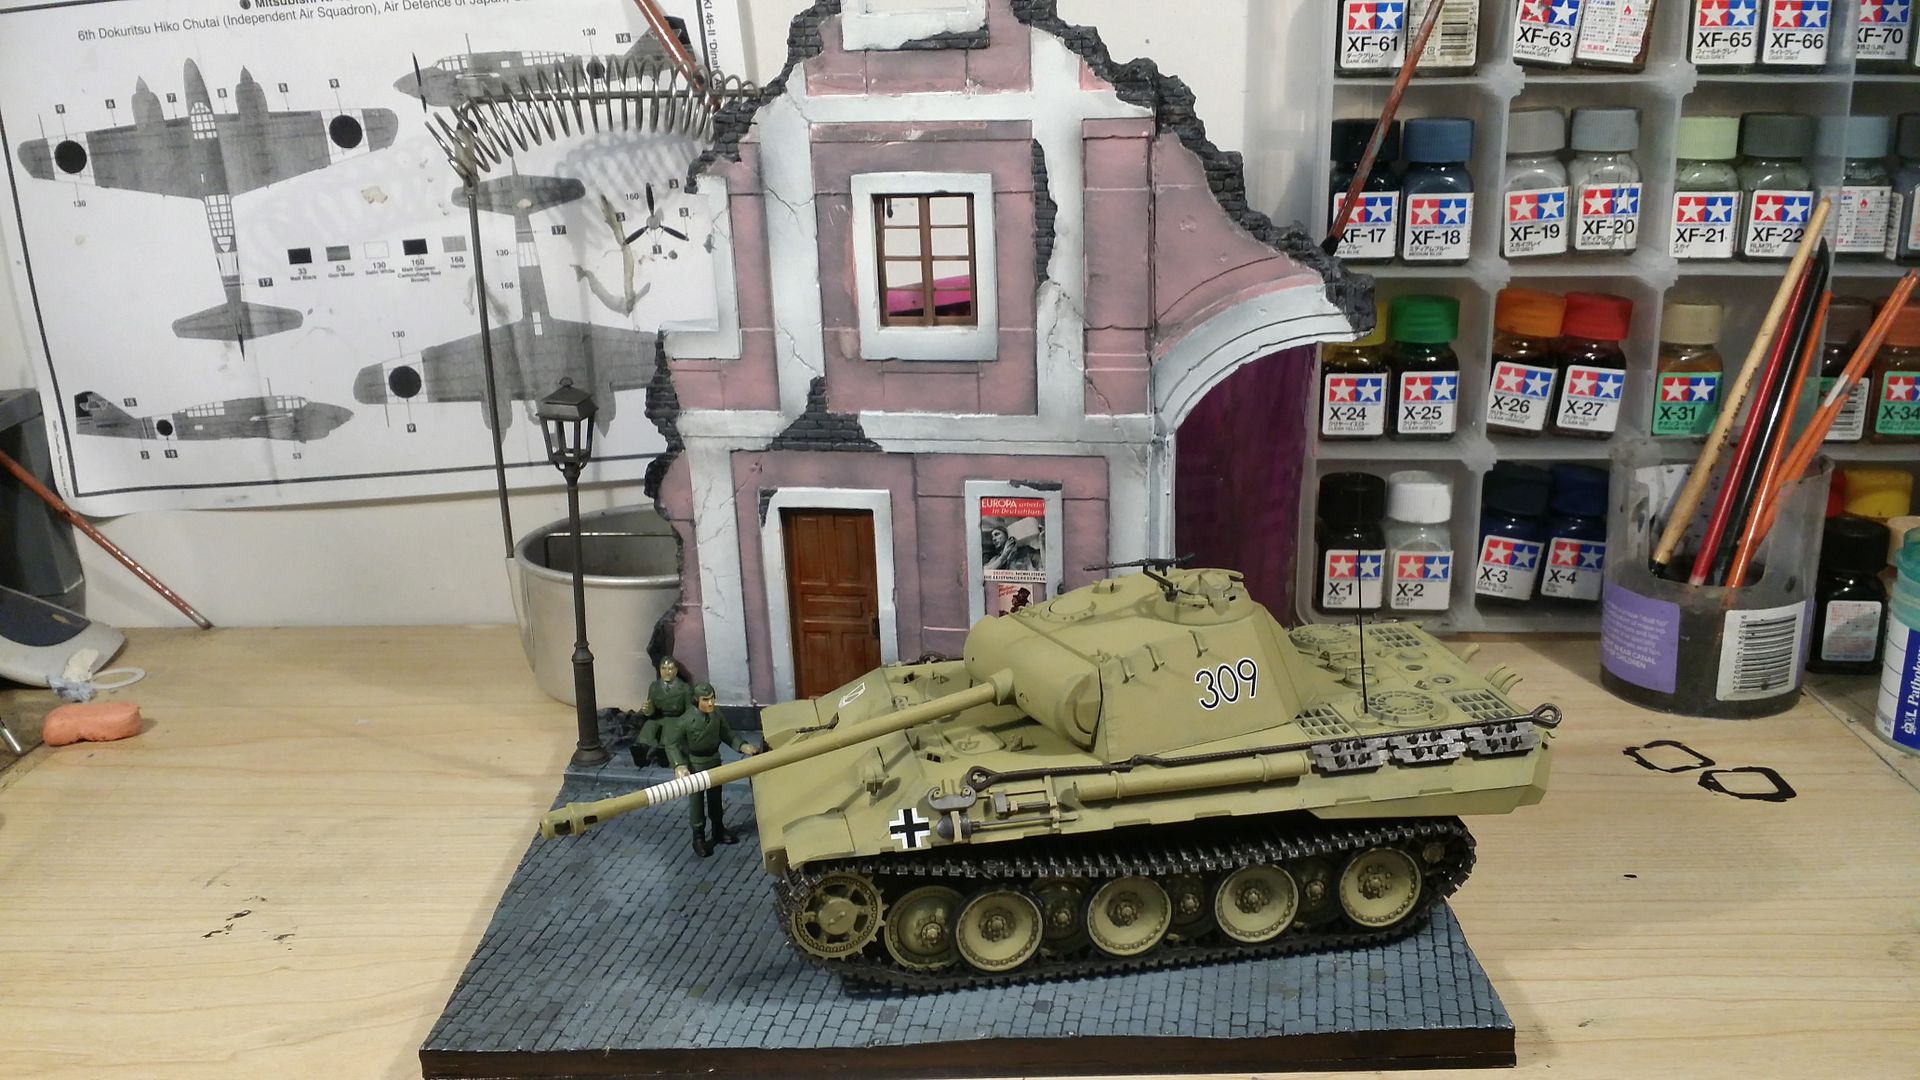
In the mean time I will work on the Miniart Building


Hope you guys enjoyed the Build update and the photos. 
 
Last edited:

monica

“When there's no more room in hell, the dead will
SMF Supporter
Joined
Oct 30, 2013
Messages
15,111
Points
113
Location
Melbourne
First Name
monica
nice going on this one,Bob looking good,like what your doing, :D
 

Ian M

Administrator
Staff member
Administrator
Moderator
SMF Supporter
Joined
Dec 14, 2008
Messages
19,685
Points
113
Location
Falster, Denmark
First Name
Ian
Hoochie Cord - this can be found from an Army Disposals shop in Australia .. I dont know what it is called in the UK.

That would be para-cord in most of Europe.
Looking good Bob.


Now about those Mini-Art buildings. The main building parts are vac formed out of a sheet of plastic. If you watch the video on their web site it will help a lot with the cutting out.
One mistake a lot of people make is cutting them out the wrong way. So pay attention to that in the video, Also a whole sheet of sand paper glued to a flat board is great for sanding the cut edge flat. This helps a lot in getting a flat surface to glue up-
 

tr1ckey66

SMF Supporter
Joined
Mar 6, 2009
Messages
3,686
Points
113
First Name
Paul
Looking good Bob. Looking forward to the building and resulting diorama. Ian's suggestions re: the Miniart building's construction are good ones. The sand paper glued to a board is a very good tip with these vacform kits.


Paul
 
B

Builder

Guest
Very nice work Bob

Thanks Joe mate!

nice going on this one,Bob looking good,like what your doing, :D

Thanks Monica!

Looking good Bob. Looking forward to the building and resulting diorama. Ian's suggestions re: the Miniart building's construction are good ones. The sand paper glued to a board is a very good tip with these vacform kits.


Paul

Thanks Paul, I have taken this suggestion on board

Now about those Mini-Art buildings. The main building parts are vac formed out of a sheet of plastic. If you watch the video on their web site it will help a lot with the cutting out.
One mistake a lot of people make is cutting them out the wrong way. So pay attention to that in the video, Also a whole sheet of sand paper glued to a flat board is great for sanding the cut edge flat. This helps a lot in getting a flat surface to glue up-

Thanks Ian for suggesting the video, I have watched a few and gone to the mini art website. It was very helpful. I used the methods to cut out he buildings very carefully. It took me quite a while to do so. I am happy with the results. There were a few mistakes but nothing some filling wont fix. The building are extremely detailed. 


Here is my latest build update with a preview of what the final diorama should look like. 


I have built the figures from the Tamiya Kit. Being a cheapskate I try to maximize what I can get from a kit, and never really ever use aftermarket figures or parts ... except maybe photoetch seatbelts (thats because I have a set of so many spare ones)


I have cut the base of the diorama out as well, I am uncertain as to wether I will place a wooden base under this or just leave it as is. 


Here is the main building cut out - there were two pieces, a back and a front, these have been glued together and filled in with putty. 


The other pieces of the building.. these are still being glued together


Lots of gaps in this one... not a big issue as it will be filled in with putty


Here is a preview of what I plan to set the diorama, the two soldiers are having a break due to a "lull in the battle space". I was always trained that whenever there is a  "lull in the battle space" you must take full advantage to rest up, gear up, refresh, do whatever needs to be done, mentally and physically so that once the lull dies down and the battle starts again, you are ready. 


So in this diorama the two soldiers are chilling out, getting some air and recuperating to start over again. Now with the soldier sitting down, I need some kind of drink to put in his hand, so might scratch build some kind of can, so it seems as if hes having a drink. 


Here it is the preview of a "lull in the battle space"


I hope you guys liked the build update and the photos, and most importantly the preview.
 
D

dubster72

Guest
Looking good so far Bob, I hate making Miniart buildings, although they do look the part.


If you decide not to fix the cobbled base to a piece of wood, I'd suggest filling it with plaster. You'll need some weight to prevent it being top-heavy & wobbly.
 

monica

“When there's no more room in hell, the dead will
SMF Supporter
Joined
Oct 30, 2013
Messages
15,111
Points
113
Location
Melbourne
First Name
monica
looking good Bob,there a little tricky the building,but i do like them,your done well with this one,so far, :D


very good advice by Patrick as well,and don,t forget to go around with a sharp blade and take off all these,little nubby things as well, 9_9
 
B

Builder

Guest
Looking good so far Bob, I hate making Miniart buildings, although they do look the part.


If you decide not to fix the cobbled base to a piece of wood, I'd suggest filling it with plaster. You'll need some weight to prevent it being top-heavy & wobbly.


looking good Bob,there a little tricky the building,but i do like them,your done well with this one,so far, :D


very good advice by Patrick as well,and don,t forget to go around with a sharp blade and take off all these,little nubby things as well, 9_9

Thanks Patrick and Monica, I have taken both your advices, I will add the wooden base at the end and I have removed as many nubs as I could. Miniart Buildings take a lot of time to build and paint and get right, but the final product is very detailed. This is my first every miniart building. With all the advice Ive gotten here its really helped me pull it off I think. 


Here is the latest Build update. 


So I built the base and had it primed, I primed it with Tamiya White primer.. simple reason being I was almost out of grey primer! I think it worked out really well as I decided to use the white primer as the colour of the walls. Well in any case I realised there were still some areas to fill and sand so this was then done. 


Here it is


I then preshaded with Tamiya XF-1 Flat Black Enamel. 


The cobblestone floor was painted Tamiya XF-66 


I then masked off the areas which I wanted to be white.. and then pre shaded again with more Tamiya XF-1 Flat Black Enamel. I did this because the colour I was going to apply wsa Tamiya X-17 Pink.. this was a glossy colour and also very pink so I needed it to be darker. 


Tamiya XF-17 Pink Enamel applied


Detail work was then done, the sides with exposed bricks were painted, I painted several individual bricks in the floor with different colours, I think there are 4 different colours in the floor. The door and window are painted a Flat earth, though the door will be given a clear orange top coat to give it more of a wood look. 


The back side still has a lot of work left to do


Posters added


Here is the diorama in its current state


Still lots of detailing to do on the backside of the building. I need to give the entire floor a wash as well, maybe also on the building too, and then apply some pigment weathering using Tamiya Weathering Master sets. Still waiting on my Alclad II Flat to arrive as well so I can weather the tank. 


I hope you all liked the Build Update and the photos. Comments are welcome!
 
Last edited:
D

dubster72

Guest
That's coming along really well Bob. Looks like you've mastered those Miniart buildings!


For the inside, you can buy scale wallpaper, but I generally look through old magazines. My better half has lots with useful patterns.


A small request if I may for those of us who usually view the forum on a smartphone; when posting a Photobucket link, use the IMG one. That way we see just the image, rather than the album. TIA :smiling3:
 
B

Builder

Guest
That's coming along really well Bob. Looks like you've mastered those Miniart buildings!


For the inside, you can buy scale wallpaper, but I generally look through old magazines. My better half has lots with useful patterns.


A small request if I may for those of us who usually view the forum on a smartphone; when posting a Photobucket link, use the IMG one. That way we see just the image, rather than the album. TIA :smiling3:

Thanks Patrick... with the Photos, I always use the IMG link on photobucket, so I am not sure why an album is showing up on your smartphone, I have checked the images on our smartphones and they look fine to me, it opens up photobucket if you click on a picture though ... computers !!
 
D

dubster72

Guest
Fair enough mate, I just wasn't sure why it was happening so I thought maybe it was a different type of link.
 

monica

“When there's no more room in hell, the dead will
SMF Supporter
Joined
Oct 30, 2013
Messages
15,111
Points
113
Location
Melbourne
First Name
monica
looking real good ,Bob,like the colors,the black under the salmon,gives a very nice feel of depth,


and like the way your done the door and windows,I have never used flat earth,with the orange wash,mite just


have to try that one,real like what your done,looking great, :D
 
B

Builder

Guest
That's looking really good Bob


Bob


looking real good ,Bob,like the colors,the black under the salmon,gives a very nice feel of depth,


and like the way your done the door and windows,I have never used flat earth,with the orange wash,mite just


have to try that one,real like what your done,looking great, :D

Thanks Bob and Monica. 


Monica with reference to the door I havnt applied clear orange in the pictures above, however in the photos below I have. So for a wood effect I paint Tamiya Flat Earth wait for it to dry then apply Tamiya Clear Orange then a matte coat. 


In the pics below you can see how it looks


So I applied a Vallejo wash to the floor


20160904_082341_RichtoneHDR_zps2wy5bvyq.jpg


Did up the last piece of the base


20160904_113558_RichtoneHDR_zpsy4t0upus.jpg


Here it is


20160904_123849_RichtoneHDR_zpsfvkszkgb.jpg


20160904_123908_RichtoneHDR_zpsrbqu7lfc.jpg


20160904_124019_RichtoneHDR_zpspubagzws.jpg


Many more pics in the Completed Buildings Section .. Link below


Then did some weathering on the wheels using Vallejo Model wash light grey. I apply the wash directly over the dried enamel. 


20160904_082349_RichtoneHDR_zpsz0gfte3w.jpg


I have painted the figures but they still need alot more work. Here it is in its current state


20160905_064846_RichtoneHDR_zpsrmhrquls.jpg


20160905_064840_RichtoneHDR_zpswwkj5gsq.jpg


20160905_064856_RichtoneHDR_zps0dp9s3re.jpg


So still need to matt coat the tank, detail up the figures and it should be done. 


Hope you all like the build update and photos. All comments are welcome.
 

monica

“When there's no more room in hell, the dead will
SMF Supporter
Joined
Oct 30, 2013
Messages
15,111
Points
113
Location
Melbourne
First Name
monica
looking real good Bob,well done so far on this one, :D
 
0

0ne48thtel

Guest
This is coming along nicely Bob the building  looks great.
 

tr1ckey66

SMF Supporter
Joined
Mar 6, 2009
Messages
3,686
Points
113
First Name
Paul
Looking good Bob. Those Miniart buildings make up quite nicely don't they? And it makes for a terrific backrop to the Panther.


Cheers


P
 

Snowman

We come in peace, so shoot to kill!
SMF Supporter
Joined
Oct 20, 2014
Messages
1,996
Points
113
First Name
Gavin
I like that Panther! Reminds me of the kit I build when I was 15yrs old! 9_9


I did not paint it at the time, so yours is worlds apart in finish - very nice! B|


On a critical note if you don't mind, a bit more "wear 'n tear" on the Panther will not go amiss. ;)
 
B

Builder

Guest
looking real good Bob,well done so far on this one, :D


This is coming along nicely Bob the building  looks great.


Looking good Bob. Those Miniart buildings make up quite nicely don't they? And it makes for a terrific backrop to the Panther.


Cheers


P


I like that Panther! Reminds me of the kit I build when I was 15yrs old! 9_9


I did not paint it at the time, so yours is worlds apart in finish - very nice! B|


On a critical note if you don't mind, a bit more "wear 'n tear" on the Panther will not go amiss. ;)

Thanks Monica Terry, Paul and Gavin... the miniart buildings do make a fantastic backdrop. On Weathering Gavin, I said in my plan (at the start of the thread) that weathering would be kept to a minimum and so that is the case here. Though I have lightly weathered the wheels, the tracks and the hull. I have done this using Vallejo washes and Tamiya Weathering Master sets. 


Here are the pictures of the Completed Panther, The tracks were given a Desert Dust wash and then pigmented with Tamiya Weathering Master - Sand. 


This was all done after the Tank was coated with 2 coats of Alclad II Flat coat. 


20160907_210023_RichtoneHDR_zpsaehu91ii.jpg


20160907_205948_RichtoneHDR_zps6tumwoto.jpg


20160907_210032_RichtoneHDR_zpspi4fsrlq.jpg


20160907_210059_RichtoneHDR_zpsbq8v37yq.jpg


20160907_205959_RichtoneHDR_zpsv4a49xn0.jpg


20160907_210203_RichtoneHDR_zpsqtzc2gde.jpg


I hope you all like the build update. All comments welcome.
 
Last edited:
Top