B
Builder
Guest
Hi All,
This is my entry into the GB. I know its a bit late, but I actually started this build about a month ago, just couldn't find the time to post up a full thread untill now.
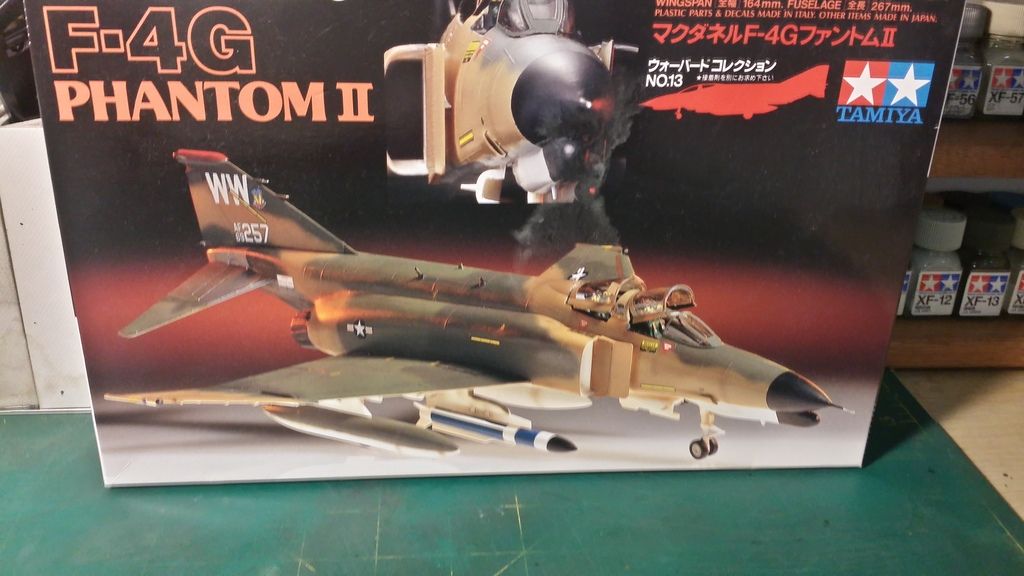
I will be building the Tamiya 1/72 F-4G phantom.
Build Plan
Apart from using some photo etch seat belts, the goal is to build the kit OOB in the provided German scheme. This will form part of my 1/72 German Airbase project which I came up with at the end of last year. Link below.
http://www.scale-models.co.uk/threads/1-72-german-airbase-project.27124/#post-336051
I have already built a 1/72 Mig 21 so this will be the second Jet for this project. The kit has raised panel lines, and I will use these to practice my skills with a copic marker - so it will provide a good test on how to highlight raised panel lines.
The kit will be painted with Tamiya enamels, Lacquers and Humbrol Enamels.
Kit Details (from www.scalemates.com)
Title: McDonnell F-4G Phantom II
Number: 60713
Scale: 1:72
Type: Full kit
Includes: Plastic sprues, Waterslide decals, Clear parts
Released: 1994 - This is a rebox of Italeri kit 133 released in 198.
Decal options
Box art:
Kit Contents

The build
As stated earlier the build started a month back, here are the updates.
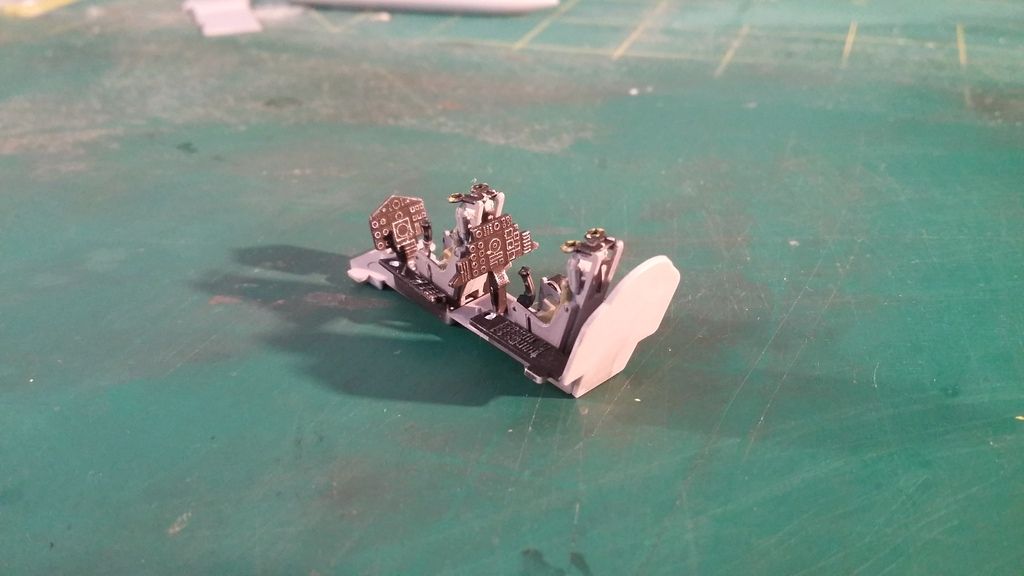
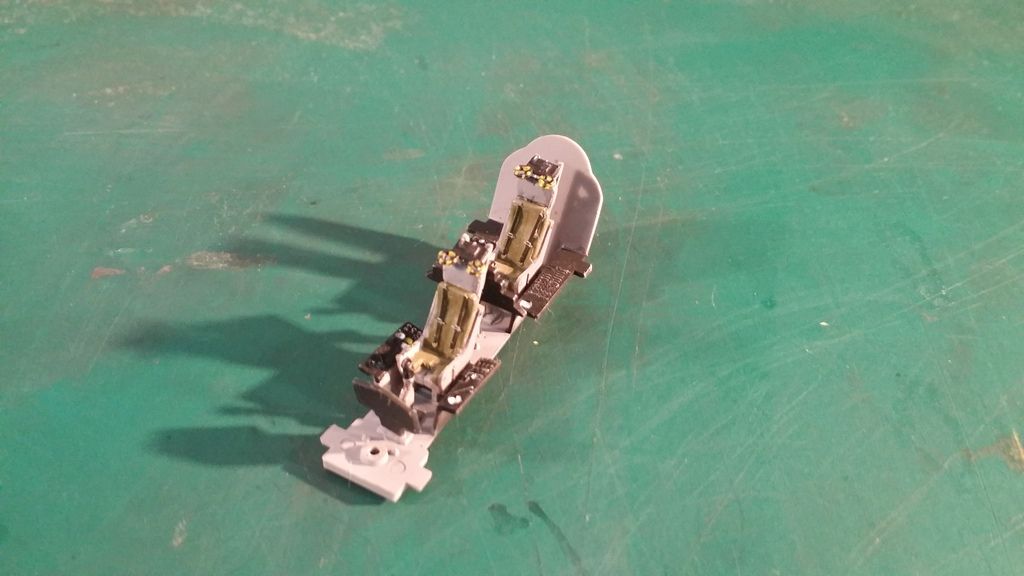
The cockpit was completed, the panels were highlighted using Tamiya Weathering Master set with the colour silver. I put the pigment onto my index finger and painted over the raised detail to get the desired effect. I have also used a spare set of photo etch seatbelts.
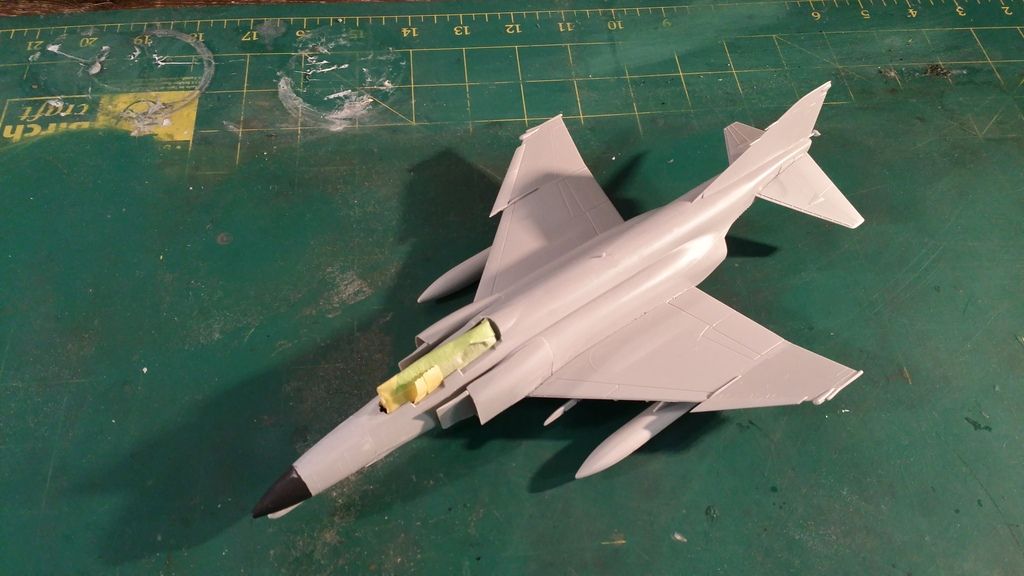
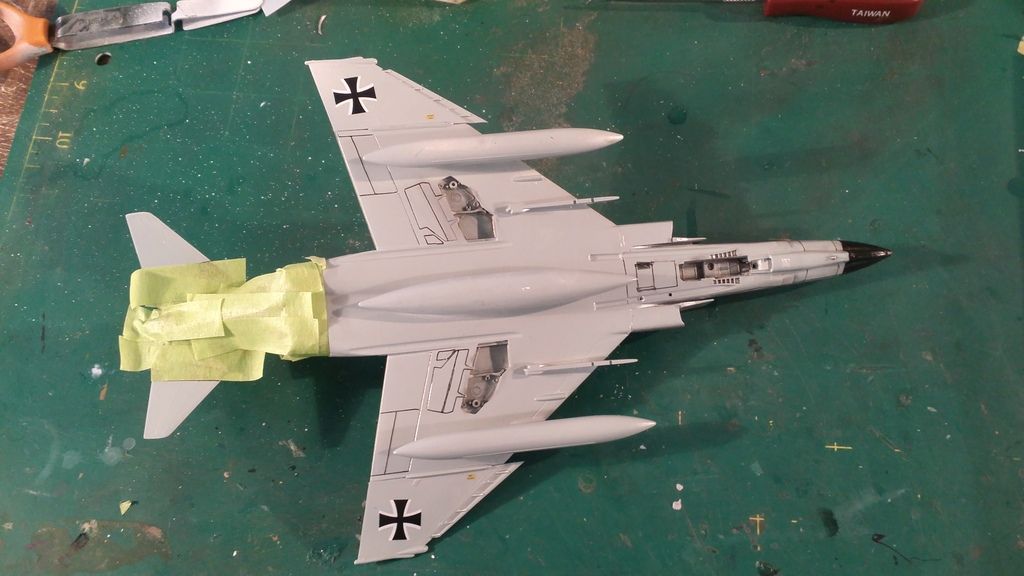
Once the cockpit was complete the kit was put together and I began filling in the small gaps with either Tamiya Putty or Tamiya Extra thin glue.
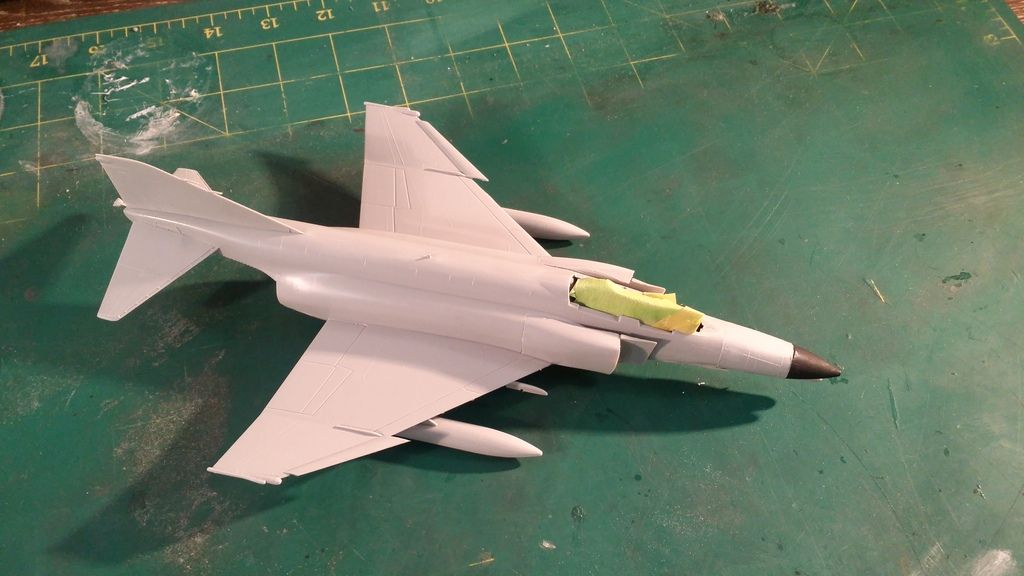
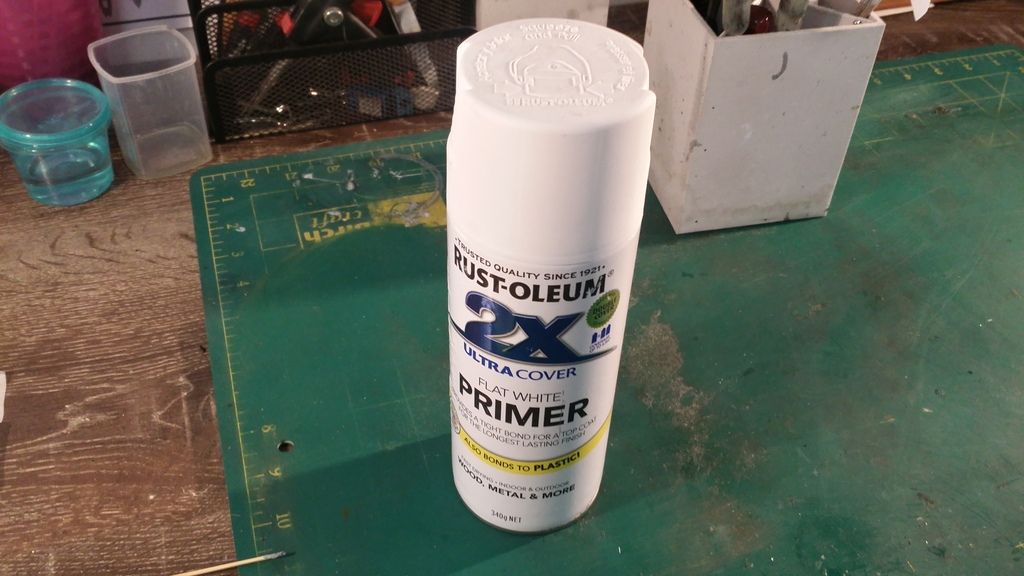
Primed using Rustoleum 2X White Primer.
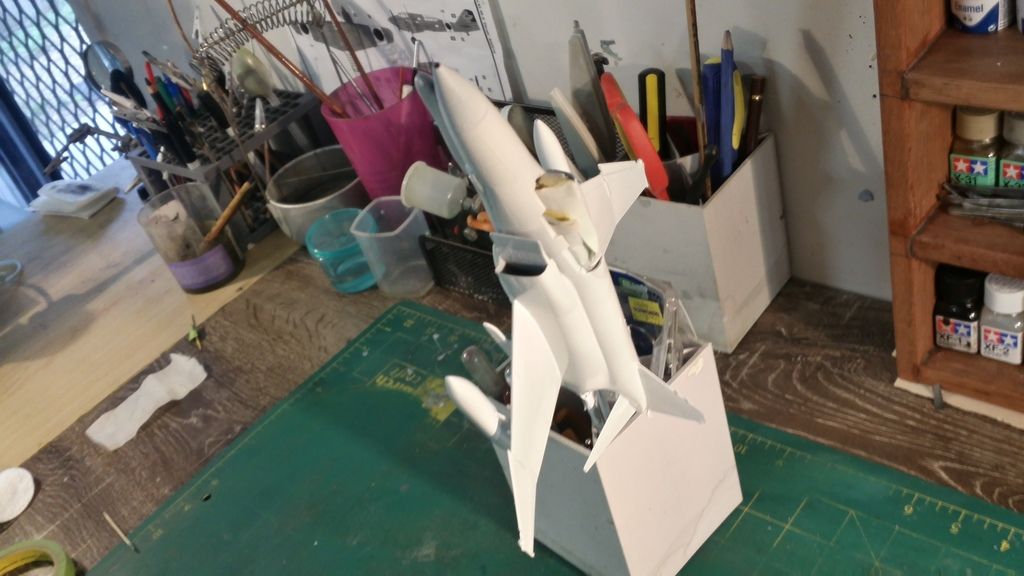
I then forgot to take any photos!
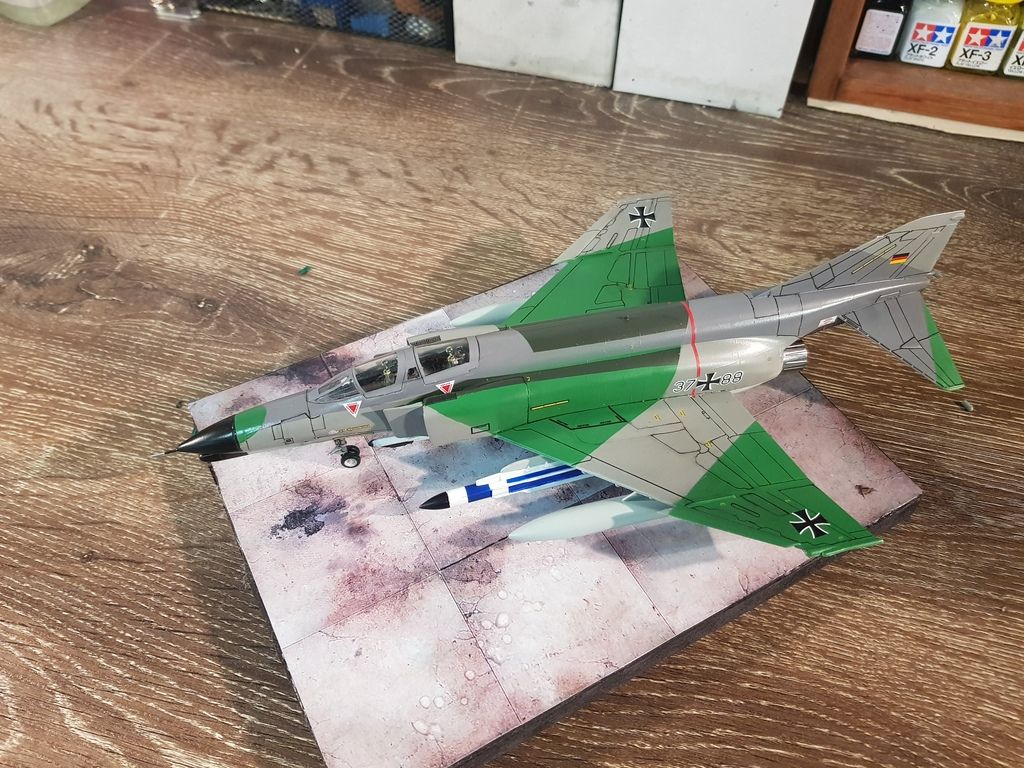
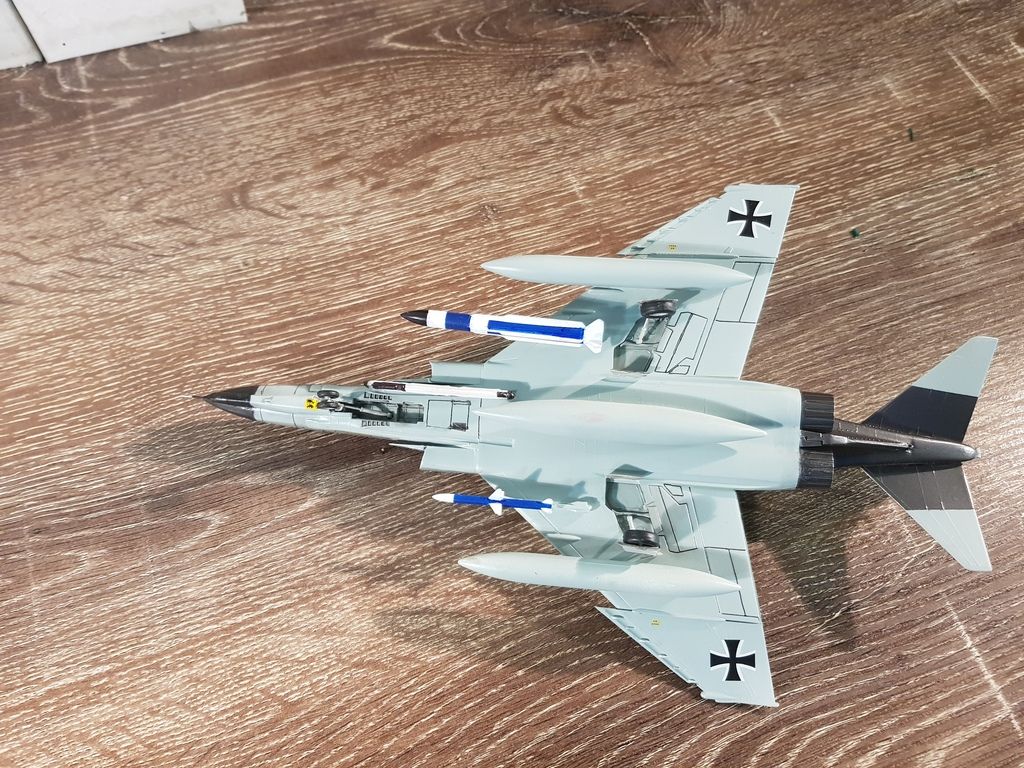
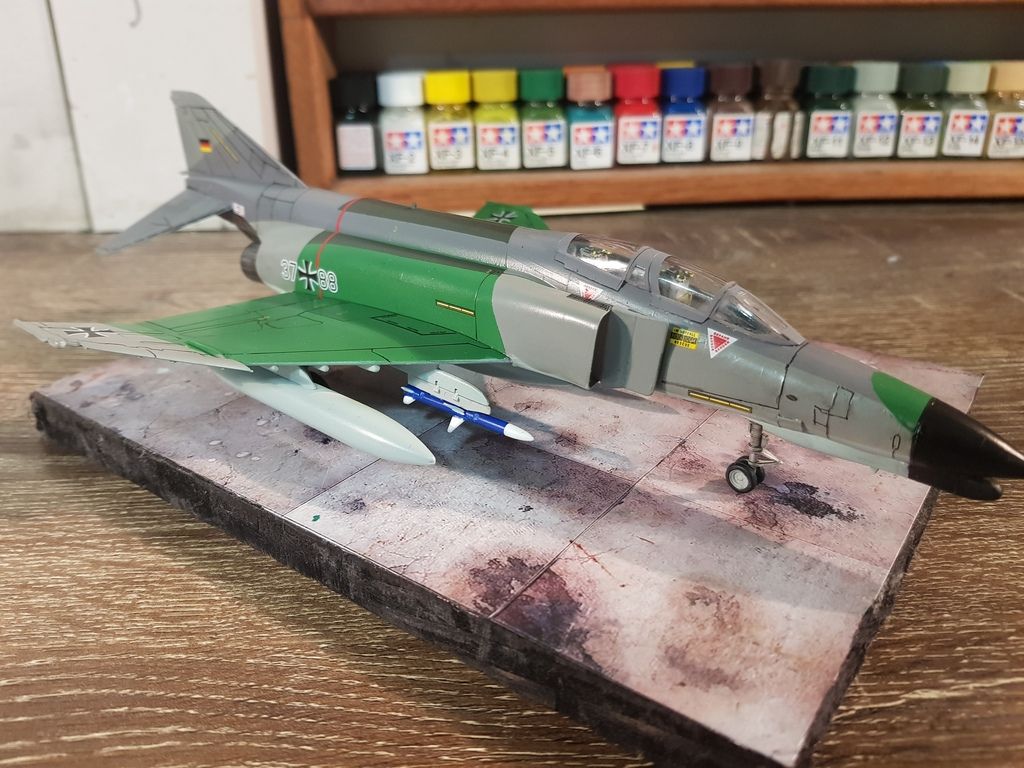
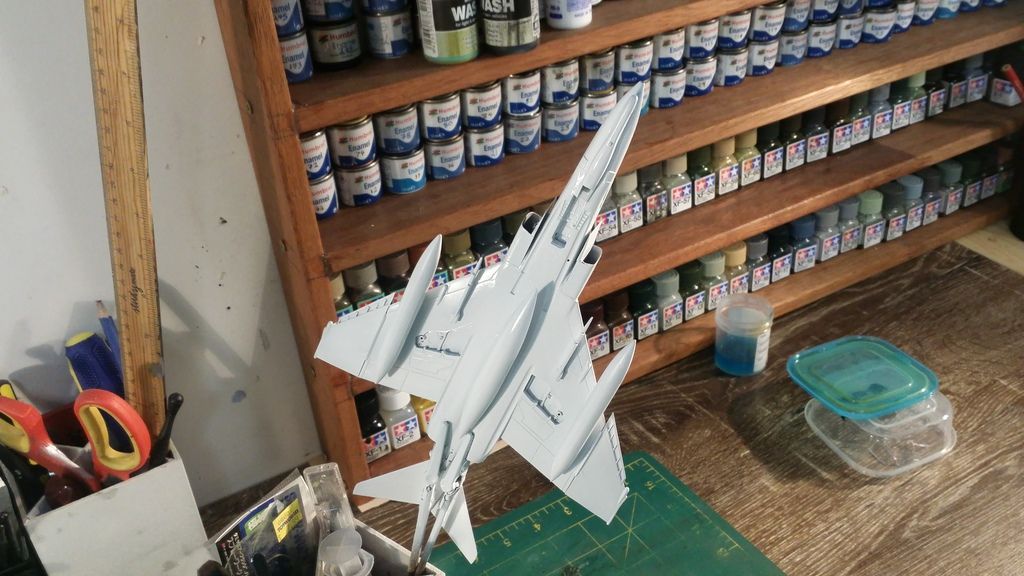
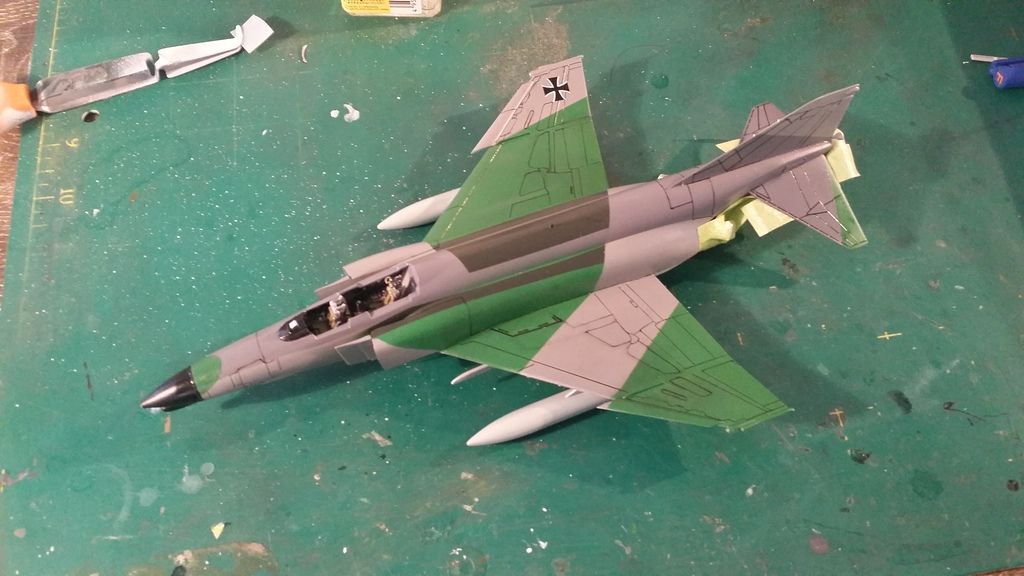
The kit was painted in the desired scheme over several weeks. The scheme is described in the kit instructions. No pre-shading or post shading was done.
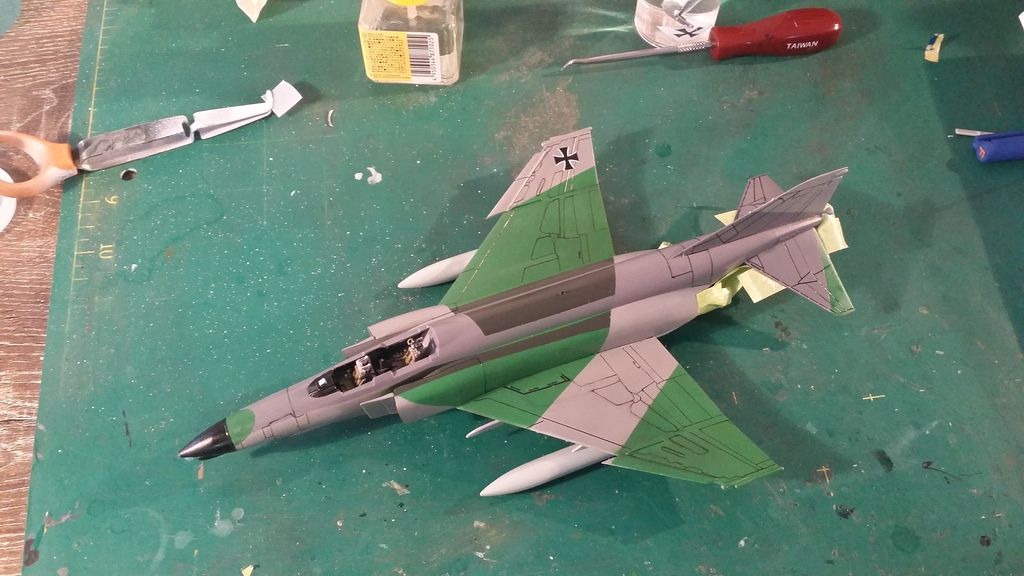
The panel lines have been highlighted using a copic multiliner pen with a 0.03mm tip. This has become one of my favourite tools - he only qualm I have is I cannot find it in a brown or dark grey shade, thus the panel lines seem very dark.
I then gloss coated this with Pledge Future
So here it is in its current state as decals are being applied

The goal now is to get as much done on the weekend as I can, maybe even complete this kit. I have to finish up the weapons, and the landing gear. The canopies have all been completed.
As always I hoped you all liked the build thread. All comments welcome.
This is my entry into the GB. I know its a bit late, but I actually started this build about a month ago, just couldn't find the time to post up a full thread untill now.
I will be building the Tamiya 1/72 F-4G phantom.
Build Plan
Apart from using some photo etch seat belts, the goal is to build the kit OOB in the provided German scheme. This will form part of my 1/72 German Airbase project which I came up with at the end of last year. Link below.
http://www.scale-models.co.uk/threads/1-72-german-airbase-project.27124/#post-336051
I have already built a 1/72 Mig 21 so this will be the second Jet for this project. The kit has raised panel lines, and I will use these to practice my skills with a copic marker - so it will provide a good test on how to highlight raised panel lines.
The kit will be painted with Tamiya enamels, Lacquers and Humbrol Enamels.
Kit Details (from www.scalemates.com)
Title: McDonnell F-4G Phantom II
Number: 60713
Scale: 1:72
Type: Full kit
Includes: Plastic sprues, Waterslide decals, Clear parts
Released: 1994 - This is a rebox of Italeri kit 133 released in 198.
Decal options
- McDonnell Douglas F-4F Phantom II
 Bundeswehr Luftwaffe (German Air Force 1956-Now)
37+88
Green, grey, Light grey, White - McDonnell Douglas F-4G Wild Weasel
 US Air Force (1947-Now)
35 TFW, 39 TFTS 69-257
SE Asia - McDonnell Douglas F-4E Phantom II
 Türk Hava Kuvvetleri (Turkish Air Force)
70290
SE Asia
Box art:
Kit Contents
The build
As stated earlier the build started a month back, here are the updates.
The cockpit was completed, the panels were highlighted using Tamiya Weathering Master set with the colour silver. I put the pigment onto my index finger and painted over the raised detail to get the desired effect. I have also used a spare set of photo etch seatbelts.
Once the cockpit was complete the kit was put together and I began filling in the small gaps with either Tamiya Putty or Tamiya Extra thin glue.
Primed using Rustoleum 2X White Primer.
I then forgot to take any photos!
The kit was painted in the desired scheme over several weeks. The scheme is described in the kit instructions. No pre-shading or post shading was done.
The panel lines have been highlighted using a copic multiliner pen with a 0.03mm tip. This has become one of my favourite tools - he only qualm I have is I cannot find it in a brown or dark grey shade, thus the panel lines seem very dark.
I then gloss coated this with Pledge Future
So here it is in its current state as decals are being applied
The goal now is to get as much done on the weekend as I can, maybe even complete this kit. I have to finish up the weapons, and the landing gear. The canopies have all been completed.
As always I hoped you all liked the build thread. All comments welcome.