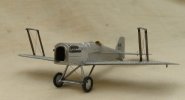
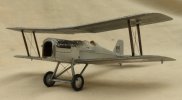
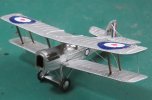
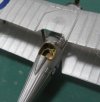
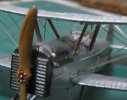
Chris's 1/72 Revell SE5A.

Steve-the-Duck

SMF Supporter
Joined
Jul 3, 2020
Messages
1,215
Points
113
Location
Medway Towns
First Name
Chris
Every time I see that RE8, Richard, I marvel at the work done on it. I went to town as much on my Brisfit

We do the work that please us!
 

Steve-the-Duck

SMF Supporter
Joined
Jul 3, 2020
Messages
1,215
Points
113
Location
Medway Towns
First Name
Chris
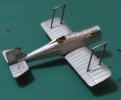
So, first spray of silver overall is on
IMG_2486.JPG
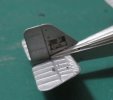
Which did show up even more the ejector marks on top of the lower wing, despite the filling. Also need a bit of work where the gun position was filled on the cowling, as expected
The cowling will get a Chrome Silver overspray for the polished surface
 

Lee Drennen

Box Stock Builder with a Twist/ Rabble Member
SMF Supporter
Joined
Apr 29, 2018
Messages
5,772
Points
113
Location
Wortham Mo
First Name
Lee
Okay, so, the Hector is stalled for a while, much air-brush practice to ensue, so this was going to be next afterwards but I may just make a start now-ishView attachment 499718View attachment 499719
I WILL be putting in cockpit detail, thanks to Wingnut references. Intention is a post-war RAE display aircraft in silver, which I can rattle-can
BTW, when I got this, CHEAP, off eBay, this was in the box too
View attachment 499720
Brings back memories. I think all my Matchbox kits in the 'seventies were stuck with this

But not this one, not this time.
Now I just need to wait for some new drill-bits to arrive for the rigging holes.
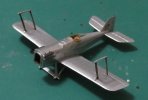
Nice Classic I have all of these old 1/72 Revell kits including the ones molded across the pond which have a somewhat different Boxart to them
 

Steve-the-Duck

SMF Supporter
Joined
Jul 3, 2020
Messages
1,215
Points
113
Location
Medway Towns
First Name
Chris
Well, we're progressing more. With the usual problems
IMG_2487.JPGIMG_2488.JPG
All the main paint done, with the cowling oversprayed in Chrome for 'polished metal.' Soon for the upper wing and then the rigging
However...
IMG_2489.JPG
So, I tried lettering with Letraset overpainted, but theletters just would not come off without, too much, scratching. I should have left them as a guide and overpainted white. Only once has this every properly worked for me, and that was putting Verlinden rub-down numbers on a 1/35th BMP-1, THIRTY YEARS ago!
 

Steve-the-Duck

SMF Supporter
Joined
Jul 3, 2020
Messages
1,215
Points
113
Location
Medway Towns
First Name
Chris
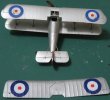
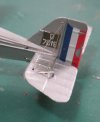
Upper wing filled and marked up. I've used Xtradecal Pre-WW2 Roundels, or so it says they are
IMG_2490.JPG
They're nicely thin, and robust, and VERY shiny, but they needed a lot of decal solution to get them to bed down properly. There'll be a satin varnish overspray before attachment, after I've added the control wires to the horns
However, PT umpteen
IMG_2491.JPG
Comparing them to the (kit) roundels on my Sopwith Snipe, the blue looks more wartime dark
I can live with that, though. Like I said, the kit transfers were just too yellowed to use
 

Steve-the-Duck

SMF Supporter
Joined
Jul 3, 2020
Messages
1,215
Points
113
Location
Medway Towns
First Name
Chris
Well, THAT's a bit better, even with the slightly out-of-focus pic
IMG_2504.JPG
Undercarriage and wheels now on, and rigged, but too late for pictures
Progress!
 

Steve-the-Duck

SMF Supporter
Joined
Jul 3, 2020
Messages
1,215
Points
113
Location
Medway Towns
First Name
Chris
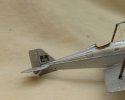
So, this is the other side of the tail, with better focus
IMG_2522.JPG

And so, the rigged u/c
IMG_2520.JPG
And the top wing on
IMG_2524.JPG
To give me enough space, the cabane struts will go on after I've rigged between them

So, my rigging method, as said elsewhere, is steel rod/wire, because it's stiff and silver-y. I measure the distance, cut main length, then usually secure one end with PVA to be able to judge correct length, then finally secure, at least one end, with cyano. I just have to be careful as the cyano tends to discolour the silver
That's going to be a days work at least
 

Steve-the-Duck

SMF Supporter
Joined
Jul 3, 2020
Messages
1,215
Points
113
Location
Medway Towns
First Name
Chris
So, no interim pics, but the wings are now rigged, the tail likewise, so just the control lines to add and the tail stripes and fuselage roundels and done
Pics may go straight to a completed thread

I don't know. A sixty-year-old kit has given me no trouble at all, except for rigging wires pinging into oblivion, whereas that Amodel Hector has been nothing but trouble!

Ooh, must add a windscreen and airspeed indicator...
 

Steve-the-Duck

SMF Supporter
Joined
Jul 3, 2020
Messages
1,215
Points
113
Location
Medway Towns
First Name
Chris
The last touches
IMG_2568.JPG
Slight trouble with the Xtradecal stripes, but nothing a touch-up didn't fix
I just wish the damn things would stay in place while I tamp them down!
IMG_2569.JPG
So, added a little airspeed indicator sensor
IMG_2570.JPG
Are we done? Or have I forgotten something? Nothing springs to mind (lol)
IMG_2571.JPGIMG_2572.JPG
And for the last bit, a windscreen, otherwise entirely missing from the kit.
I managed to find pictures of about six different windscreens on the net!

And that's it done, so over into a completed thread!
 
Top