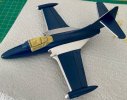
Matchbox 1/72 Grumman F9F-5 Panther

flyjoe180

Joe
SMF Supporter
Joined
Jan 18, 2012
Messages
12,419
Points
113
Location
Earth
First Name
Joe
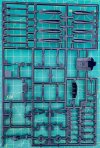
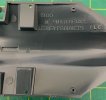
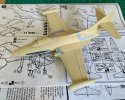
I wanted another 'simple' build so dug this out. Matchbox kit dated 1985, but the moulds are stamped 1980. I believe Revell still issue this kit as one of their own. Shame on them, it's pretty old, but having said that it does have some recessed lines and restrained raised panel detail.
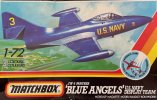
IMG_1252.jpeg

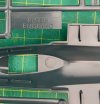
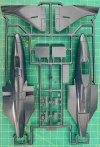
Typical Matchbox multi-coloured parts, some sink marks which will be easily to deal with:
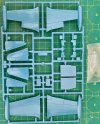
IMG_1259.jpeg
IMG_1260.jpeg
IMG_1261.jpeg
IMG_1262.jpeg
IMG_1263.jpeg

The decals are in pretty good condition:
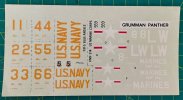
IMG_1258.jpeg
 

flyjoe180

Joe
SMF Supporter
Joined
Jan 18, 2012
Messages
12,419
Points
113
Location
Earth
First Name
Joe
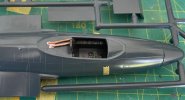
Started the cockpit, looking at photos there are pipes on the rear deck area (probably air conditioning/de-misting?). I simulated these using electrical wire. I repositioned them once the glue was drier. Lower fuselage section is dry fitted at this stage.
IMG_1265.jpeg

I added some wheel well detail and sanded the airbrakes flush. (What is it with me and these perforated airbrakes? The Jag was bad enough!). I then drilled holes into very thin templates cut from styrene card and layered them on top. I'll clean the holes up prior to the final paint coat, as they get clogged with primer etc.
IMG_1270.jpeg

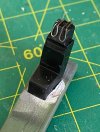
The ejection seat was blank. I added two strands of thin wire to simulate the ropes that hung down on these seats. Rigid handles were yet to be invented.
IMG_1271.jpeg
 

flyjoe180

Joe
SMF Supporter
Joined
Jan 18, 2012
Messages
12,419
Points
113
Location
Earth
First Name
Joe
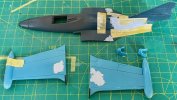
My 'simple' build gets more complicated with the fit of the tail area onto the aft fuselage. As you will see, this thing absorbs filler.
IMG_1273.jpeg
IMG_1275.jpeg
IMG_1277.jpeg

Fill, sand, smooth, repeat. The multi-colour got to me so I sprayed it in overall buff. No reason for that other than I have plenty of buff colour and the lighter shade helps me to see the shadows from blemishes and indentations. Fill, sand, smooth, repeat...
IMG_1295.jpeg

Pretty certain a 10 year old Joe would've had this thrown together and painted in a few days.
 

Jakko

Way past the mad part
SMF Supporter
Joined
Apr 28, 2018
Messages
10,832
Points
113
First Name
Jakko
Matchbox kits are always nostalgic for me :smiling3: I have this one too, built when I was probably about ten years old or so, and like you said, it can’t have taken more than a few days to build, paint and decal back then :smiling3:
 

rickoshea52

SMF Supporter
Joined
Dec 20, 2011
Messages
3,977
Points
113
Location
North West
First Name
Rick
The multi-colour got to me so I sprayed it in overall buff. No reason for that other than I have plenty of buff colour and the lighter shade helps me to see the shadows from blemishes and indentations.
Building models just as if they were the real thing - it’s like primer on assembly line aircraft.
 

flyjoe180

Joe
SMF Supporter
Joined
Jan 18, 2012
Messages
12,419
Points
113
Location
Earth
First Name
Joe
Many shaves later, I have done some more work on the Panther.

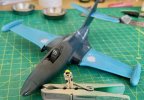
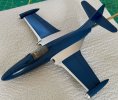
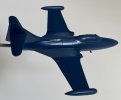
Overall painted Blue Angels Blue, using Model Master enamel:
IMG_1375.jpeg

The Panther then had a stall/spin crash a few days later. I removed it from the drying mount and my stick up the exhaust slid out. Repairs were done to the paint on the wingtips and nose, and the canopy was fixed back on, and paint touch ups done. Luckily enamel paint is tough.

Then I moved on to the landing gear and wheels, the struts for which are the same colour as the aircraft. Convenient!

Then time to tackle those metallic surfaces:
IMG_1380.jpeg

This is where we're at today:
IMG_1381.jpeg

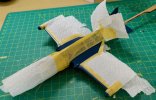
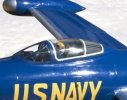
I've removed the main canopy masking. I will Re-mask the surrounds and add a centre canopy 'brace', to be painted white. Like this:
F9F Panther copy.jpg

I also just realised I have to ad some metal colour to the tail fin and horizontal stabiliser leading edges.

Hopefully next update will occur much sooner than another two months!
 

yak face

Wossupwidee?
Staff member
Moderator
SMF Supporter
Joined
Jun 13, 2009
Messages
12,414
Points
113
Location
sheffield
First Name
tony
Great work joe , it took some bashing but its looking fine now , no sign of those awkward seams . Paint looks lovely , im curious though , did the blue angels only use six aircraft in those days ? theres only six number options on the decals . Cheers tony
 

flyjoe180

Joe
SMF Supporter
Joined
Jan 18, 2012
Messages
12,419
Points
113
Location
Earth
First Name
Joe
Cheer guys. Tony, I'm not sure about there being only six numbers. I do know that number 7 is usually a two-seat 'PR flight experience' and back up airframe, maybe they did not have a two seat Panther?

I got the metallic tail areas done, but they require touch ups once dry. The canopy framing has been masked ready for white.
IMG_1383.jpeg
 

flyjoe180

Joe
SMF Supporter
Joined
Jan 18, 2012
Messages
12,419
Points
113
Location
Earth
First Name
Joe
Tony, further to my previous. The first two seat additional aircraft to the six, was with the F9F Cougar in 1956
 
Top