Roberts Tamiya 1/48 Swordfish ( with extras)

Robert1968

SMF Supporter
Joined
Mar 2, 2015
Messages
3,410
Points
113
First Name
Robert
Well I have mulled over when I'm going to start this and now is the time. I will be building OOB so to speak but I have taken the opportunity to get some extras to make it that much more appealing ( my opinion )
I'm a little confused as of yet which to do though
Options are Fairey Swordfish Mk2 836Sqn MAC - Ship Amastra 1943-44
Fairey Swordfish MK 2 816Sqn HMS Tracker 1943
Fairey Swordfish MK 2 810Sqn Tanzania 1942

Or something else as I'm open to suggestions
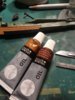
Extras I have purchased are:- Tamiya Photo etch Bracing wires ( still not sure if I will use these as I'm led to believe they are a bit overscale.
Eduard FE384 cockpit detail ( self adhesive )
Ammo Rigging wire 0.2mm
Ammo Rigging Wire 0.3mm
HGW 148005 Sutton Harness
Plastruct round rod 0.5mm 90851
Plastsruct Round rod 0.3mm 90850

The Plastruct is I'm hoping to replace the rigging in place of Tamiya Bracing but this will be anew venture for me.
I've taken some notes from the Internet IE Brett green and others in their constructions of the Swordfish.
I'm hoping to put in control wires in as well that will hopefully represent my aircraft better.
I've looked at some nice weathering too from others and washed and stains will all be incorporated so wish me luck.
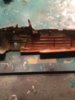
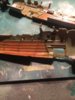
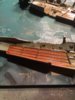
Ok the box. Shots and some sprue shots etc
image.jpeg image.jpeg image.jpegimage.jpeg image.jpeg image.jpegimage.jpeg image.jpeg image.jpeg image.jpeg Iimage.jpeg
Thanks for looking and any feedback would be most welcome ( advice etc
Regards

Robert
 

colin m

Moderator
Staff member
Moderator
SMF Supporter
Joined
Dec 26, 2008
Messages
8,604
Points
113
Location
Stafford, UK
First Name
Colin
Nice one Robert, I look forward to watching this being built. I mentioned somewhere else I have one to build as well. Like you, I'm really not sure about the Tamiya PE rigging either. I'm thinking I might try a large ish fishing wire painted in the relevant colour.
 

Robert1968

SMF Supporter
Joined
Mar 2, 2015
Messages
3,410
Points
113
First Name
Robert
Nice one Robert, I look forward to watching this being built. I mentioned somewhere else I have one to build as well. Like you, I'm really not sure about the Tamiya PE rigging either. I'm thinking I might try a large ish fishing wire painted in the relevant colour.
Thanks Colin
I was looking down the same route as Fishing line too and there were a few available n I saw a Swordfish using Plastruct and think I can only try and if it doesn't work I've got a fall back

Regards

Robert
 

Ian M

Administrator
Staff member
Administrator
Moderator
SMF Supporter
Joined
Dec 14, 2008
Messages
19,710
Points
113
Location
Falster, Denmark
First Name
Ian
It's a very nice kit and builds very well. The PE can be a bit tricky but looks the part. Note that the bracing wires where not round, more like a flattened oval. The PE matches that quite well.
 

Robert1968

SMF Supporter
Joined
Mar 2, 2015
Messages
3,410
Points
113
First Name
Robert
Update.
Well I have made some progress in between the HMS Rodney.
The two fuselage halfs have been sprayed and the cockpit frame constructed and painted.
PE detail is throughout the cockpit with harnesses and dials
The pilots control facial was difficult to sand smooth but the PE detail looks amazing.Very 3D still have to affix gunners seat belts/ harnesses before a wash
Paints used Tamiya and Vallejo
Still lots to do before I seal up ( all parts given a Klear coat and will be given another before wash begins. Then it's chipping before I seal all up
Comments welcome
Pics of progress
image.jpeg image.jpeg image.jpeg image.jpeg image.jpegimage.jpeg image.jpeg image.jpeg image.jpeg
 
D

dubster72

Guest
That looks very good Robert, although the IP is a tad blurry to my eyes!

Watch out for those ejector pin marks though in future builds. It's a shame to put so much great work into the cockpit, only to have it marred by leaving those marks.

Looking forward to seeing more of this one
 

Robert1968

SMF Supporter
Joined
Mar 2, 2015
Messages
3,410
Points
113
First Name
Robert
That looks very good Robert, although the IP is a tad blurry to my eyes!

Watch out for those ejector pin marks though in future builds. It's a shame to put so much great work into the cockpit, only to have it marred by leaving those marks.

Looking forward to seeing more of this one

Thanks Patrick

When I've done a lot of dry fitting the fuselage doesn't seem to show the Ejector pin marks but I'll attend to those and re paint ( better safe than sorry eh )
I'll try and get some clearer pics up next.

Thanks

Robert
 

Robert1968

SMF Supporter
Joined
Mar 2, 2015
Messages
3,410
Points
113
First Name
Robert
Some more instrument panel pics
Enjoy
I still have to scratch a compass as PE says to cut off so that will be another challenge.
IMG_5914.JPG IMG_5913.JPG
 

colin m

Moderator
Staff member
Moderator
SMF Supporter
Joined
Dec 26, 2008
Messages
8,604
Points
113
Location
Stafford, UK
First Name
Colin
Nice start. You've spent a bit of time on the 'pit and it shows. I'm looking forward to the rest of your build.
 

Robert1968

SMF Supporter
Joined
Mar 2, 2015
Messages
3,410
Points
113
First Name
Robert
A little more progress today I have done some washes with oils and made a start on the engine. I will look at some more pics of the Pegasus at the weekend to see if I can improve with ignition leads etc. I have also made a few more sub assemblies painted the inner cowl and gave a dry brush.
I'm still not sure on a version I'm going to do but I'm leaning to the white version from MAC ship AMASTRA of 836Sqn. I think this version will get me more practice in the art of oil streaks and dirt streaking. Oh I noted on one of the sub assemblies there are two small bumps which I nearly cut off when cleaning up ( I have marked with pen on pic as these must stay in place ( part of the upper wing support
Pics of progress
Enjoy and comments welcome
image.jpeg image.jpeg image.jpeg image.jpeg image.jpeg image.jpeg image.jpeg image.jpegimage.jpeg image.jpeg image.jpeg image.jpeg
 

Attachments

  • image.jpeg
    image.jpeg
    86.2 KB · Views: 8
  • image.jpeg
    image.jpeg
    94.4 KB · Views: 8
  • image.jpeg
    image.jpeg
    94.7 KB · Views: 7
  • image.jpeg
    image.jpeg
    92 KB · Views: 8
  • image.jpeg
    image.jpeg
    83.7 KB · Views: 8
  • image.jpeg
    image.jpeg
    84.7 KB · Views: 8

PhilJ

SMF Supporter
Joined
May 14, 2015
Messages
1,114
Points
113
Location
Beltinge
First Name
Phil
This is all looking very nice Robert, should be a really decent example when finished. Will be watching this.
Phil
 
T

T. van Vuuren

Guest
Really cool detail, the IP looks good :smiling:
I have been after this kit for a long time but budget does not allow it , is I got the 1/72 new Airfix one instead .

Theuns
 

Ian M

Administrator
Staff member
Administrator
Moderator
SMF Supporter
Joined
Dec 14, 2008
Messages
19,710
Points
113
Location
Falster, Denmark
First Name
Ian
A lot of work going into this and it shows. Its a great kit and builds well but the extra detail that you are putting into it is time well spent.
Re your oil washes. Next time you are at the shop, get some Payens grey. I find it very nice for grime and such. As for the colour, it is just the 'perfect' non de-script grey that just works with just about any colour under it.
 

Snowman

We come in peace, so shoot to kill!
SMF Supporter
Joined
Oct 20, 2014
Messages
1,996
Points
113
First Name
Gavin
Oh..... VERY NICE!!:cool::cool:

That is one cool kit and a great 'ol kite!:smiling3:
 
T

Trekkie_John

Guest
This is going to be one nice looking "String Bag".

Have fun, John
 

Robert1968

SMF Supporter
Joined
Mar 2, 2015
Messages
3,410
Points
113
First Name
Robert
Thanks for the positive feedback guys
I'm hoping to get all internals finished today but I have to take the dear wife to hospital today as she has to have an MRI on her back.
So once all that done hopefully get back to the bench to get some more done.

Regards

Robert
 

Robert1968

SMF Supporter
Joined
Mar 2, 2015
Messages
3,410
Points
113
First Name
Robert
Once the fuselage is sealed up I'll be looking at dressing the Pegasus up a bit more and cowling support. I foind a few good ref pics on new which I'll try and replicate. Thanks Ian for the Paynes grey idea as this would/ could replicate good dirt and grime ( not that the RN didn't take care of their A/C but I'm sure waiting on deck there would be lots of soot and oil spray around.
image.jpeg image.jpeg image.jpeg
 
Top