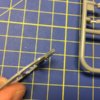
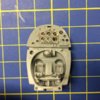
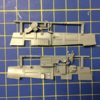
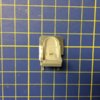
I did not intend to do another build thread for this one but once I started cutting plastic I just had to share what a great kit this is.
First, about this build - it is going to be a very basic one, it will be all 'buttoned up' to show off the great clean lines of the aircraft. While the engine panels are potentially removable, being held in place with small magnets, I will just be building the Merlin to see how it goes together without painting and will be gluing the panels into place. I have three of these Tammy Spits to build and I will be building one of them with the engine panels removable and with a fully painted and detailed Merlin. So you can regard this build as a bit of a reccy ahead of the more detailed build. It will also be out of the box except for an aftermarket set of seat harnesses. The kit offers interchangeable u/c legs attached with screws and a stand so you can swap it from being on the ground to in the air. I prefer to build without a pilot to display the interior detail to more effect so my build will be parked up on the ground, I will not be bothering with the 'wheels up' attachments. The actual aircraft I am depicting is below:

About the aircraft. We all know the Spitfire of course, probably the most beautiful, graceful (and yet of its time deadly) flying machine ever built. To my mind the Spitfire lost some of that beauty when they built it with Griffon engines, with those exhaust lumps and over extended nose. The classic Spit has 'that' distinct canopy but in the Mk XVI, the last of the Merlin Spits, they cut down the rear and installed a bubble canopy as pictured to improve all around visibility it also had the clipped wings to improve low level speed and roll performance. It was actually a development of the Mk IX with a Packard Merlin built to metric measurments. To me this MkXVI is the ultimate in Spitfire beauty and that is why I want to build it to show off those lines. I will be doing a light weathering as this aircraft is depicted in the summer of 1945, post-war, so it would not have suffered the high level of wartime operational tempo and the ground crew would have had more time to give it some t.l.c.
A word about the Tamiya 1/32 WW2 'uberkits'...I have seen on FB and on some forums a lot of critisism of the cost of the kits. £100 or so is a lot of money and I can appreciate that and, of course, you could build 5 Revell 1/32s and two or three Hasegawa 1/32s for the same cost as a single Tammiya 1/32. But for me the fun is in the build experience and I really believe that quality wins over quantity. I would rather build a single Tamiya 1/32 beauty than 5 Revells. What I find absurd is how some people will think nothing of spending £40 to £50 on a Hasegawa kit and a further £50 or more on aftermarket resin and p.e. to detail it up but will not spend £100 on a Tamiya kit. The point is that the Tamiya 1/32 WW2 aircraft range give you a superbly detailed and acccurate model right out of the box that fits together perfectly. Yes, there is still some (limited..) room for improvement if you want to spend the money and, indeed with the Tamiya builds I have in my stash, I will be using some aftermarket products, decals (the Tamiya ones are terrible), masks and seat belts in most cases but with my MkVIII Spit I will be using a lot of aftermarket including a resin seat, metal gun barrels, resin wheels and so on. But you dont have to spend that money to get a great result, you can do that with only what's in the box, it is all there including canopy paint masks. So far the Tamiya 1/32 warbird range includes the following kits, listed in the order they were released, every one a masterpiece of model engineering, accuracy and fit. All, except the first Zero that I have already built, are in my stash.
Mitsubishi Zero A6M5 (I have previously built this one and the result is posted on SMF)
Mitsubishi Zero A6M2
Spitfire IXc
Spitfire VIIIc
Spitfire XVIe (on the bench)
Mustang P51D
Mustang P51D/K
Corsair F4U-1 (birdcage)
Corsair F4U-1A
Mosquito FB.IV
I expect them to bring out another Mossie soon and who knows what they will come out with after that.
So if you have looked at these and hesitated to get one because of the cost, just go for it... You will not regret it.
Now for the build in hand....
I have just made a small start on the cockpit area incliding the p.e. compass which has a decal to position on the face once it is painted. More pics as I progress....


First, about this build - it is going to be a very basic one, it will be all 'buttoned up' to show off the great clean lines of the aircraft. While the engine panels are potentially removable, being held in place with small magnets, I will just be building the Merlin to see how it goes together without painting and will be gluing the panels into place. I have three of these Tammy Spits to build and I will be building one of them with the engine panels removable and with a fully painted and detailed Merlin. So you can regard this build as a bit of a reccy ahead of the more detailed build. It will also be out of the box except for an aftermarket set of seat harnesses. The kit offers interchangeable u/c legs attached with screws and a stand so you can swap it from being on the ground to in the air. I prefer to build without a pilot to display the interior detail to more effect so my build will be parked up on the ground, I will not be bothering with the 'wheels up' attachments. The actual aircraft I am depicting is below:

About the aircraft. We all know the Spitfire of course, probably the most beautiful, graceful (and yet of its time deadly) flying machine ever built. To my mind the Spitfire lost some of that beauty when they built it with Griffon engines, with those exhaust lumps and over extended nose. The classic Spit has 'that' distinct canopy but in the Mk XVI, the last of the Merlin Spits, they cut down the rear and installed a bubble canopy as pictured to improve all around visibility it also had the clipped wings to improve low level speed and roll performance. It was actually a development of the Mk IX with a Packard Merlin built to metric measurments. To me this MkXVI is the ultimate in Spitfire beauty and that is why I want to build it to show off those lines. I will be doing a light weathering as this aircraft is depicted in the summer of 1945, post-war, so it would not have suffered the high level of wartime operational tempo and the ground crew would have had more time to give it some t.l.c.
A word about the Tamiya 1/32 WW2 'uberkits'...I have seen on FB and on some forums a lot of critisism of the cost of the kits. £100 or so is a lot of money and I can appreciate that and, of course, you could build 5 Revell 1/32s and two or three Hasegawa 1/32s for the same cost as a single Tammiya 1/32. But for me the fun is in the build experience and I really believe that quality wins over quantity. I would rather build a single Tamiya 1/32 beauty than 5 Revells. What I find absurd is how some people will think nothing of spending £40 to £50 on a Hasegawa kit and a further £50 or more on aftermarket resin and p.e. to detail it up but will not spend £100 on a Tamiya kit. The point is that the Tamiya 1/32 WW2 aircraft range give you a superbly detailed and acccurate model right out of the box that fits together perfectly. Yes, there is still some (limited..) room for improvement if you want to spend the money and, indeed with the Tamiya builds I have in my stash, I will be using some aftermarket products, decals (the Tamiya ones are terrible), masks and seat belts in most cases but with my MkVIII Spit I will be using a lot of aftermarket including a resin seat, metal gun barrels, resin wheels and so on. But you dont have to spend that money to get a great result, you can do that with only what's in the box, it is all there including canopy paint masks. So far the Tamiya 1/32 warbird range includes the following kits, listed in the order they were released, every one a masterpiece of model engineering, accuracy and fit. All, except the first Zero that I have already built, are in my stash.
Mitsubishi Zero A6M5 (I have previously built this one and the result is posted on SMF)
Mitsubishi Zero A6M2
Spitfire IXc
Spitfire VIIIc
Spitfire XVIe (on the bench)
Mustang P51D
Mustang P51D/K
Corsair F4U-1 (birdcage)
Corsair F4U-1A
Mosquito FB.IV
I expect them to bring out another Mossie soon and who knows what they will come out with after that.
So if you have looked at these and hesitated to get one because of the cost, just go for it... You will not regret it.
Now for the build in hand....
I have just made a small start on the cockpit area incliding the p.e. compass which has a decal to position on the face once it is painted. More pics as I progress....


Last edited by a moderator:


