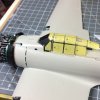
Tamiya A6M2bZero 1/32

J

John Rixon

Guest
That really does look a well engineered kit. Looking forward to seeing the finished item.
It is Alan, really well done. I just hope I can do it justice! I keep looking through Barry's build thread, which sets the bar rather high!
 

BarryW

SMF Supporter
Joined
Jul 23, 2011
Messages
5,028
Points
113
Location
Dover
First Name
Barry
John - the oleos were positioned compressed somewhat on the second build. It does improve the 'stance' of the model.

I did get a look John, a great bit of video, thank you.
 
J

John Rixon

Guest
Sorting out all the Aotake pieces before I ru out of the green I mixed for the job! There is, as ever, much debate over the actual colour - Nick Millman sent me some images of 3 extant samples, all from the era, and guess what, quite a difference in them all!! I am, however, happy that the colour I have is as good as I'll get without a time-machine, but I feel I want to weather the surface a bit, as it looks almost blingy!
IMG_5098.JPG
I've decided to have it all retractable for the build, as it will allow me to close the doors when I come to paint the wings, which will save me some troublesome masking!! Once all is painted, am hoping to glue the wheels down, just to be sure!
IMG_5104.JPG

IMG_5105.JPG

IMG_5107.JPG
So far, so good!
I'm loving this scale so much, although there are still some tiny parts, most of it suits my eyesight and sausage fingers to a tee. There is a lot of problem solving involved, mostly in the "what to paint before I glue it together" areas, but the kit is a real pleasure so far...
 

BarryW

SMF Supporter
Joined
Jul 23, 2011
Messages
5,028
Points
113
Location
Dover
First Name
Barry
Aotake is always a tricky one.

In the Vallejo sets they have two versions, one in the IJN set and one in the IJA set. Both being clear colours to be painted over a silver/aluminium metaliser. One being more of a green and the other more of a blue.

I used the one in the IJN set for my second Zero build. You can see the colour quite clearly in the shot below:
IMG_2322.JPG
It has of course been weathered but it is very close to what you have mixed.

Gunze have a very good metallic blue in their range which I used on my first Zero build. I dont have such a clear shot of that one but you can just make it out in the photo below on the undercarrage.
IMG00886-20121203-0636.jpg

I think that you have done a brilliant job with your mix, better than the Gunze colour. I think you can be very pleased with that result.

I will be interested to see how MRP address this tricky issue when they release their promised IJN/IJA colours in the near future.
 
J

John Rixon

Guest
Aotake is always a tricky one.

In the Vallejo sets they have two versions, one in the IJN set and one in the IJA set. Both being clear colours to be painted over a silver/aluminium metaliser. One being more of a green and the other more of a blue.

I used the one in the IJN set for my second Zero build. You can see the colour quite clearly in the shot below:
View attachment 291090
It has of course been weathered but it is very close to what you have mixed.

Gunze have a very good metallic blue in their range which I used on my first Zero build. I dont have such a clear shot of that one but you can just make it out in the photo below on the undercarrage.
View attachment 291091

I think that you have done a brilliant job with your mix, better than the Gunze colour. I think you can be very pleased with that result.

I will be interested to see how MRP address this tricky issue when they release their promised IJN/IJA colours in the near future.
Thanks Barry, I'd recently bought those Tamiya transparent colours, and have been playing around with them - they're not the easiest to get a grip on, as they are unusually viscous, but, for mixing, they behave like inks, so a green/blue mix was pretty straightforward. On reflection, when I do my next IJN 'plane, I may mix a gnat's knacker of dark grey to my silver, simply to tone down the overall finish. Did you weather your Aotake surfaces? This would kill them off a little bit!
 
J

John Rixon

Guest
Thanks Barry, I'd recently bought those Tamiya transparent colours, and have been playing around with them - they're not the easiest to get a grip on, as they are unusually viscous, but, for mixing, they behave like inks, so a green/blue mix was pretty straightforward. On reflection, when I do my next IJN 'plane, I may mix a gnat's knacker of dark grey to my silver, simply to tone down the overall finish. Did you weather your Aotake surfaces? This would kill them off a little bit!
...as for the MRP paint, if their other metallics , especially that burnt iron are anything to go by, they should nail it, particularly as they are so thin.
 

BarryW

SMF Supporter
Joined
Jul 23, 2011
Messages
5,028
Points
113
Location
Dover
First Name
Barry
...as for the MRP paint, if their other metallics , especially that burnt iron are anything to go by, they should nail it, particularly as they are so thin.
I did indeed do a wash (brown) which knocked back the colour a little and also some metallic dry brushing to show some wear through the paint.
 

PhilJ

SMF Supporter
Joined
May 14, 2015
Messages
1,114
Points
113
Location
Beltinge
First Name
Phil
Looks good so far John, love those retractable doors. Looking forward to seeing some more.
 
J

John Rixon

Guest
Right! Had the (clearly common) wing fairing issues - hacking away at styrene that Tamiya clearly thought was in the right place, to get a flush joint.
IMG_5111.JPG

Its not much, but enough to create a clear shadow, so It has to go!
IMG_5113.JPG
That's better!
Now, the bit I've been looking forward to, even if only the front is going to be visible...
IMG_5114.jpg

The engine is beautifully detailed, and is a project in it's own right.
IMG_5117.JPG
I'll be using my newly acquired Uschi metal powders and a bit of AK interactive's engine wash to finish it off, and will try to photograph the finished article properly before hiding it away under the cowling!
So far, this has been a real pleasure to work on, enough of a challenge to keep me honest, but so well made as to not niggle me;)
 

BarryW

SMF Supporter
Joined
Jul 23, 2011
Messages
5,028
Points
113
Location
Dover
First Name
Barry
That is indeed a problem John. Its not often you get a fit issue like that with Tammy but I had exactly the same on both my Zero builds. Lots of hacking away at plastic involved there.

I have a similar problem with my third Tammy Spitty, but this time it was my fault as the previous two did not have this issue. I will be updating my thread soon.
 
J

John Rixon

Guest
That is indeed a problem John. Its not often you get a fit issue like that with Tammy but I had exactly the same on both my Zero builds. Lots of hacking away at plastic involved there.

I have a similar problem with my third Tammy Spitty, but this time it was my fault as the previous two did not have this issue. I will be updating my thread soon.
It's shocking really, how much it took to get a fit, but I'd watched Bobby Waldron's video, and he did helpfully point out that, as long as you kept it above the line, it was fine to chop! We live and learn, I'm sure I'm edgier about this kit as its my first one at this scale and price! Still can't decide between black basing and pre-shading....
 

BarryW

SMF Supporter
Joined
Jul 23, 2011
Messages
5,028
Points
113
Location
Dover
First Name
Barry
I think black basing works well with this scale and also with the lighter camo colours. I think it is easier as well.
 
J

John Rixon

Guest
Finished the engine - this was a lot of fun, but I am now convinced that, even using thin cement, some components need to have fixing points masked prior to painting.
image.jpeg
Those metallic green frames front and back, need to be accurately aligned, and attachment points are small, I didn't use my usual masking fluid, and regretted it! This is not such an issue with non-metallic paints, as they are easy to Scrape clean. But the Aotake finish uses Tamiya clear paints, which act like varnishes. All sorted now though.
image.jpeg

image.jpegimage.jpeg
The fit seems good, so have fixed it in place.
 

Attachments

  • image.jpeg
    image.jpeg
    113.9 KB · Views: 1
J

John Rixon

Guest
I think black basing works well with this scale and also with the lighter camo colours. I think it is easier as well.
Yep, I think I agreee, need to do a bit more research on this!
 
J

John Rixon

Guest
Properly fitted now, with cowl flaps open.
IMG_5135.JPGIMG_5136.JPG

Just started the canopy masking...
IMG_5137.jpg

I'm probably going to re-do this, although the Montex masks are excellent quality, and really well cut, they have a fatal flaw, in my opinion. Being vinyl, the adhesive parts company from the mask very easily, so, if you don't position it perfectly first time, you have a problem. When you peel it off and try to reposition it, you'll notice that it has left some of its adhesive on the canopy, meaning that when you re-position it, some of the mask has no adhesion! So I resorted to using the kit masks, which require cutting out. As you can see, there are a few errors, some of which I can fix with tamiya tape, but my gut feeling is telling me to buy the Eduard mask set, which isn't vinyl.
 
J

John Rixon

Guest
Thanks Joe, looking forward to getting some paint on it!
 
Top