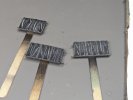
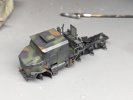
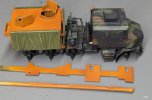
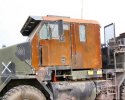
1/72 M1070 gun truck

Andy T

SMF Supporter
Joined
Apr 26, 2021
Messages
1,952
Points
113
Location
Sheffield
First Name
Andy
I know this is a soft skin at heart but with the added armour & armament I thought it would be best suited here. I hope that's okay.
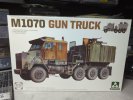
2024-03-1618.26.587674111114807440751.jpg

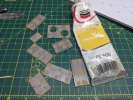
Construction so far was identical to the previous M1070 I built so I've skipped that, despite there being around 80 tiny parts just for the chassis!

Interior just had a basic paint job as it's pretty invisible once closed up:
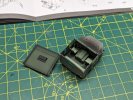
1000007021.jpg

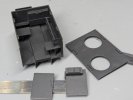
The chassis, cab & winch rack had a coat of primer (scraped away from contact areas) so I'm now ready to build the armoured gun pit on the back:
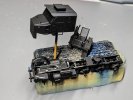
1000007026.jpg

I did have one issue for the first time ever - water in my air line! It certainly makes spraying a bit sporty when you have to react fast to a blob of water coming out of the airbrush :tears-of-joy:

Definitely something to fix before the next session.
 

Andy T

SMF Supporter
Joined
Apr 26, 2021
Messages
1,952
Points
113
Location
Sheffield
First Name
Andy
Good to have you aboard Paul. It's another of mine where it'll be more about the paint than the build but I guess I need to play to my strengths :smiling3:

Cheers Dave. I'm running through the system now. I never had a water problem in the shed but then I put much more thought into the plumbing. I just threw this into the new room quickly and it's bitten me on the behind!

--------------

The gun pit has started out as an exercise in filling. I doubt many (if any) of these ejector marks will be visible once it's built but better safe than sorry. Murphys law means the one I leave will be the one that's seen!

1000007029.jpg
 

Jim R

SMF Supporter
Joined
Apr 27, 2018
Messages
13,724
Points
113
Location
Shropshire
First Name
Jim
Watching with interest Andy. Certainly a lot of pin marks to fill. Hope you get the moisture issue sorted.
 

Andy T

SMF Supporter
Joined
Apr 26, 2021
Messages
1,952
Points
113
Location
Sheffield
First Name
Andy
Welcome Jim. Yes, plenty of filler practice on this one.

--------------
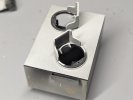
The inside is surprisingly detailed so I'm guessing they expect you to leave the roof removable, as you can see bugger all once it is fitted:

1000007037.jpg

1000007038.jpg

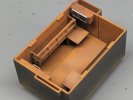
I debated the colour for a while. The outside was just left as bare steel, which rusted, so I figured they wouldn't have bothered painting the interior either:

1000007051.jpg

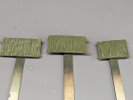
There are fabric panels hanging on 3 sides to possibly hide the bright rusty colour somewhat. These were primed black, dry brushed in white, then had a very light coat of green (actually 4b0 :tears-of-joy: )

1000007046.jpg

1000007050.jpg

I'm just getting the base colours down on everything for now, there'll be more work to follow.
 

grumpa

SMF Supporter
Joined
Jan 14, 2015
Messages
4,690
Points
113
First Name
Jim
OOH, I like that! though 1/72 is a bit fiddly for these old eyes and arthritic fingers.
I have an ARVclub M35A1Quad .50 Gun Truck in 1/35 an awesome model!
Almost afraid to start it, as it is a very intricate and highly detailed kit, plus
I do have other things in progress, but I'll move it up the list a bit.
I'll be checking in on this one though.
Jim.
 

Andy T

SMF Supporter
Joined
Apr 26, 2021
Messages
1,952
Points
113
Location
Sheffield
First Name
Andy
Thanks Jim & Mick. One good thing about the scale is not too much fiddly detail and a good excuse not to scratch too many extras :tears-of-joy:

--------

Main colours are on. I haven't bothered too much with the sides since they'll be covered in the armoured panels:

1000007052.jpg

Talking of armoured panels - the kit supplies them as PE but doesn't actually include all the ones shown in the box art. I'm hoping to make them from the remainder of the fret.
 

The Smythe Meister

Born to be WILD....... until about 9pm
SMF Supporter
Joined
Jan 30, 2019
Messages
5,719
Points
113
Location
Devon
First Name
Andy
Just caught this one, looking great in that basic camo coat :hugging-face: , loving that shading on the green internal panels too. :thumb2:
Good stuff mate!!
 

Andy T

SMF Supporter
Joined
Apr 26, 2021
Messages
1,952
Points
113
Location
Sheffield
First Name
Andy
Thank you both.

I'm starting to feel like I'm in a bit of a rut with my model making. Maybe it's time to try a different approach for a bit to shake things up :smiling3:
 
  • Like
Reactions: JR

Jim R

SMF Supporter
Joined
Apr 27, 2018
Messages
13,724
Points
113
Location
Shropshire
First Name
Jim
Progressing nicely Andy. Those fabric panels have come out well. The whole paint job is excellent.
 

Andy T

SMF Supporter
Joined
Apr 26, 2021
Messages
1,952
Points
113
Location
Sheffield
First Name
Andy
All of the basic painting is done now. The rusty metal is quite light coloured on the real thing but it still needs a fair bit of work to tone down the orange look of the lifecolor rust set. The foundations are down though and there's actually a lot more variation than this picture shows:

1000007063.jpg
 

adt70hk

I know its a bit sad but I like quickbuild kits!!!
SMF Supporter
Joined
Sep 4, 2019
Messages
9,492
Points
113
First Name
Andrew
Andy

I acquired one of these last year. Good to see that you're having fun with yours.

ATB.

Andrew
 

Andy T

SMF Supporter
Joined
Apr 26, 2021
Messages
1,952
Points
113
Location
Sheffield
First Name
Andy
Yes, definitely some way to go to match the real thing Jakko, but as I'm sure you know, easier to start light and weather darker than the other way around :thumb2:

1000007068.jpg

Thanks Andrew. It's a cracking little kit, I'm sure you'll enjoy it.
 

Tim Marlow

Little blokes aficionado
SMF Supporter
Joined
Apr 27, 2018
Messages
16,777
Points
113
Location
Somerset
First Name
Tim
Looking good Andy. I’ve used the lifecolor set a lot over the years and have found it very effective. The lightest colour is great when overdiluted and spotted onto a wet surface. It creates those puddle splash and streak modulation effects really effectively. A very dilute filter of Prussian blue can also recreate the effects seen to the right below the side window. I’m sure you’ll find what works for you, but thought you might be interested.
 

Andy T

SMF Supporter
Joined
Apr 26, 2021
Messages
1,952
Points
113
Location
Sheffield
First Name
Andy
Thanks Tim. I'll be having a play around on the mostly hidden areas first but will bear the filter in mind.

I've been trying all morning to get a more realistic picture as to the naked eye it's actually quite close to the real thing, but no matter what background or lighting I try my phone makes it look like it's been Tangoed! :tears-of-joy:
 

Tim Marlow

Little blokes aficionado
SMF Supporter
Joined
Apr 27, 2018
Messages
16,777
Points
113
Location
Somerset
First Name
Tim
Might sound weird Andy, but try photographing it against a light blue background, it should help with the colour balance. Also, if you are using a phone or IPad get the picture up on the screen, then tap the part you are most interested in before taking the picture. This is supposed to set the exposure and focus for the tapped area so should give you a better image. Don’t hold your breath though, reds and oranges seem to “blow” the sensors on devices, destroying the highs and lows on the image. I think it’s because they are designed to make faces look good so warm them up (enhancing hot colours). It’s common for the JPEG picture format to do this and is part of the reason SLR cameras enable you to shoot in a RAW (unprocessed) format.
 
Top