A Phantom for Halloween

Geoffers

SMF Supporter
Joined
Jan 26, 2017
Messages
1,016
Points
113
Location
Shropshire
First Name
Geoff
Hello Chaps,

Well I’ve finished one GB and am about to wrap up my Mossie build so time for something new.

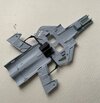
What better for Halloween than a Phantom, in this case an Airfix 1/72 Phantom FG.1

I’ve had this in the stash since last Christmas, it was a gift from my youngest son so thought it about time I built it.

Pictures:

3616DE0A-A2C6-407B-9638-7213A96C4B9A.jpeg

9BCDE574-E747-401F-8D67-8599D9B768DF.jpeg
The usual single bagful of sprues.
28419587-3383-4045-A146-88E6073C258E.jpeg

317ED6DB-570C-4BAD-A77C-1E6BE4AC56A9.jpeg
Two nice schemes to choose from “Black Mike” of 111 squadron or a classic scheme from 43 squadron.

4D514F7C-BB80-4BA4-9FF6-C66B6E2BFFBA.jpeg
And a few stencils to look forward to :astonished:

I’m starting tonight once the trick or treaters have finished knocking the door so an update soon.

Thanks for looking :thumb2:

Geoff.
 

Allen Dewire

Proud Rabble Member
SMF Supporter
Joined
Apr 27, 2018
Messages
4,105
Points
113
Location
Bamberg
First Name
Allen
Looks a nice kit Geoff!!! As a kid, F-4's used to fly over my house, and I loved them too. Now a bit advice if I may...If the stencils start driving you bonkers, wrap the kit carefully and send it to Tony (yakface). He loves to stick 'em on and the more there are, the happier he is!!!...

Prost
Allen
 

Ian M

Administrator
Staff member
Administrator
Moderator
SMF Supporter
Joined
Dec 14, 2008
Messages
19,732
Points
113
Location
Falster, Denmark
First Name
Ian
The are only about 300 stencil posts on a spook and weapons load out. Lol.
 

Geoffers

SMF Supporter
Joined
Jan 26, 2017
Messages
1,016
Points
113
Location
Shropshire
First Name
Geoff
Oh a spook. Nice one.

Cheers Ian :thumb2:

Those stencils will drive you myopic at 1/72…….it will look great when finished though…..

Fingers crossed Tim :smiling3:

Looks a nice kit Geoff!!! As a kid, F-4's used to fly over my house, and I loved them too. Now a bit advice if I may...If the stencils start driving you bonkers, wrap the kit carefully and send it to Tony (yakface). He loves to stick 'em on and the more there are, the happier he is!!!...

Prost
Allen

I’ll bear it in mind Allen :tears-of-joy:


Hopefully Ian :smiling3:
A great choice and these 1/72 Airfix kits are usually very good. As for those stencils - you have to question the sanity of that many at this scale :rolling:

I’m sure I’ll be questioning my own sanity Jim when it comes to applying them :tears-of-joy:

The are only about 300 stencil posts on a spook and weapons load out. Lol.

Should keep me out of trouble for a while or drive me crazy :tongue-out3: Ian.

Geoff.
 
Last edited:

Geoffers

SMF Supporter
Joined
Jan 26, 2017
Messages
1,016
Points
113
Location
Shropshire
First Name
Geoff
Hello chaps,

Despite not posting any updates for a while I have been pottering away with the build.

Unsurprisingly the cockpit was first up which comes as a tub with various panels to be glued in, a few decals to pop into place before the seats are added.

So here is the cockpit all painted up using various Vallejo Model Air paints and a basic bit of weathering using Tamiya Panel line wash.

D72DEEDD-A057-4868-9D72-4FC679A105C0.jpeg
9B8275D6-4D54-43E0-95B1-6BF758608DFF.jpeg
75D1B818-C351-4BE0-820E-A0460F3FB6B5.jpeg

I’ve painted all the other internal bits and bobs such as intakes and engine parts so the next stage is to add the cockpit and join the fuselage together.

Hopefully another update soon, thanks for looking :thumb2:

Geoff.
 

Geoffers

SMF Supporter
Joined
Jan 26, 2017
Messages
1,016
Points
113
Location
Shropshire
First Name
Geoff
Hello chaps,

Slow progress so far due to limited bench time but I’ve managed to get a bit more done.

With the cockpit finished it was time to bring the two fuselage halves together.
8637BDA7-FBB6-4F50-A2CF-292B393AFEF8.jpeg
The spine comes as a separate piece which helps eliminate any nasty seam line down the centre.
The fit was generally good but I made sure I took time to glue it down a bit at a time.

The underside once gluing finished.1C34052B-29D6-4F35-9FD7-DAE9C0C6BEC6.jpeg
The jet exhausts haven’t been fixed in place at this stage. The actual placement is a bit vague so I’m leaving them loose until the fuselage underside is fitted.

The aforementioned underside ready to be cemented into place.
9E99366A-F089-46AC-819D-28C2FB43CC05.jpeg

9DEA5F80-6BB6-45D8-9E80-554A000F2090.jpeg
A lot of the ancillary parts have been primed.

A bit more work to go but I’m really enjoying the build so far.

Hopefully another update soon, thanks for looking :thumb2:

Geoff.
 

Attachments

  • 262A6E62-0B17-4913-9764-2A25517AFCBB.jpeg
    262A6E62-0B17-4913-9764-2A25517AFCBB.jpeg
    102.9 KB · Views: 2
  • 46EC3D20-ADE6-4C20-8987-9B138D74B7EB.jpeg
    46EC3D20-ADE6-4C20-8987-9B138D74B7EB.jpeg
    102.9 KB · Views: 0

Geoffers

SMF Supporter
Joined
Jan 26, 2017
Messages
1,016
Points
113
Location
Shropshire
First Name
Geoff
Hello chaps,

Seems like Halloween was a good time to start this build as so far it’s been a bit of a devil :confused:

9E0C2100-9BC1-456A-8975-C6552A1D3AF9.jpeg
The underside plate has been added but I really struggled to get it all to fit in place properly. I think it may have been slightly warped which meant lots of clamping to get it anything near a reasonable fit.

83D0A3C1-328B-44D8-BE48-6716F81053C5.jpeg

Unfortunately it seems that this has made the air intake covers trickery to fit. Some filler will be required despite some fettling.

E9C80ED2-D6D8-4BC7-80AA-5B4BF19E73A0.jpeg

I’ve also added the wing tip’s which come as separate parts. There is a bit of a step where it joins but I’m not sure if this is correct. I’ve looked at a few reference photos and checked out a couple of builds on YouTube but can’t find any reference to it :confused:

BF6095A4-840C-4440-BFB0-CA1C0741B166.jpeg

I’m putting this build on the back burner for a short time now while I start my Emergency Services Group Build entry.

Thanks for looking

Geoff.
 

Attachments

  • AFD4575F-5413-4A40-9EAB-1C2CD087CFCD.jpeg
    AFD4575F-5413-4A40-9EAB-1C2CD087CFCD.jpeg
    64.8 KB · Views: 0

Jim R

SMF Supporter
Joined
Apr 27, 2018
Messages
13,743
Points
113
Location
Shropshire
First Name
Jim
Looking good Geoff. Having the separate fin along the spine is good. That large, flat underside is probably prone to a slight twist but you seem to have it nicely in place. Intake covers fit issue looks straightforward to fix.
 

Geoffers

SMF Supporter
Joined
Jan 26, 2017
Messages
1,016
Points
113
Location
Shropshire
First Name
Geoff
Looking good Geoff. Having the separate fin along the spine is good. That large, flat underside is probably prone to a slight twist but you seem to have it nicely in place. Intake covers fit issue looks straightforward to fix.

Cheers Jim, yes all fixable thankfully.

I wasn’t expecting any issues with it though as the few builds I’ve watched/read made no mention of any problems :thinking:

Geoff.
 
Last edited:
Top