Airborne's 1/35 Takom Bergepanzer 2A2

Airborne01

SMF Supporter
Joined
Mar 30, 2021
Messages
3,233
Points
113
Location
Essex
First Name
Steve
Well, I can finally post the sprue shots of this, my next project. I have my in-laws living with me until their house purchase is complete - he has Alzheimer's and li is difficult at times to say the least. Two months down and one to go!

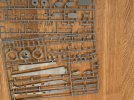
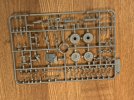
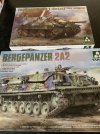
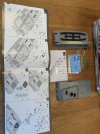
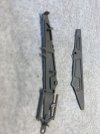
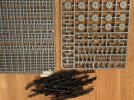
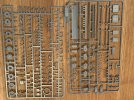
Anyway on with the motley! The stout box contains ten well-populated grey plastic sprues, one clear plastic sprue, hull upper and lower, a small PE fret, decals (when did they stop being called 'transfers' I wonder?),nylon cord and a copper cable; I forgot to mention the six sprues of black poly track connectors (some 300 in all). One of the surprising omissions in the otherwise well-laid out instruction is reference to the number of track links,I counted those on the outline drawing on the front cover of the instructions and made it some 84 per side so there are spares if the Carpet Monster strikes! Takom moulding stubs seem to have been reduced in size somewhat but caution in cutting is still the watchword of the day.

Detail is fine with some beautiful details and a clean, crisply engraved engine deck; there is no interior detail but I wonder how long that will take to appear. There are eight marking schemes including winter cam, and a desert scheme from Kuwait in 2011. I'm going for the German three-colour scheme; thanks to Jakko for pointing out the colours differ between NATO nations and directing me to the appropriate Revell enamels (ordered from John immediately!) So, here are IMG_0443.JPGIMG_0444.JPGIMG_0445.JPGIMG_0446.JPGIMG_0426.JPGthe photos:
IMG_0442.JPG
 

Jakko

Way past the mad part
SMF Supporter
Joined
Apr 28, 2018
Messages
10,971
Points
113
First Name
Jakko
decals (when did they stop being called 'transfers' I wonder?)
When American terminology took over. “Decal” comes from French décalcomanie, which derives from décalquer, “to trace, transfer”. British English seems to have cut out the middle man and clipped “transferrable design” to “transfer” instead of loaning the French term for the exact same concept.

FWIW, much the same has happened in Dutch: these kinds of water-slide markings used to be called transfers (accent on FERS when pronounced in an educated way, as in French but unlike the English word; uneducated pronunciation is much like in English but with the <a> as that letter is supposed to sound like ;) ) but nowadays, everybody calls them decals (either with English pronunciation, or more usually, as approximately “DECK-uls”, which always makes me cringe, though I guess they could claim Canadian pronunciation :smiling3: ).
 

Airborne01

SMF Supporter
Joined
Mar 30, 2021
Messages
3,233
Points
113
Location
Essex
First Name
Steve
HOORAH! paint from John has just arrived - no slight on John as his dispatch was notified several days past - our wonderful postal system sent it to Wales first, then to Liverpool! Only the GPO... ! Now I can crack on with the beastie! Stand by, stand by (maybe ;) )!
Steve
 
Last edited:

stillp

SMF Supporter
Joined
Nov 17, 2016
Messages
7,240
Points
113
Location
Rugby
First Name
Pete
HOORAH! paint from John has just arrived - no slight on John as his dispatch was notified several days past - our wonderful postal system sent it to Wales first, then to Liverpool! Only the GPO... !
GPO? Has it been in transit since 1969 then? :tongue-out:
Pete
 

Waspie

SMF Supporter
Joined
Mar 13, 2023
Messages
2,713
Points
113
Location
Portland - Dorset
First Name
Doug
HOORAH! paint from John has just arrived - no slight on John as his dispatch was notified several days past - our wonderful postal system sent it to Wales first, then to Liverpool! Only the GPO... ! Now I can crack on with the beastie! Stand by, stand by (maybe ;) )!
Steve
Have the same problem. My purchase from John has arrived - RM even tried to deliver it today but even after requesting 'formally' that they leave in my 'safe place'. They tell me they attempted to deliver but then took it back to the local depot!!! I despair!!
 

Airborne01

SMF Supporter
Joined
Mar 30, 2021
Messages
3,233
Points
113
Location
Essex
First Name
Steve
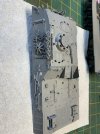
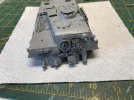
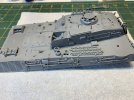
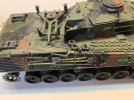
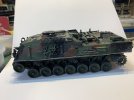
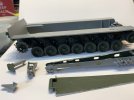
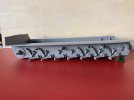
Circumstances are constrained as the in-laws are still living here due to delays down the house purchase chain :sad-face: , however I have managed a little progress. Running gear and suspension assembled; points to note for anybody who is tempted by this - the instructions would have you attach the suspension dampers prior to attaching the swinging arms - I found it better to assemble each unit separately as this allows the locating pins of the dampers to properly locate in the mountings without the risk of misplacement! There are some awkward moulding stubs to be cleaned up (photo 2 I hope!) but otherwise the fit is good - I deepened most of the locating dimples on the upper hull and there are quite a few holes to be drilled - there are also some mould seams to be cleaned up (some in awkward spaces) and a handful of ridiculously small rivet heads for the glacis plate - why they thought that was a good idea is beyond me - they could easily have moulded them in-situ! Here's progress so far - no comparisons with a certain current Buffel build please ;)
Steve
IMG_0451.JPGIMG_0455.JPGIMG_0457.JPGIMG_0458.JPGIMG_0459.JPG
 

Jakko

Way past the mad part
SMF Supporter
Joined
Apr 28, 2018
Messages
10,971
Points
113
First Name
Jakko
the instructions would have you attach the suspension dampers prior to attaching the swinging arms - I found it better to assemble each unit separately as this allows the locating pins of the dampers to properly locate in the mountings without the risk of misplacement!
That sounds like Takom, alright :smiling3: I strongly suspect nobody builds their kits during the design process, except on a computer where you always have perfect parts alignment. Their instructions often want you to build things that in the real world will be very tricky to align with things they have you add them to later on, for example.
 

Airborne01

SMF Supporter
Joined
Mar 30, 2021
Messages
3,233
Points
113
Location
Essex
First Name
Steve
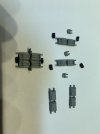
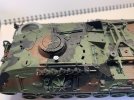
Dipping in and out as Outlaws were here until Wednesday last; cleaned all the track components (200 links with four mould scars, 200 guide horns with two scars each and 400 end caps :face-with-thermometer:) and made progress on the jib, initial paint job on the superstructure which will be worked on later. No optics emplaced yet as upper works need matt varnish, Nice model to build, no major hiccups, but needs careful scrutiny of the instructions as you go.
Steve
IMG_0476.JPGIMG_0483.JPGIMG_0484.JPGIMG_0482.JPGIMG_0481.JPG
 

Scratchbuilder

SMF Supporter
Joined
Jul 2, 2022
Messages
2,055
Points
113
Location
Luton
First Name
Mike
Great build due to your circumstances.
I hope you have not cut all of the end connectors from the sprues.... These are set like this so that you just push them onto the track pins, aka, you clip the track pads into the guide horns and then push on the end connectors...
 

Airborne01

SMF Supporter
Joined
Mar 30, 2021
Messages
3,233
Points
113
Location
Essex
First Name
Steve
Great build due to your circumstances.
I hope you have not cut all of the end connectors from the sprues.... These are set like this so that you just push them onto the track pins, aka, you clip the track pads into the guide horns and then push on the end connectors...
Mea Culpa - my life has taken a distinct downturn as a result of your revelation Mike (I was going to say 'I knew that but I wanted a challenge ...' -but I would be lying!) :anguished: I am now considering it as an exercise in manual and visual dexterity!
Steve
 

Scratchbuilder

SMF Supporter
Joined
Jul 2, 2022
Messages
2,055
Points
113
Location
Luton
First Name
Mike
Mea Culpa - my life has taken a distinct downturn as a result of your revelation Mike (I was going to say 'I knew that but I wanted a challenge ...' -but I would be lying!) :anguished: I am now considering it as an exercise in manual and visual dexterity!
Steve
:tears-of-joy: it will be 'an exercise in manual and visual dexterity' when you are crawling all over the floor looking for them...
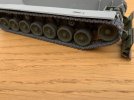
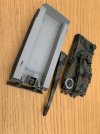
Run out a length of masking tape and fold it into a flat tube, you can then stick the end connectors to the tape, holes up, and then push the track onto them - guess how I found that idea.....
Mike with the red knees.....
 

Airborne01

SMF Supporter
Joined
Mar 30, 2021
Messages
3,233
Points
113
Location
Essex
First Name
Steve
:tears-of-joy: it will be 'an exercise in manual and visual dexterity' when you are crawling all over the floor looking for them...
Run out a length of masking tape and fold it into a flat tube, you can then stick the end connectors to the tape, holes up, and then push the track onto them - guess how I found that idea.....
Mike with the red knees.....
Yeah! Came to the same conclusion once advised of my 'oversight'!
Steve
 

Airborne01

SMF Supporter
Joined
Mar 30, 2021
Messages
3,233
Points
113
Location
Essex
First Name
Steve
Tracks assembled (surprisingly easy and restful!), initial paint work complete and tracks fitted, spade assembled and fitted and jib assembled. The jib needs the physical dexterity of a three-armed brain surgeon but eventually concedes! The cable diagram is unclear and the end fixing is unidentified, similarly the position of part K27 is unclear and the mounting bracket K36 is not identified at all. The instructions persist in suggesting the mounting of tiny, fragile parts! (Attention Takom - use your noddle and think this through!). Basic three-colour cam going down nicely. No more for awhile as I'm working at school for a while.
Steve
IMG_0489.JPGIMG_0488.JPG
 

Scratchbuilder

SMF Supporter
Joined
Jul 2, 2022
Messages
2,055
Points
113
Location
Luton
First Name
Mike
That looks the business, how are the knees?
I have found that recently the kit instructions omit certain parts or even give you a part and then it is not on the sprue they say it is....
Just recently when building the Doher I was looking for a part - went through the sprues A - Z and it was only when I realised the there were three sprue B for example, one large sprue and then two smaller sprues which I thought were more sprues. It was only when I checked the sprue layout on the instructions that all became clear....
 

Jakko

Way past the mad part
SMF Supporter
Joined
Apr 28, 2018
Messages
10,971
Points
113
First Name
Jakko
The instructions persist in suggesting the mounting of tiny, fragile parts! (Attention Takom - use your noddle and think this through!).
I’ve said it before, but I’m convinced Takom’s instructions are drawn up by people who have never built a real kit in their lives, but have only done so on their computers. Where parts are never impossible to hold, always fit exactly as they should, don’t get in the way, and don’t break from handling. Luckily for me, I’ve not followed instructions from start to finish for probably 40 years, because when I did try to do that with Takom’s M29 Weasel, I found it to be just about impossible to build the model as you’re told to. By step 5 or 6, IIRC, I gave up and just built it my way instead.

The cable diagram is unclear
Looking at the instructions on Scalemates, I think the arrows point the wrong way :smiling3: I guess what they’re trying to tell you is to start at the end with the eye and then just wrap the cable around the pulleys and down the jib. I’d do it from the other side, I guess.

the position of part K27 is unclear
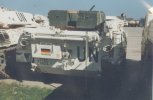
K27 is the thing that covers the support leg when it’s folded up, by the looks of it, but it’s very hard to really tell. Does this photo help?

520791AC-E3C4-4B38-B845-9DA3F487C0A3_1_105_c.jpeg
 
Last edited:
Top