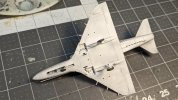
Airfix 1:72 A-4 Skyhawks Father/Son build

Ed Sunder

SMF Supporter
Joined
Nov 13, 2022
Messages
82
Points
53
Location
Flintstone, GA
First Name
Ed
Now that school is out for the Christmas holidays, my 15 year-old son and I are going to be building the 1:72 Airfix A-4 Skyhawk kits together. I happen to have 2 of them and he's interested in learning more about building models. So I figured this would be a good opportunity for us to build side by side. I did this with my (now 22 year old) twins several years ago with F-22's. It was quite fun and their models turned out well while they learned some good building skills.

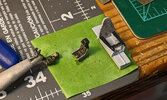
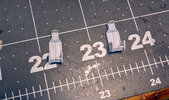
I'm going to build mine as an A-4P from Argentina, and he hasn't decided which A-4B he'll build, but I have a ton of decal options for him. We started with the cockpit, as per the instructions and particularly with the bang seats. The kit doesn't include the prominent ejection handle so I scavenged a couple from a Fujimi A-4J kit that I had used resin seats on and we each built the seats with the handles added and a bit of styrene on top. Mine is on the left and his is on the right, below:
PXL_20221216_005400292.jpg

Don't worry about the seams- they will be covered up.

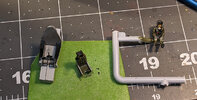
After airbrushing the main parts and then picking out details, we let the paint dry. Then we put a wash over everything to pull out details. I put an Argentine flag on my pilot's sleeve, though you can't see it from this angle and while I normally paint and scratchbuild details in the cockpit, since he wanted to use the decals, I'll be using the decals as well.
PXL_20221216_030329637.jpg

And here is his version:

PXL_20221216_030408955.jpg

I actually think his seat looks a bit better than mine.

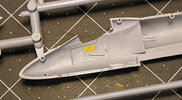
Tomorrow we'll add the control decals and dullcoat everything here. Also note that the large ejector pin marks in the cockpit will be completely covered by the seat so we didn't bother completely getting rid of them.

Anyway, these should be fun to work on over the next couple weeks and I hope he'll pick up some useful skills. Thanks for looking!
 

Jim R

SMF Supporter
Joined
Apr 27, 2018
Messages
13,758
Points
113
Location
Shropshire
First Name
Jim
How nice to see a youngster enjoying the hobby. Also great for father and son to share an interest together. Progress is looking great.
 

adt70hk

I know its a bit sad but I like quickbuild kits!!!
SMF Supporter
Joined
Sep 4, 2019
Messages
9,508
Points
113
First Name
Andrew
Cool Ed!

I got back into the hobby when my then 6 year old son decided he wanted a kit. Eight years later he still dabbles.... And it's taken over my life! :smiling5:

Search for 'junior' in thread titles for ones I have created.

Looking forward to these come together!

ATB.

Andrew
 

Tim Marlow

Little blokes aficionado
SMF Supporter
Joined
Apr 27, 2018
Messages
16,801
Points
113
Location
Somerset
First Name
Tim
Lovely idea. You are not building a kit you are both building memories…….
Pilots look good, as does the pit. Pass on my regards to your son (what is his name?). He’s doing well :thumb2:
 

Jakko

Way past the mad part
SMF Supporter
Joined
Apr 28, 2018
Messages
10,846
Points
113
First Name
Jakko
Always been one of my favourite planes, so this should be interesting to follow :smiling3:
 

Lee Drennen

Box Stock Builder with a Twist/ Rabble Member
SMF Supporter
Joined
Apr 29, 2018
Messages
5,695
Points
113
Location
Wortham Mo
First Name
Lee
Great way to stay connected to your son Happy Modeling together
 

Ed Sunder

SMF Supporter
Joined
Nov 13, 2022
Messages
82
Points
53
Location
Flintstone, GA
First Name
Ed
Thanks everyone for the encouragement. Nathan thinks it's cool that y'all are interested in what he's up to. :smiling3:

I got back into the hobby when my then 6 year old son decided he wanted a kit. Eight years later he still dabbles.... And it's taken over my life!

Similar story for me - I did models as a kid and about 10 years ago visited a local model show here in Chattanooga with my kids and got hooked. I joined the club and we even hosted IPMS Nationals in 2019. It certainly has taken over a lot of my life as well. Though it was all the work for Nationals that kind of got me away from building for a while. I'm really enjoying being back.
 

Ed Sunder

SMF Supporter
Joined
Nov 13, 2022
Messages
82
Points
53
Location
Flintstone, GA
First Name
Ed
Just a little bit of an update today. There's a pocket on the starboard bulkhead of the cockpit which is pretty noticeable. After I made one with tape, my son decided he wanted one too. Here's his pre-paint:
PXL_20221218_043918499.jpg

It's actually two pieces of tape - one on top of the other to create a 3D shape. After painting the cockpit a dark wash really makes it pop. Here's his on top and mine on the bottom (I also scribed some detail lines on the wall which I promise looks better in person):

PXL_20221218_044403171.jpg

In mine, I also placed a paper in the pocket. Once the cockpit center section is in, they both look really nice. Tomorrow we'll probably join the fuselage halves (we've already build the engine intake and exhaust (and painted them) that need to go in there.
 

Ed Sunder

SMF Supporter
Joined
Nov 13, 2022
Messages
82
Points
53
Location
Flintstone, GA
First Name
Ed
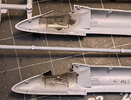
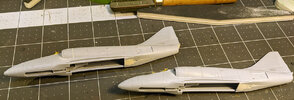
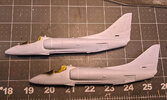
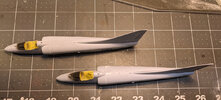
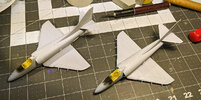
Over Christmas we were busier than I thought we'd be, but we're back on it with a quick update. We've glued the fuselage halves together. In doing so, we did things out of order, and so there wound up being a slight gap between the outer intakes and the body. I figured it would be a great time to introduce him to perfect plastic putty and filling in gaps. We used Tamiya putty on the bottom to fill in the gaps. The panel at the back of the wings is pretty concave and needs quite a bit of filler. We also painted the intakes along with the front and rear of the engine prior to assembly.

For all photos, mine is on top, his on the bottom.

PXL_20230110_034931508.jpg
PXL_20230110_033445206.jpg
PXL_20230110_033549264.jpg


After assembly we painted the instrument cowling so we'll be adding the windscreen soon. We'll also be masking off the interior of the intakes as well.
 

yak face

Wossupwidee?
Staff member
Moderator
SMF Supporter
Joined
Jun 13, 2009
Messages
12,416
Points
113
Location
sheffield
First Name
tony
Great progress ed , good to see nathan matching you step by step . Always loved the skyhawk , a straightforward , simple design that is just so effective and loved by pilots and ground crew alike. Cheers tony
 
Joined
Aug 25, 2014
Messages
748
Points
93
Location
Buckfastleigh
First Name
Dave
Looking good, got to love the skyhawk!.
My dad taught me how to build models in later years I learnt "modern" techniques and could pass knowledge back great memories.

Dave
 

Ed Sunder

SMF Supporter
Joined
Nov 13, 2022
Messages
82
Points
53
Location
Flintstone, GA
First Name
Ed
It's been a long time since we've worked on these, but we're back on it. Some of the steps have been skipped as we've been working.

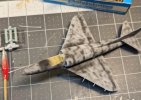
This is the preshading I did on my A-4:

PXL_20240104_220048258.jpg


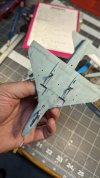
Here is the underside after initial bottom paint (with the blue of the Argentina A-4P):
PXL_20240104_220054911.jpg

And here is the bottom of Nathan's (his will be a Navy A-4B):
PXL_20240110_030850327.jpg

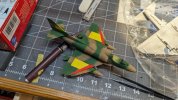
Initial camo paint for my Argentine A-4P along with the identification stripes:
PXL_20240110_030912840.jpg

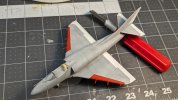
Nathan's so far (his refueling probe broke and he'll add it again later):
PXL_20240112_023300485.PORTRAIT.ORIGINAL.jpg

And his gear well detail:
PXL_20240112_023318991.PORTRAIT.ORIGINAL.jpg

So we're moving along again finally. Unfortunately, I realized too late that I forgot to add nose weight so we've both got tail sitters. We'll probably use small bases for our models and so we can pull the front wheel down onto the bases. Of course this teaches my son a lesson about model making: we all make mistakes. :smiling3:
 
Top