- Home
- Forums
- Group Builds
- The New Group Builds (2017 on)
- The User Created Group Builds
- 2023 Builds
- Pete's wheeled cargo movers GB. August - Dec. 2023
You are using an out of date browser. It may not display this or other websites correctly.
You should upgrade or use an alternative browser.
You should upgrade or use an alternative browser.
Andy T's 1/72 Takom M1070
- Thread starter Andy T
- Start date
Andy T
SMF Supporter
Thanks everyone.
I may get some primer on this before I start building the trailer. Maybe even get the interior painted & buttoned up.
Paint is a sore point. I wanted to try something different on this but I couldn't work out which colours I needed in S M S, and MRP would have meant ordering from a few different places due to the usual stock problems, so I'm sticking with the old reliable Mr Color as I bought their NATO colour set recently.
Still not sure I'm up to a 3 colour scheme in 1/72. I've seen the amazing Plasmo / David Damek do it with stencils but I'm far from his level! If the updates suddenly stop you'll know the answer

Andy T
SMF Supporter
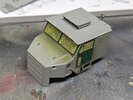
Interior painted and then buttoned up before I took a picture of it 
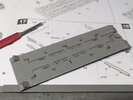
I've made a start on the trailer which seems to be an exercise in "let's see how high we can get the parts count" . I've added 32 parts to this deck (should have been 33 but lost one!) but I'm sure it could have been moulded in. Mostly tie downs and chocks I believe.
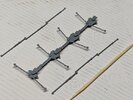
The underside is going to be similar. These parts are very fragile and I held my breath when snipping them from the sprue. Nicely detailed but will be almost completely hidden by the wheels so I'm not going to risk breakage by cleaning them up much
Talking of wheels they are probably on the agenda for tomorrow. All 40 of the little darlings!
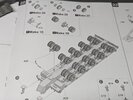


I've made a start on the trailer which seems to be an exercise in "let's see how high we can get the parts count" . I've added 32 parts to this deck (should have been 33 but lost one!) but I'm sure it could have been moulded in. Mostly tie downs and chocks I believe.

The underside is going to be similar. These parts are very fragile and I held my breath when snipping them from the sprue. Nicely detailed but will be almost completely hidden by the wheels so I'm not going to risk breakage by cleaning them up much

Talking of wheels they are probably on the agenda for tomorrow. All 40 of the little darlings!

Looking very nice.
Must confess I saw the 135 scale off this truck and trailer on offer for a great price but where to put it...
Must confess I saw the 135 scale off this truck and trailer on offer for a great price but where to put it...
Jim R
SMF Supporter
That is really stunning for a 1/72 model. Many manufacturers equate a high parts count with excellent detail. That isn't always true but here Takom seem to have pulled it off.
Andy T
SMF Supporter
Thanks, yes it's turning out to be a well designed and detailed kit.
I'll have to put some thought into painting all of those wheels and I can't imagine I'll get all 40 to touch the ground with so little weight, but I will find a solution.
I'll have to put some thought into painting all of those wheels and I can't imagine I'll get all 40 to touch the ground with so little weight, but I will find a solution.
Well at least you got separate tyres so painting them should be simple. Good luck with getting them level.
The more I look at this, the more tempted I am so it's a good job pennies are a little tight at the moment else I'd have another big box to add to my collection!
The more I look at this, the more tempted I am so it's a good job pennies are a little tight at the moment else I'd have another big box to add to my collection!
Andy T
SMF Supporter
For the price I'm more than happy Dave. The "value for money", as in modelling hours, is great when you think it's pretty much 3 detailed kits in the box.
I wanted to get the bed fixed to the spine this morning. We're off doing the rounds gardening for elderly relatives today so it'll have a good few hours to set up.
With multiple tabs to fit into tight slots it was a bit of a wrestle. Get some in and others pop out. I didn't want a bowed load surface though so persevered, and once all the tabs were in place the fit was as perfect as you could expect.
I clamped it up to make sure nothing moved and applied the slower TET everywhere.
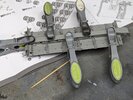
A couple more pieces to add when we return then it's on to the wheels. I reckon I'll spray them on the sprue first to make life much easier!
I wanted to get the bed fixed to the spine this morning. We're off doing the rounds gardening for elderly relatives today so it'll have a good few hours to set up.
With multiple tabs to fit into tight slots it was a bit of a wrestle. Get some in and others pop out. I didn't want a bowed load surface though so persevered, and once all the tabs were in place the fit was as perfect as you could expect.
I clamped it up to make sure nothing moved and applied the slower TET everywhere.

A couple more pieces to add when we return then it's on to the wheels. I reckon I'll spray them on the sprue first to make life much easier!
Andy T
SMF Supporter
So it turned out to be a big mistake spraying the wheels on the sprue, at least with the random can of black I used. The TET wouldn't eat through it like it does with my regular paints, which made gluing up the wheels & bogies a bit of a faff. They kept coming apart and I had to go back in with the cement several times.
With 10 pieces to each bogie (plus tyres) that was a lesson learnt. If I did it again I'd ignore the instructions and cement each bogie as an assembly, paint, then add the tyres later which is just about possible before fixing them to the trailer.
Anyway, job done and at least all the visible ones touch the ground, even though some are very slightly wonky.
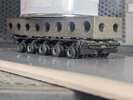
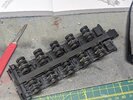
The front section of the trailer was next. Again well detailed.
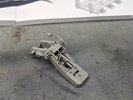
There was scope for a bit of adjustment when fitting this part so I lined everything up on my flat surface so that all of the tyres, towing pin and fifth wheel were aligned.
From the box it only allows the trailer to sit dead straight behind the tow vehicle, but snipping an extra pin off underneath would allow some angle for a better pose on a diorama or base
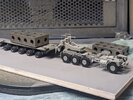
And that's the construction phase complete, apart from a few knocky off bits that I'll add after paint.
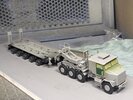
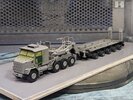
With 10 pieces to each bogie (plus tyres) that was a lesson learnt. If I did it again I'd ignore the instructions and cement each bogie as an assembly, paint, then add the tyres later which is just about possible before fixing them to the trailer.
Anyway, job done and at least all the visible ones touch the ground, even though some are very slightly wonky.


The front section of the trailer was next. Again well detailed.

There was scope for a bit of adjustment when fitting this part so I lined everything up on my flat surface so that all of the tyres, towing pin and fifth wheel were aligned.
From the box it only allows the trailer to sit dead straight behind the tow vehicle, but snipping an extra pin off underneath would allow some angle for a better pose on a diorama or base

And that's the construction phase complete, apart from a few knocky off bits that I'll add after paint.


Nice!
Keeping it dead straight may not be exciting, but it does reduce the footprint on your shelf - or whatever base you might use!
Keeping it dead straight may not be exciting, but it does reduce the footprint on your shelf - or whatever base you might use!
Very smart looking so far nice updates
Andy T
SMF Supporter
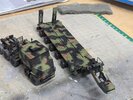
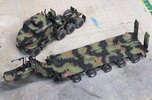
And painted lol
I used a green and brown from the Mr Color NATO set, did a bit of post shading with lightened variants, then tidied up the edges & overspray with S M S Camo black. Not the perfect hard edge of the real thing but I'm more than happy for a freehand job at this scale.
Decals & detail painting next, without knocking the rear mudflaps off completely as they are hanging on by a thread.
Then maybe some weathering, the bit I always fear.
I used a green and brown from the Mr Color NATO set, did a bit of post shading with lightened variants, then tidied up the edges & overspray with S M S Camo black. Not the perfect hard edge of the real thing but I'm more than happy for a freehand job at this scale.


Decals & detail painting next, without knocking the rear mudflaps off completely as they are hanging on by a thread.
Then maybe some weathering, the bit I always fear.
Jim R
SMF Supporter
That's come on a treat Andy. Getting that many wheels on and all touching the ground is an achievement in itself. I like the paint job. Looks pretty hard edged to me. I'd keep the weathering light - maybe just some dust and some streaking on the lower parts.
Just beautiful. Great modeling.
scottie3158
SMF Supporter
Andy,
That is a cracker mate you should be more than happy with that.
That is a cracker mate you should be more than happy with that.
Waspie
SMF Supporter
Very nice work.And painted lol
I used a green and brown from the Mr Color NATO set, did a bit of post shading with lightened variants, then tidied up the edges & overspray with S M S Camo black. Not the perfect hard edge of the real thing but I'm more than happy for a freehand job at this scale.
View attachment 490454
View attachment 490455
Decals & detail painting next, without knocking the rear mudflaps off completely as they are hanging on by a thread.
Then maybe some weathering, the bit I always fear.
TBH Andy, I like the soft edge, helps blending in of the camo.


