Andy T's Tamiya 1/48 Fairey Swordfish Mkll

Andy T

SMF Supporter
Joined
Apr 26, 2021
Messages
2,036
Points
113
Location
Sheffield
First Name
Andy
Thanks for having me in this Group Build. I've never built a biplane before so I've gone for what should hopefully be a fairly safe option. There's certainly plenty of video builds to look at if I get stuck somewhere, although they all seem to take a different approach so I might be better just trying to figure out my own way.
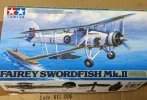
1000005740.jpg

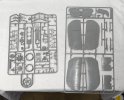
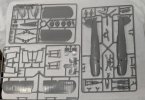
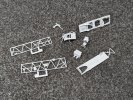
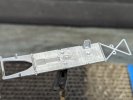
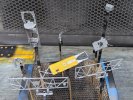
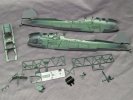
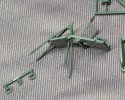
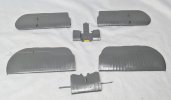
Sprue shots, including the additional PE set:
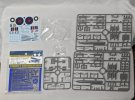
1000005952.jpg

1000005953.jpg

1000005954.jpg

I'm not 100% decided but I'll probably build this with the wings extended, include the crew, and paint it with the sky lower half.

We'll see how it goes with the finer rigging but I'll certainly make an attempt at it.
 

yak face

Wossupwidee?
Staff member
Moderator
SMF Supporter
Joined
Jun 13, 2009
Messages
12,426
Points
113
Location
sheffield
First Name
tony
Lovely jubbly andy. A great aircraft and by all accounts a superb kit , reasonably sized too . Cheers tony
 

Andy T

SMF Supporter
Joined
Apr 26, 2021
Messages
2,036
Points
113
Location
Sheffield
First Name
Andy
A rigging set in the kit! Good on you Tamiya!
It's actually an optional extra detail pack. I'm slightly worried that it says "for experts" on it :smiling5:

I had a good few hours on this today, starting with the cockpit as most aircraft builds do.

1000006025.jpg

I got the floor painted in silver, then masked it up and gave it all the parts a coat of primer then MRP interior green. I made the mask myself, first applying some tape lightly then rubbing a pencil over it to show up the detail (like the brass rubbing I did back in school). I then cut it out with a fresh blade and a leather punch.

1000006031.jpg

1000006032.jpg

1000006033.jpg

I've already had my first mishap. I dropped this assembly onto the floor and then stood on it, bending the delicate struts at all angles and breaking off the rudder pedals! I've bent it back into something like the correct shape but it'll need some fettling when I get around to assembly.

1000006034.jpg
 

adt70hk

I know its a bit sad but I like quickbuild kits!!!
SMF Supporter
Joined
Sep 4, 2019
Messages
9,523
Points
113
First Name
Andrew
That's a fast start Andy! Coming on nicely too!
 

Tim Marlow

Little blokes aficionado
SMF Supporter
Joined
Apr 27, 2018
Messages
16,839
Points
113
Location
Somerset
First Name
Tim
Looking good Andy. Pity about the accident, but that seems to happen with most builds I’ve found.
 

rtfoe

SMF Supporter
Joined
Apr 29, 2018
Messages
7,533
Points
113
Location
Malaysia
First Name
Richard
I've stepped on many fallen parts in my time Andy to develop this habit of freezing when I hear something drop, look around the floor before making my next step. Saved a lot of scratch builds that way. Also the searchlight method of placing the torch on the floor and turning it 360 degrees works for me.
Got one of these in the stash...it's so shake and bake that I'm scared to work on it. Maybe for relaxation one of these days I'll go for it. Meanwhile I'm going to torture myself with a Monogram kit.
Envy your speed...next time I chyme in wings would be fastened.

Cheers,
Wabble
 

Andy T

SMF Supporter
Joined
Apr 26, 2021
Messages
2,036
Points
113
Location
Sheffield
First Name
Andy
I was amazed at how well it survived to be honest. Two of the braces were bent double and I felt sure they would snap. I'm only guessing but maybe the freshly applied lacquer paint had softened the plastic a little, making it more malleable.

Envy your speed...next time I chyme in wings would be fastened.

Cheers,
Wabble
I often wish I was more considered in my approach, taking time to smell the roses as it were, but my whole working life has been centred around building, fixing, or painting things in the most efficient way possible. I still haven't ironed that out of my hobby time.
 

Andy T

SMF Supporter
Joined
Apr 26, 2021
Messages
2,036
Points
113
Location
Sheffield
First Name
Andy
I've had a change of plan. After taking a good look at the figures and their poses I've decided not to use them, so have ordered some belts and a cockpit detail set instead.

This is a step backwards in some places but better now than later, and I'm not happy with the paint on the inside of the fuselage anyway (where the fabric can be seen through the internal bracing), so it's a good excuse to strip it and start again.

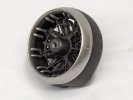
That meant moving on to something else so I've put the engine together and painted it and the exhaust ring. I've also primed the cowl and have dry fitted it together for now.

I've seen the exhaust ring in so many different colours that I figured anything would work so I've sprayed it in Mr super metallic iron 2, with super fine silver 2 for the narrow band where it meets the cowl.

By leaving it separate I can avoid putting any varnish on it further down the line, which might take away the realistic metallic sheen these paints have.

1000006042.jpg

I've also put the wings together. Lots of holes to drill out and several to open up for the bracing, which is carried out using a tool supplied with the PE kit.

1000006043.jpg
 

rtfoe

SMF Supporter
Joined
Apr 29, 2018
Messages
7,533
Points
113
Location
Malaysia
First Name
Richard
Never thought how broad the swordfish wings were which added the drag and lift it was known for. At its maximum speed you could overtake it with a Ferrari I believe.
good move on redoing the interior Andy.

Cheers,
Wabble
 

boatman

SMF Supporter
Joined
Nov 8, 2018
Messages
12,978
Points
113
Location
NORFOLK UK
First Name
christopher
HI Andy stood on it however did you managed that ? an one thing i'll have to look out for as doin a wingy thing for the first time in yrs oh gawrd
chrisb
 

Waspie

SMF Supporter
Joined
Mar 13, 2023
Messages
2,591
Points
113
Location
Portland - Dorset
First Name
Doug
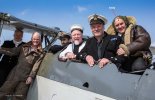
I'll follow along Andy. Another aircraft I have an interest in. A very very good friend of mine, strangely enough called Andy. Was until recently a member of the RNHF crewing the Swordfish on its regular displays around the country. Look for the flag in the TAG's (Telegraphist Air Gunner), position and the short guy in the pics will most likely be Andy!!
Image.jpg
(As an aside, the TAG's were the predecessors of the branch in the RN I found myself in. - We wore the same aircrew wings but luckily didn't have to learn morse code as they did!!!!)
 
Last edited:

Andy T

SMF Supporter
Joined
Apr 26, 2021
Messages
2,036
Points
113
Location
Sheffield
First Name
Andy
Thanks guys, good to have you all aboard.

HI Andy stood on it however did you managed that ?
I do most of my spraying standing up, habit from the day job I guess.

I'd just finished painting and it fell out of the clippy thing that was holding it and onto the floor. I thought it had rolled left so I stepped right. Wrong!
 

colin m

Moderator
Staff member
Moderator
SMF Supporter
Joined
Dec 26, 2008
Messages
8,607
Points
113
Location
Stafford, UK
First Name
Colin
You've picked a good one here Andy. I built the float version, it's a very nice kit. However, I seem to remember sliding the wing (left or right, I can't remember) into place was a really tight fit. It took a surprising amount of force to get it in place, not a problem if they wings are folded !
This problem had been reported on the web, so it wasn't just me who struggled.
 

Andy T

SMF Supporter
Joined
Apr 26, 2021
Messages
2,036
Points
113
Location
Sheffield
First Name
Andy
Thanks for that Colin. I saw a video where the guy split one of the wings trying to force it into place. He figured it was something he'd done wrong but maybe not given what you've said. I'll keep an eye out :thumb2:


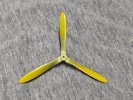
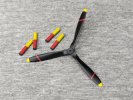
I got the prop painted today. A bit of fiddly masking but better than wrestling with decals.

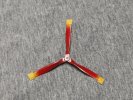
While I had the red & yellow out I sprayed some of the ordinance too. I've no idea what they are, they look like strong painkillers to me :smiling5:, but it's what the instructions called out for.

1000006052.jpg

1000006053.jpg

1000006056.jpg
 

Waspie

SMF Supporter
Joined
Mar 13, 2023
Messages
2,591
Points
113
Location
Portland - Dorset
First Name
Doug
Thanks for that Colin. I saw a video where the guy split one of the wings trying to force it into place. He figured it was something he'd done wrong but maybe not given what you've said. I'll keep an eye out :thumb2:


I got the prop painted today. A bit of fiddly masking but better than wrestling with decals.

While I had the red & yellow out I sprayed some of the ordinance too. I've no idea what they are, they look like strong painkillers to me :smiling5:, but it's what the instructions called out for.

View attachment 498957

View attachment 498958

View attachment 498960
The ‘pain killers’ look very much like smoke and flame floats, we used to mark targets (and divers in the water). They were still in use in 92
They burn for approx 1 hour you get smaller one but they only burn for a few minutes.
I could see them being dropped by first attacking plane as a datum for further torpedo drops!
 

Allen Dewire

Proud Rabble Member
SMF Supporter
Joined
Apr 27, 2018
Messages
4,120
Points
113
Location
Bamberg
First Name
Allen
Evening Andy,

I'm with you here, even though I have been quiet of late. The Fish is looking good so far and a great job on fixing the 'Oopsie'!!! I'll have to remember when I comment, not to say, "Great Job Andy, now stand up and take a bow Sir!!!".......That prop looks really well done and must have been lotsa fun to to do...

Prost
Allen
 

Andy T

SMF Supporter
Joined
Apr 26, 2021
Messages
2,036
Points
113
Location
Sheffield
First Name
Andy
Thanks Doug, that would make sense. Weirdly my instructions don't mention anything about the torpedo, even though they show you how to paint and fit its carrying bracket.

I found something torpedo shaped on the sprue though so I'm fitting it, right or wrong :smiling5:

Hi Allen, good to have you here my friend.

Yes the masking was a faff but I love that kind of thing :cool:
 
Top