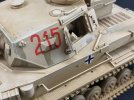
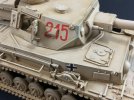
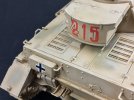
DAK Pz.Kpfw. IV Ausf. G, 1942

Jakko

Way past the mad part
SMF Supporter
Joined
Apr 28, 2018
Messages
10,791
Points
113
First Name
Jakko
The speed surprised me too :smiling3: By now I’ve also built seven jerrycans and two of the figures, but I still need to do a bit more work on the tank before I can paint it. Also on that front, I will need to wait for an order I placed last Saturday to arrive, as it contains the paint I want to use :smiling3:
 

Tworrs

SMF Supporter
Joined
Jan 6, 2022
Messages
1,255
Points
113
Location
New Zealand
First Name
Garry
As has been said, this build is moving along at speed, and is looking very nice. Looking forward now to how you finish it off.
 

Jakko

Way past the mad part
SMF Supporter
Joined
Apr 28, 2018
Messages
10,791
Points
113
First Name
Jakko
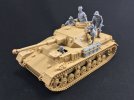
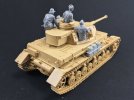
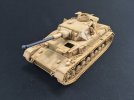
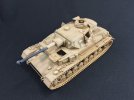
After some more work tonight, I think the basic build is finished already:

IMG_0482.jpegIMG_0483.jpeg

Aside from building the figures, I also added a jerrycan rack on the right, for which I had to remove the shovel (leaving its brackets) because else it couldn’t be long enough for what’s shown in the photo of the real 411 215. On the hull front, I also removed the fittings for the spare track on the transmission deck, as 215 looks to have been a very early Ausf. G that was made before those brackets were introduced.

The jerrycans are from Bronco. There is nothing wrong with the ones that come in the kit (other than lacking the central seam, which is easy enough to add from plastic card) but because I wanted seven cans, I didn’t want there to be any obvious visual differences between them, so I went for all Bronco cans instead.

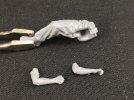
As for the figures, the moulding on those is seriously impressive. Find the mould part line:

IMG_0481.jpeg

It’s clearer on some parts than these, but especially the bare arms pretty much have no visible line, even on the side where it attaches to the sprue you frequently can’t even find it. Maybe it will show up more with a layer of paint, but then I can always scrape it back when I can see it :smiling3:
 

Scratchbuilder

SMF Supporter
Joined
Jul 2, 2022
Messages
1,935
Points
113
First Name
Mike
Looking good Jakko.
Spilt glue, once dry a gentle rub with somm 400 WnD should remove and polish up the spill.
 

Graeme C.

SMF Supporter
Joined
Apr 29, 2018
Messages
1,485
Points
113
First Name
Graeme
Just found this Jakko, it's gone together rather well, looking good.
 

Jakko

Way past the mad part
SMF Supporter
Joined
Apr 28, 2018
Messages
10,791
Points
113
First Name
Jakko
Sprayed the model this afternoon in Tamiya XF-93:

IMG_0486.jpeg

I also painted the skin parts on the figures over the past few days, and started on their uniforms. I’m not happy with the colour on the loader’s clothing, though, so that will get redone in a better shade.
 

Jakko

Way past the mad part
SMF Supporter
Joined
Apr 28, 2018
Messages
10,791
Points
113
First Name
Jakko
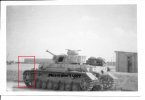
Not much has happened to this model over the last week or so, but I thought I’d share another picture of the real tank that somebody posted elsewhere in a thread about which colours this tank was painted in:

Panzer IV 215.jpg

It’s clearly the same tank as the right rear view, because the overpainted rear turret number is visible, and other details confirm that this is the same tank as the 215 with the sandbags and spare tracks on the front.
 

Jakko

Way past the mad part
SMF Supporter
Joined
Apr 28, 2018
Messages
10,791
Points
113
First Name
Jakko
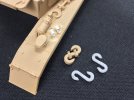
In the discussion about the colours, it was pointed out to me that the tank’s S-hooks, that I had already spotted on the nose of the real tank, were in fact used to retain the length of spare track that lies flat on the hull front. That meant I have to have empty brackets on the mudguard (as is visible in the front picture of the real tank), but also that I need S-hooks, because I’m not sure the ones from the kit will be salvageable.

IMG_0487.jpeg

After cutting the Tamiya parts off with a knife and a fine saw, I built the empty brackets from some strip and stretched sprue. In my German WWII spares box, I found two hooks from a Dragon Panzer III (leftover parts from a StuG I built 20, 25 years ago), from which I just needed to remove the brackets that were moulded onto them. But then I noticed that the real tank had at least three S-hooks on the front plate: one on each end of the spare track, and a third lying sort of above it. I guess I’ll need to separate the Tamiya part as well and try cleaning up at least one to be usable.
 

Jim R

SMF Supporter
Joined
Apr 27, 2018
Messages
13,724
Points
113
Location
Shropshire
First Name
Jim
Looking good. Good luck cleaning up the Tamiya hook. Not an easy shape to work on. Those figures are very nice. Well moulded and they look natural in situ.
 

Jakko

Way past the mad part
SMF Supporter
Joined
Apr 28, 2018
Messages
10,791
Points
113
First Name
Jakko
Yes, I’m not convinced it will be an easy job, which is why I delved into my spares boxes first to see if I had any that would need less work :smiling3: The figures are really good, though some of the detail, such as many pockets, is a bit poorly defined. The poses and things like the folds in the clothes, though, are excellent.
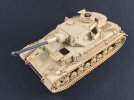
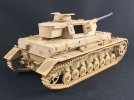
 

Mini Me

SMF Supporter
Joined
Jun 1, 2018
Messages
10,160
Points
113
First Name
Rick
Like Graeme, I just spotted this also....looks good and the figs. fit it like a glove. Haven't seen an African build for awhile so something a bit different.
 
Last edited:

Jakko

Way past the mad part
SMF Supporter
Joined
Apr 28, 2018
Messages
10,791
Points
113
First Name
Jakko
Those figures were clearly purpose-designed for this tank, yes. You could stick them (except the driver) into a Panzer III as well, I suppose, but the gunner and loader will be very difficult to fit anywhere else.
 

Jakko

Way past the mad part
SMF Supporter
Joined
Apr 28, 2018
Messages
10,791
Points
113
First Name
Jakko
Now the wind has lessened as well as turned, so it won’t blow into my attic window anymore, I’ve sprayed this model a bit more:

IMG_0489.jpegIMG_0490.jpeg

A big hurdle here was the colours this tank was painted in. It apparently came from the factory in the so-called Tropen 2 (“Tropics 2”) scheme, of a sand colour (RAL 8020) with patches in a grey-brown colour (RAL 7027) over one-third of the tank. My main problem was that my research hadn’t turned up the fact that in black-and-white photos, the 7027 virtually disappears against the 8020, so I had only ordered Tamiya’s version of 8020, XF-93 Light Brown DAK 1942, but not a paint suitable for 7027. In the end I mixed roughly equal parts of XF-93 and XF-49 Khaki as a decent enough approximation. I restricted the spots to mostly the lower hull sides and a few other places, because the real tank seems to have lacked them — perhaps it was partly repainted?

That done, I added some more XF-93 into the mix and sprayed paler spots inside the brown patches, and then I rinsed out the airbrush so I could put an approximately 3:1 mix of XF-93 and XF-2 White into it to highlight the rest of the tank.

I had already painted the gun barrel in XF-63 German Grey, because elsewhere we concluded that it was probably that colour from the gun factory and not repainted in sand at the tank factory, because guns were painted in heat-resistant paint.
 

Jakko

Way past the mad part
SMF Supporter
Joined
Apr 28, 2018
Messages
10,791
Points
113
First Name
Jakko
The next step was my usual wash over the whole model, this time Army Painter Soft Tone thinned about 1:2 or 1:3 with water, and followed by painting the camouflage on the turret front and sides with RAL 8000 from Life Color:

IMG_0498.jpeg

Because that camouflage is almost or entirely invisible in most photos of the real tank, except the front view, I only applied it where I could actually make it out. Whether that’s because there was never any camo there at all, or if wore off, or some other reason, I don’t know. It’s a strange camouflage anyway, that doesn’t seem to fit with the standardised camouflage on North Africa tanks, but hey, I just paint what I see in the photo :smiling3:

After that I drybrushed the model twice with Army Painter Skeleton Bone:

IMG_0499.jpeg

Why twice, you ask? Because I have two bottles of it, and they’re not the same colour! They’re both a shade of light sand, but one is paler and a bit more yellow than the other, so I drybrushed with the darker one first, then slightly less vigorously with the lighter one.
 
Last edited:

Jakko

Way past the mad part
SMF Supporter
Joined
Apr 28, 2018
Messages
10,791
Points
113
First Name
Jakko
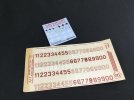
@Tim Marlow was wondering how I was going to do the overpainted 411. Well, a big trawl through my decals turned up something:

IMG_0512.jpeg

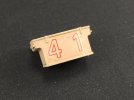
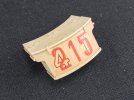
The kit’s decals at the top, an ancient sheet of Almark German aircraft decals below them. Though they’re dark red and the real tank probably had black outlines, dark red is going to appear close to black in black-and-white photos, so to anybody who takes offense at them, I say: prove to me that they weren’t dark red ;)

First, I applied the 4 and the 1:

IMG_0513.jpeg

Followed by the 215, but with the digits cut apart, for two reasons. One is because they were spaced wider on the real tank than what you get from Tamiya (likely because the kit numbers are fractionally too small as well), but the other reason is that this way, I could line up the 2 and the 5 with the 4 and the 1, which is much easier to do than the other way around:

IMG_0514.jpeg

Then I added the crosses on the hull sides and rear, as well as the other turret numbers:

IMG_0515.jpegIMG_0516.jpegIMG_0517.jpeg

The left and rear crosses are per photographs of the real tank, but those don’t show a cross on the right. However, one could be in the place where I put it, because that isn’t visible enough (or at all) in the existing photos, so again, it’s a logical place and it could have been there.

The numbers were fun to apply over the vision flaps and their bolts … Lots of Micro Sol, and unlike what is always recommended when using that, I pressed firmly down on them between applications, using both a folded-up cloth and a blunt dental tool, to get them to go around the corners and details. Once they’re dry tomorrow, I may have to apply some more, we’ll see.
 
Last edited:

Jakko

Way past the mad part
SMF Supporter
Joined
Apr 28, 2018
Messages
10,791
Points
113
First Name
Jakko
are you expecting a visit from the decal Nazis? ;)
I forgot that people on this forum aren’t that fussed about this sort of thing :smiling3:

dont try and justify what your doing
I do need to justify it, at least to my own satisfaction — IMHO, it has to be at least plausible, else you might as well paint the tank light blue instead of sand or something :smiling3:
 
Top