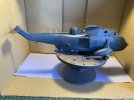
Doug's 1/48 Airfix Sea King

Steve-the-Duck

SMF Supporter
Joined
Jul 3, 2020
Messages
1,158
Points
113
Location
Medway Towns
First Name
Chris
Me, I usually rig with a slow 'medium' CA. But that's just what works for me, giving a bit of wiggle room

BTW I've seen it a couple of times, but what IS TET?
 

Andy T

SMF Supporter
Joined
Apr 26, 2021
Messages
1,970
Points
113
Location
Sheffield
First Name
Andy
Me, I usually rig with a slow 'medium' CA. But that's just what works for me, giving a bit of wiggle room

BTW I've seen it a couple of times, but what IS TET?
Tamiya Extra Thin (cement)

Doug, I'd use CA glue for that too. Styrene cement won't bond either of those materials effectively. White glue / pva / canopy glue would hold it but is too slow drying for this application in my opinion.
 

Jakko

Way past the mad part
SMF Supporter
Joined
Apr 28, 2018
Messages
10,830
Points
113
First Name
Jakko
As Andy says, plastic cement won’t work on brass or nylon. It works by dissolving the plastic, so the material of both parts runs together, and then evaporating so they stay mixed and thus, the parts joined. However, nylon won’t dissolve in it, let alone brass, of course. Plastic cement may work sort of to bond plastic kit parts to nylon or brass, but that’s only because the plastic will melt and get moulded to the shape of the nylon or the brass, trapping it — which is nowhere near as strong a bond.

So I’d say: superglue for either.
 

Steve-the-Duck

SMF Supporter
Joined
Jul 3, 2020
Messages
1,158
Points
113
Location
Medway Towns
First Name
Chris
Ah, TET

"I don't care how 'bleep' runny it is!"

From what I've heard of that it's way too thin for the 'spot-weld' job of attaching any wiring / rigging
 

Scratchbuilder

SMF Supporter
Joined
Jul 2, 2022
Messages
1,946
Points
113
First Name
Mike
Try using the rigging material they use on ship kits and bi-planes, Ushi van der Rosen is one brand I have. You attach one end with c/a, let it dry and then stretch slightly to the other contact point and c/a it it will shrink back and look tight.
 

Waspie

SMF Supporter
Joined
Mar 13, 2023
Messages
2,492
Points
113
Location
Portland - Dorset
First Name
Doug
Thank you Steve, Jakko, Tim, Mike and Rick for your advice regards the aerial fixing and suggestions. The door I am going to use the bras wire!!
The longer HF aerial, I'll try and source some from Johns shop as many the Uschi 'stuff' is out of stock in many places. I'm at a stage where I can afford a few days or so as I have just put a gloss varnish coat over the King and will be otherwise employed tomorrow, (SWMBO has a new list).

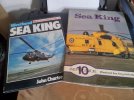
Mike, Your SK books, envy!! I only have two reference books re helicopters. One is the history of FAA helicopter from 1948 to the Merlin/Wildcat era. The second is one I contributed to and is the operational history of the Wasp.
 

Waspie

SMF Supporter
Joined
Mar 13, 2023
Messages
2,492
Points
113
Location
Portland - Dorset
First Name
Doug
Back to the build!
After the advice above, I had a go at attaching some brass wire to the front port access door to replicate the wire stays that hold the lower door at the correct angle for access and also used for raising the door when closing!

Pic 1
The length will be dictated when the door is affixed in place once all the masking is removed and decals in place.
IMG_1360.JPG

Next I prep'd ready for a coat of gloss varnish. A light IPA wash, lunch, then applied the varnish. Now it is left until Saturday.

Pic 2
Gloss varnish applied. Sat in my improvised spray booth. Courtesy of a recent amazon delivery!!!
IMG_1361.JPG

On another note. Airbrush has been acting strange since I last put some varnish through it. When I depress the finger button for air, I start to get bubbles come through the pot!! Stripped it down, cleaned thoroughly, reassembled and this time air was coming through the nozzle without me pressing the finger control!!! Stripped down again and scratched my bonce. When I re assembled the problem disappeared. Seems only after I use varnish. Used Vallejo airbrush cleaner and IPA to wipe clean after. It's had a brush through using t hose mini brushes for airbrushes. Any ideas chaps if it re-occurs????
 

Scratchbuilder

SMF Supporter
Joined
Jul 2, 2022
Messages
1,946
Points
113
First Name
Mike
Airbrush... You need to strip it down to the bones. Leave it in a pot of IPA overnight and then go for a full clean. What has happened is that when cleaning the airbrush the varnish has thinned and not all been washed away. The air still coming out of the brush even though you have not pressed the trigger is the valve sticking. I have this still on a couple of mine and normally if it happens I just flick the trigger to the up position. With the valves I have cleaned them, replaced the rubber ring/seal, left them to dry for days before assembly and still it happens - I now let it dry for a couple of days in the airing cupboard, then dust it with a bit of talcom powder which helps most of the time.
Also check the needle because when you assemble and there is still a bit of moisture left, the needle develops a ring around where it joins the tunnel, again mine is left out untill I am ready to spray, but don't do what I have done on a couple of occasions, started spraying and wondering why all the paint is going over my hand and not on the model - and that is a clean up job.
 

Waspie

SMF Supporter
Joined
Mar 13, 2023
Messages
2,492
Points
113
Location
Portland - Dorset
First Name
Doug
Airbrush... You need to strip it down to the bones. Leave it in a pot of IPA overnight and then go for a full clean. What has happened is that when cleaning the airbrush the varnish has thinned and not all been washed away. The air still coming out of the brush even though you have not pressed the trigger is the valve sticking. I have this still on a couple of mine and normally if it happens I just flick the trigger to the up position. With the valves I have cleaned them, replaced the rubber ring/seal, left them to dry for days before assembly and still it happens - I now let it dry for a couple of days in the airing cupboard, then dust it with a bit of talcom powder which helps most of the time.
Also check the needle because when you assemble and there is still a bit of moisture left, the needle develops a ring around where it joins the tunnel, again mine is left out untill I am ready to spray, but don't do what I have done on a couple of occasions, started spraying and wondering why all the paint is going over my hand and not on the model - and that is a clean up job.
Thanks for that Mike. After the final coat of varnish today I again stripped it right down, literally!!!! left it for a wee while, then started cleaning again. Managed to pull off small pieces if drying varnish from around the parts that make up the nozzle.
Before SWMBO starts me on my Friday jobs, I'll strip it down again and soak for the day in IPA as you say than dry and leave it apart overnight.
It's only the varnish so in the future I'll cary out a full strip down and soak procedure.
Doug
Airbrush... You need to strip it down to the bones. Leave it in a pot of IPA overnight and then go for a full clean. What has happened is that when cleaning the airbrush the varnish has thinned and not all been washed away.
OK, it's sat in a bowl of IPA, (covered). I'll attack it tomorrow and see what we get from an overnight soak.
 

Scratchbuilder

SMF Supporter
Joined
Jul 2, 2022
Messages
1,946
Points
113
First Name
Mike
Thanks for that Mike. After the final coat of varnish today I again stripped it right down, literally!!!! left it for a wee while, then started cleaning again. Managed to pull off small pieces if drying varnish from around the parts that make up the nozzle.
Before SWMBO starts me on my Friday jobs, I'll strip it down again and soak for the day in IPA as you say than dry and leave it apart overnight.
It's only the varnish so in the future I'll cary out a full strip down and soak procedure.
Doug

OK, it's sat in a bowl of IPA, (covered). I'll attack it tomorrow and see what we get from an overnight soak.
Pleased to help, been through the pain of wondering what I have done wrong on many occasions.
 

Waspie

SMF Supporter
Joined
Mar 13, 2023
Messages
2,492
Points
113
Location
Portland - Dorset
First Name
Doug
SitRep. AB has had a thorough clean. I even dismantled the mechanism where the air hose connects to the AB. Unscrewed a small brass screw, removed the spring and rod which depresses when you put in a demand for air!! Cleaned all that then reassembled!! The whole AB was then assembled and tested and all appears to be functioning as it should. Glad I don't use varnish every time I use the damn thing!!

All things being equal, I should be in a position to start on the decals tomorrow. (When I say all things being equal, I, of course mean, if SWMBO allows me time off for good behaviour!!!!!!) I did clean ALL the block paving today. AND. Replace the two valves on the kitchen tap. AND cook dinner. So by my reckoning - I'm in credit!!!
 

Scratchbuilder

SMF Supporter
Joined
Jul 2, 2022
Messages
1,946
Points
113
First Name
Mike
SitRep. AB has had a thorough clean. I even dismantled the mechanism where the air hose connects to the AB. Unscrewed a small brass screw, removed the spring and rod which depresses when you put in a demand for air!! Cleaned all that then reassembled!! The whole AB was then assembled and tested and all appears to be functioning as it should. Glad I don't use varnish every time I use the damn thing!!

All things being equal, I should be in a position to start on the decals tomorrow. (When I say all things being equal, I, of course mean, if SWMBO allows me time off for good behaviour!!!!!!) I did clean ALL the block paving today. AND. Replace the two valves on the kitchen tap. AND cook dinner. So by my reckoning - I'm in credit!!!
If it is fine weather, you know what that means - grass cutting...
I did my bit for the gardening fraternity today, I put up two of those lights that blind you when you go out to hopefully find and pick up what the dog has just done - question to SWMBO - How do I find it when I am blind.... Reply - Follow your nose, how do you think the dog avoids it.....
Pleased the a'brush is working again...
Did you hang out the washing, dry the dishes, hoover, clean the windows, clean the inside of the car..... Nope still in debit.....
 

Jakko

Way past the mad part
SMF Supporter
Joined
Apr 28, 2018
Messages
10,830
Points
113
First Name
Jakko
Glad I don't use varnish every time I use the damn thing!!
This is one of my more minor reasons for not wanting to use varnish unless I need to: you often can’t tell where the stuff has gotten to — and where not.
 

Waspie

SMF Supporter
Joined
Mar 13, 2023
Messages
2,492
Points
113
Location
Portland - Dorset
First Name
Doug
Well wasn't yesterday a day to forget!! If it could go wrong - it did. Home - Sea King the works!!
However, on the model front. My first attempt at home made decals was a disaster!!!! Only good thing was I must have put enough coats of varnish on as the didn't run or wash out!! However - and totally my fault, when measuring up the sizes I used the wrong Mk Sea King!! I used the Mk2 1/48 decals as a template!! WRONG!!! The sizes are too big. The Mk5 has smaller side numbers and lettering on the tail due to the fitment of the Orange Crop sensors!! So it was back to the drawing board. This time I used the correct Mk and correct decal size to copy from!!
Another set of decals produced this morning and sprayed with gloss varnish, several layers. Then came the strip down of airbrush and soak in IPA so as to remove residual varnish and avoid AB issues later!!!!

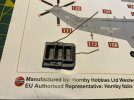
After a couple of SWMBO's only five minute jobs!!! (Where do they get their time measurement from?) I finally managed to get some time in the garage and make a start on getting a few of the Airfix supplied decals on. By gum there are a few very tiny decals. Eyesight was being pushed to the limits with them.
I decided to fit the strips on the rotor blades, which if some can remember me saying, I was going to omit as I couldn't remember seeing them. But after looking at a few of my pics I don't have on PC I see that the Mk2/4/5 all have them. Albeit covered in exhaust muck!!

A few pics of my limited progress.

Pic 1
Rotor Blades
IMG_1364.JPG

Pic 2
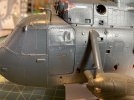
TKS stripes on barn door, (thats engine intake shield). Tail rotor end blade stripes.
IMG_1365.JPG

Pic 3
Intake warning sign and if you look very closely, the aerial bit on the undercarriage sponson has its 'No Hand Hold' decal on it as has the rest on the tail.
IMG_1366.JPG

Pic 4
Intake and pilots door jettison markings fitted as is also the 28 volt electric point sign. Unsure of the grey semi-circle - that may yet disappear!!!!!
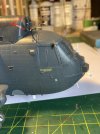
IMG_1368.JPG

That little lot took a lions share of the afternoon. That's all for now and hopefully - all Sundays bad fortune is gone and never to be repeated!!!!
 
Last edited:
Top