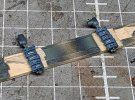
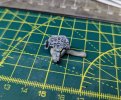
Eduard 1/48 Bf 110E

Andy T

SMF Supporter
Joined
Apr 26, 2021
Messages
1,974
Points
113
Location
Sheffield
First Name
Andy
This kit popped up recently in Andy's poll and reminded me how much I wanted to build it. Something about that big canopy. Then John posted up a discounted one due to a (very slightly) damaged box, so I took it as a sign
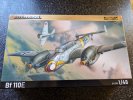
1000005227.jpg

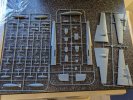
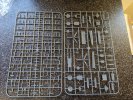
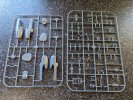
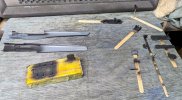
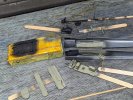
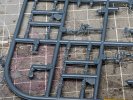
Sprue shots first:

1000005231.jpg

1000005230.jpg

1000005229.jpg

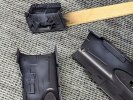
Being the profipack there's also some lovely (if tiny!) painted photo etch, along with a nice looking decal sheet and canopy masks. A few clear parts had come away from the sprue but there's no visible damage:
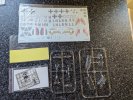
1000005228.jpg

I've made a bit of a start but will leave that for tomorrow. It's my first ever Eduard kit and already I can see it's no Tamiya!

I don't mean that in a bad way, it's just very different and not the throw-together kind of kits I've been building lately. I might have to do some real modelling for a change :tears-of-joy: and deal with some very small parts

1000005236.jpg

I also understand I'll be running into some fitment issues further down the line so I might have to dig out the filler.

There are a few colour schemes suggested but right now I'm fancying the one on the front of the box.
 

Jim R

SMF Supporter
Joined
Apr 27, 2018
Messages
13,743
Points
113
Location
Shropshire
First Name
Jim
I have made a couple of these Eduard Profipack kits and I reckon they are pretty good. As you say they do not build up as simply as Tamiya but the detail is good and the fit OK. This is a great choice and I'll enjoy watching you do some "real modelling" .
 

The Smythe Meister

Born to be WILD....... until about 9pm
SMF Supporter
Joined
Jan 30, 2019
Messages
5,738
Points
113
Location
Devon
First Name
Andy
This kit popped up recently in Andy's poll and reminded me how much I wanted to build it. Something about that big canopy. Then John posted up a discounted one due to a (very slightly) damaged box, so I took it as a sign

View attachment 495131

Sprue shots first:

View attachment 495132

View attachment 495133

View attachment 495134

Being the profipack there's also some lovely (if tiny!) painted photo etch, along with a nice looking decal sheet and canopy masks. A few clear parts had come away from the sprue but there's no visible damage:

View attachment 495135

I've made a bit of a start but will leave that for tomorrow. It's my first ever Eduard kit and already I can see it's no Tamiya!

I don't mean that in a bad way, it's just very different and not the throw-together kind of kits I've been building lately. I might have to do some real modelling for a change :tears-of-joy: and deal with some very small parts

View attachment 495136

I also understand I'll be running into some fitment issues further down the line so I might have to dig out the filler.

There are a few colour schemes suggested but right now I'm fancying the one on the front of the box.
Excellent, I'll be following this one mate...
.. looking forward to doing mine in a few months time :smiling3:
I wasn't aware of fit issues,so I'll look out for the pitfalls that you encounter ;)
 

Andy T

SMF Supporter
Joined
Apr 26, 2021
Messages
1,974
Points
113
Location
Sheffield
First Name
Andy
The 110 is a great looking aircraft
Agreed Mick, I'm hoping to do it justice.

I have made a couple of these Eduard Profipack kits and I reckon they are pretty good. As you say they do not build up as simply as Tamiya but the detail is good and the fit OK. This is a great choice and I'll enjoy watching you do some "real modelling" .
Cheers Jim. Seems really nice so far although I think I'll be doing a lot more dry fitting than normal.

Excellent, I'll be following this one mate...
.. looking forward to doing mine in a few months time :smiling3:
I wasn't aware of fit issues,so I'll look out for the pitfalls that you encounter ;)
Good to have you along Andy. It's probably down to you that I'm doing it, so if it all goes pear shaped I'll know who to blame :smiling5:

I've watched a couple of builds while waiting for the kit to arrive and there was plenty of filler action! Wing root and engine nacelles mostly.

Small parts? Where? I don’t see any …
I lost one part on the first step of the instructions so I've already started scratching. Doesn't bode well :tears-of-joy:
 

adt70hk

I know its a bit sad but I like quickbuild kits!!!
SMF Supporter
Joined
Sep 4, 2019
Messages
9,506
Points
113
First Name
Andrew
I have this very kit in the stash, also from John. So will follow with interest!
 

Andy T

SMF Supporter
Joined
Apr 26, 2021
Messages
1,974
Points
113
Location
Sheffield
First Name
Andy
A lot of this will be bread & butter to many of you guys but for someone at my level it's been very fiddly so far, so I'm going to make a big deal out of it :smiling5:

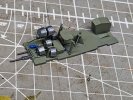
Cockpit went together well but the individual control levers were a wrestle. I also lost one part after it went supersonic from my tweezers, so scratched something similar. Some form of canister with a hose coming out of it.

1000005265.jpg

Then I folded up a couple of small boxes for the IP and side wall, to have painted etch pieces added later.

Not great but the best I could manage.

1000005234.jpg

1000005258.jpg

1000005259.jpg

The ammo drums needed some etch adding too. Some are a bit wonky but I amazed myself by actually managing to fit them all!

1000005237.jpg

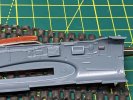
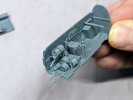
These were then fitted into the gunners area. I had to grind one down for the side wall to fit correctly. It might be my fault but the opposite side has a relief moulded in to provide clearance.

1000005249.jpg

1000005260.jpg

Then on to some paint. According to the instructions the cockpit is RLM66, gunners area RLM02 so I went with that as research is far too boring, I'd rather be making models.

Dark version of RLM66 went on all over first as a shadow coat. This was highlighted up front with a lighter version, before being masked off to add the other colour further back.

1000005261.jpg

1000005262.jpg

1000005263.jpg

Then I started on the detail painting.

1000005264.jpg


Now that the basic colours are down I can attempt some of the fancy painted etch. With several individual gauges complete with mounting brackets that need bending, it's going to be a challenge for someone not comfortable with PE, but it should add a lot of detail if I can pull it off.

The kit does provide plastic parts & decals as an alternative to most of them, so that's a fallback plan.
 

The Smythe Meister

Born to be WILD....... until about 9pm
SMF Supporter
Joined
Jan 30, 2019
Messages
5,738
Points
113
Location
Devon
First Name
Andy
A lot of this will be bread & butter to many of you guys but for someone at my level it's been very fiddly so far, so I'm going to make a big deal out of it :smiling5:

Cockpit went together well but the individual control levers were a wrestle. I also lost one part after it went supersonic from my tweezers, so scratched something similar. Some form of canister with a hose coming out of it.

View attachment 495194

Then I folded up a couple of small boxes for the IP and side wall, to have painted etch pieces added later.

Not great but the best I could manage.

View attachment 495195

View attachment 495196

View attachment 495197

The ammo drums needed some etch adding too. Some are a bit wonky but I amazed myself by actually managing to fit them all!

View attachment 495198

These were then fitted into the gunners area. I had to grind one down for the side wall to fit correctly. It might be my fault but the opposite side has a relief moulded in to provide clearance.

View attachment 495199

View attachment 495200

Then on to some paint. According to the instructions the cockpit is RLM66, gunners area RLM02 so I went with that as research is far too boring, I'd rather be making models.

Dark version of RLM66 went on all over first as a shadow coat. This was highlighted up front with a lighter version, before being masked off to add the other colour further back.

View attachment 495201

View attachment 495202

View attachment 495203

Then I started on the detail painting.

View attachment 495204


Now that the basic colours are down I can attempt some of the fancy painted etch. With several individual gauges complete with mounting brackets that need bending, it's going to be a challenge for someone not comfortable with PE, but it should add a lot of detail if I can pull it off.

The kit does provide plastic parts & decals as an alternative to most of them, so that's a fallback plan.
Blimey Andy,
You've certainly made a great fist of this,dispite all of the problems!! :thumb2:
I have to admit mind, I'm surprised about the kit's issues. . makes me not so keen to take one on!!:flushed:
Following closely mate... Good luck!!
 

Jim R

SMF Supporter
Joined
Apr 27, 2018
Messages
13,743
Points
113
Location
Shropshire
First Name
Jim
That is looking smart Andy. Great work on the itty-bitty PE.
I can attempt some of the fancy painted etch
I've used that a couple of times and it's very effective. Just be careful if you need to bend the belts into a realistic position. The colour can crack and flake off. I had to touch up the ones I used.
 

Andy T

SMF Supporter
Joined
Apr 26, 2021
Messages
1,974
Points
113
Location
Sheffield
First Name
Andy
Thanks Jim. More etch to come, I sure need the practice :smiling3:

And thanks for the heads up. In that case I may try warming the parts before bending to see if it helps the coating be more flexible.
It works with car panels so worth a try!
 

adt70hk

I know its a bit sad but I like quickbuild kits!!!
SMF Supporter
Joined
Sep 4, 2019
Messages
9,506
Points
113
First Name
Andrew
A lot of this will be bread & butter to many of you guys but for someone at my level it's been very fiddly so far, so I'm going to make a big deal out of it :smiling5:

Cockpit went together well but the individual control levers were a wrestle. I also lost one part after it went supersonic from my tweezers, so scratched something similar. Some form of canister with a hose coming out of it.

View attachment 495194

Then I folded up a couple of small boxes for the IP and side wall, to have painted etch pieces added later.

Not great but the best I could manage.

View attachment 495195

View attachment 495196

View attachment 495197

The ammo drums needed some etch adding too. Some are a bit wonky but I amazed myself by actually managing to fit them all!

View attachment 495198

These were then fitted into the gunners area. I had to grind one down for the side wall to fit correctly. It might be my fault but the opposite side has a relief moulded in to provide clearance.

View attachment 495199

View attachment 495200

Then on to some paint. According to the instructions the cockpit is RLM66, gunners area RLM02 so I went with that as research is far too boring, I'd rather be making models.

Dark version of RLM66 went on all over first as a shadow coat. This was highlighted up front with a lighter version, before being masked off to add the other colour further back.

View attachment 495201

View attachment 495202

View attachment 495203

Then I started on the detail painting.

View attachment 495204


Now that the basic colours are down I can attempt some of the fancy painted etch. With several individual gauges complete with mounting brackets that need bending, it's going to be a challenge for someone not comfortable with PE, but it should add a lot of detail if I can pull it off.

The kit does provide plastic parts & decals as an alternative to most of them, so that's a fallback plan.


That's coming on very nicely indeed!! I know what you mean about the PE. I'm having the same issues with my Yak.

Keep up the good work!!

ATB.

Andrew
 

Andy T

SMF Supporter
Joined
Apr 26, 2021
Messages
1,974
Points
113
Location
Sheffield
First Name
Andy
A bit of an up & down session this afternoon.

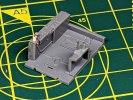
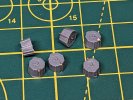
Part 58 is some kind of magazine. For the rear MG I'm guessing. On the sprue there's a bit of mould misalignment and a good dollop of flash:

2023-11-13 14.00.10-1.jpg

This made cleaning them up nicely way beyond my capabilities, so by the time I added the etch piece they were looking comically bad. It's not like they're highly visible in the top of the rear cockpit or anything... :rolling:

2023-11-13 17.12.49-1.jpg

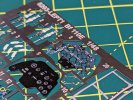
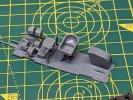
But thankfully the IP went better. In total 6 pieces of etch are folded and/or layered onto the plastic part to make this. I'm still struggling to get good shots with my phone camera, it just won't do decent macro like my old Huawei, so this is the best of several attempts :

2023-11-13 17.49.38.jpg
 

Allen Dewire

Proud Rabble Member
SMF Supporter
Joined
Apr 27, 2018
Messages
4,105
Points
113
Location
Bamberg
First Name
Allen
Ok Andy, I'm still trying to ketchup with the other 15 builds you've been doing and here you go starting another one...And a really cool wing thingy one too!!! I'm having trouble doing etch in 1/35, for my Kübelwagen and you're knocking it out like nothing, in 1/48!!! Respect Sir!!! That IP also came out really, really nice.....

Prost
Allen
 

Jakko

Way past the mad part
SMF Supporter
Joined
Apr 28, 2018
Messages
10,832
Points
113
First Name
Jakko
Part 58 is some kind of magazine. For the rear MG I'm guessing.
Yep, they’re “saddle” magazines (double drums, one on each side of the gun):


If you play this video, it starts where he shows the magazine. This is a gun adapted for ground use, but that just means it has a butt stock, bipod, etc. The functional bits are exactly the same as in the aircraft gun.

As for taking sharp photos of small things, if you want to upload them to a forum like here, you can take the photo from a bit further away so it’s in focus, then crop it in the camera app or photo viewer app on your phone (or tablet) before uploading it. This works fine because the forum will resize the photos to 1200 pixels along the long side anyway.
 

JR

Member of the Rabble and Pyromania Consultant
SMF Supporter
Joined
May 26, 2015
Messages
17,275
Points
113
Location
lincs
First Name
John
Hells Bells mate I couldn't even see it that well with my one good eye. Starting to look great .
 
Top