Hobby Boss 1/72 Seahawk

stillp

SMF Supporter
Joined
Nov 17, 2016
Messages
7,240
Points
113
Location
Rugby
First Name
Pete
I lined up the exhaust fairings, so the step was top & bottom - easier access to the filler!
Thanks Dave, I tried to do that, without much success. I think I should have used PPP in the exhausts so I could smooth it with a wet cotton bud instead of sanding. I'll have to see if I can rig up a small rotary sanding drum for my slow Dremelclone.
OH Pete im dissapointed that you aint gonna paint on the stripes as i have not ever seen one of these planes done in them an i think it will set the model as exceptenaly different from others ive seen
chris
Sorry Chris, I like the Ace of Diamonds scheme, EDSG over light grey as seen on WV805. Much easier masking!
Pete
 

stillp

SMF Supporter
Joined
Nov 17, 2016
Messages
7,240
Points
113
Location
Rugby
First Name
Pete
Well, the canopy was a delight - bright and clear, with clearly defined frames. Only trouble is that it doesn't fit! Partly (mostly) my fault as the cockpit tub is a little too high and slightly tilted to one side, but also the lower edge of the sliding part of the canopy doesn't match the fuselage.
It'll just have to be an open cockpit.
P1160952 [Desktop Resolution].JPG
Pete
 

colin m

Moderator
Staff member
Moderator
SMF Supporter
Joined
Dec 26, 2008
Messages
8,608
Points
113
Location
Stafford, UK
First Name
Colin
That's looking nice Peter. Canopies, yes I've converted a few to 'open' mode due to fit issues.
 

stillp

SMF Supporter
Joined
Nov 17, 2016
Messages
7,240
Points
113
Location
Rugby
First Name
Pete
Apologies for the lack of action on this build chaps, I'm having another bout of the shakes. In between the worst days I've been fairly busy - masked the canopies three times before I was satisfied, and had a few (I've lost count) unsuccessful attempts to paint stripes round the nose of 8 rockets, so I've decided to be content with having the nose a different colour to the body!
I'll take some photos when I've got a bit more done.
Pete
 

JR

Member of the Rabble and Pyromania Consultant
SMF Supporter
Joined
May 26, 2015
Messages
17,378
Points
113
Location
lincs
First Name
John
Sorry to read of your problems Peter, hope you improve soon and manage to continue.
 

Airborne01

SMF Supporter
Joined
Mar 30, 2021
Messages
3,226
Points
113
Location
Essex
First Name
Steve
Oh my lord - one of my favourite aircraft - so b----dy beautiful! :tears-of-joy:! Aircraft of that era were just so stunning looking!
Steve
 
Last edited:

stillp

SMF Supporter
Joined
Nov 17, 2016
Messages
7,240
Points
113
Location
Rugby
First Name
Pete
I thought I'd try to get some paint on the rockets. After giving up on the idea of stripes round them, I'm just going to paint the head and body in different greens. Found some Revell aqua colours, took the top off one and found that as usual for Revell paints, it needs thinning. I have a bottle of Revell thinners, so thought I'd just pour a drop in - hand shook, result was that I splashed enough thinners in to fill the paint pot to the brim. No problem, I'll give it a good stir with a wooden coffee stirrer as it's too full to use mt Badger stirrer. It was just starting to get the lumps dissolved, when the hand I was holding the pot in shook... About half the pot of nicely thinned paint ran over my workstation and hand!
Doctor says it's just age, try to relax more.
Pete
 

Mini Me

SMF Supporter
Joined
Jun 1, 2018
Messages
10,162
Points
113
First Name
Rick
It's O.K. Pete, at least your in there working to your best potential....is there any way you can chuck those rockets up in a dremmel or drill motor and spin them slow while you hold the brush to 'em and get a nice straight line? Just thinking out loud. :thinking: Rick H.
 

rtfoe

SMF Supporter
Joined
Apr 29, 2018
Messages
7,546
Points
113
Location
Malaysia
First Name
Richard
It's O.K. Pete, at least your in there working to your best potential....is there any way you can chuck those rockets up in a dremmel or drill motor and spin them slow while you hold the brush to 'em and get a nice straight line? Just thinking out loud. :thinking: Rick H.
That's one good way to do it. The other is to use thin strips of decal and finish the end with a dab of paint.

Cheers,
Richard
 

stillp

SMF Supporter
Joined
Nov 17, 2016
Messages
7,240
Points
113
Location
Rugby
First Name
Pete
It's O.K. Pete, at least your in there working to your best potential....is there any way you can chuck those rockets up in a dremmel or drill motor and spin them slow while you hold the brush to 'em and get a nice straight line? Just thinking out loud. :thinking: Rick H.
No Rick, the fins on the back and the pylon are moulded on and won't fit in the chuck.
I'm wondering if I could make some sort of collet that would fit on my wood lathe and hold them. Have to think about that.
That's one good way to do it. The other is to use thin strips of decal and finish the end with a dab of paint.

Cheers,
Richard
Tried that Richard, but I couldn't get the decals in the same place on all 8. Gave up after 4 or 5.

Pete
 

stillp

SMF Supporter
Joined
Nov 17, 2016
Messages
7,240
Points
113
Location
Rugby
First Name
Pete
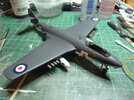
Managed to get a bit more done:
P1160992.JPG
I brushed the silver in the wheel wells and will need to touch it up when the undercarriage is complete.

P1160993.JPG
The rockets are going to stay without stripes!
I've done a bit more since those photos, added the undercarriage, which is a bit tricky since the instructions are a bit vague about the exact placing of some parts.
Next job will be to add the rockets - oh no, scrub that, I'll need to put the underside serial decals on first! Just spotted another mistake - I've glued the fuel tanks on without adding the stencils, 4 on each. Still doable but a bit more tricky.
Pete
 

stillp

SMF Supporter
Joined
Nov 17, 2016
Messages
7,240
Points
113
Location
Rugby
First Name
Pete
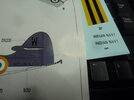
Yes, we can learn a lot from modelling - until today I didn't even know Inidia had a navy!
Anyway, you might have guessed that I've been playing with decals today - they're all on, currently marinading in Microsol. If I have time tomorrow (doubtful, visitors expected) I should be able to get a clear coat on, then attach the canopy.P1160995.JPG
Cheers
Pete
 

stillp

SMF Supporter
Joined
Nov 17, 2016
Messages
7,240
Points
113
Location
Rugby
First Name
Pete
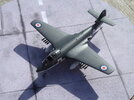
All the decals on, a clear coat of Galeria Satin applied, and the canopy fitted:
P1170028.JPG
Not a bad kit at all, the few problems were mostly my fault.
More photos in Completed Aircraft.
Cheers
Pete
 
Top