Honda road racer 1/8th scale

Mini Me

SMF Supporter
Joined
Jun 1, 2018
Messages
10,160
Points
113
First Name
Rick
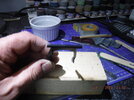
Just had a look in on this little project........very impressive build so far Simon. I couldn't help noticing that spool of stainless "safety" wire that you used to spoke your wheels. I Can't begin to count up how many of those I used up in my years as an Aircraft Mechanic. And you are right it is pretty stiff to work with. I'm looking forward to where this build goes next.
 

simontie

SMF Supporter
Joined
Jan 13, 2010
Messages
997
Points
93
Location
Morayshire Scotland
First Name
simon
Just had a look in on this little project........very impressive build so far Simon. I couldn't help noticing that spool of stainless "safety" wire that you used to spoke your wheels. I Can't begin to count up how many of those I used up in my years as an Aircraft Mechanic. And you are right it is pretty stiff to work with. I'm looking forward to where this build goes next.
My old man was an aircraft engineer, hence the safety wire, i used it for the shock springs never thought about using it for the spokes, but i will the next time :thumb2:
 
Last edited:

simontie

SMF Supporter
Joined
Jan 13, 2010
Messages
997
Points
93
Location
Morayshire Scotland
First Name
simon
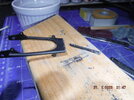
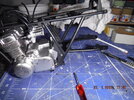
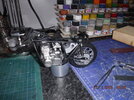
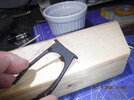
hi all well 2 steps forward and 3 back or what ever they say? took the swinging arm off as it just didn't sit pretty as you can see the tube that the swinging arm shaft should spin on is like a a banana and the shaft was short by 2 or 3mm.
DSCF6805.jpeg
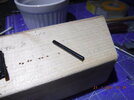
sorry not so obvious in the picture, So after some thought I cut it off and as provenance would have it that's when I ran in to one of the steel pins I used to stiffen up the 2 half!! so I cut round it using a junior hacksaw blade..
DSCF6811.jpeg
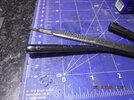
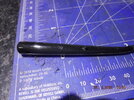
.. cut a bit of sprue slightly longer and made a new shaft drilled the to screw holes for fitting to the frame these don't pass all the way through but a massive improvement on the plastic pins that were on the original shaft ends.
DSCF6806.jpeg
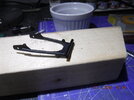
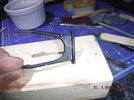
trimmed to length after trial fitting and bonded to the legs (arms?) of the swinging arm after hardening I gave it a quick coat of paint ready to fit
DSCF6808.jpegDSCF6813.jpegDSCF6814.jpeg
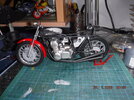
then I refitted it tonight and defiantly an improvement on the original,
DSCF6817.jpeg
so I then I started to fit the oil tank that's when I noticed this should have been done when the frame was put together but a luckily I didn't mainly because it would never have fitted the lugs for the top of the tank were twice as thick as they should have been I cut these out of the frame and split them down the middle, drilled four more fixing holes in the tank and cut away the plastic dowels that it was meant to locate on in the frame and it slipped in perfectly :tongue-out3: screwed the bottom mounts to the tank then rolled it up in to position, using the split lugs refitted to the frame and screwed the top mounts in to place.
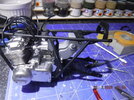
its looking quite tidy a fair bit to do but getting there (I might cut the HT leads down they seem to be to long? cut as per the kit but a lot of bulk especially when there mixed in with the throttle cables.DSCF6818.jpeg

one last thing any advice on a razor saws make model what blades are available, realistically I need one for metal as well as plastic just now I use the dermal for metal tube and bar and its great using micro disc's if you can see where the parts land!!! thought I would ask any pointers would be great
cheers
simon
 
Joined
Apr 12, 2019
Messages
2,215
Points
113
Location
Selkirk
First Name
Andy
Looks like it will turn out a cracking model Simon and a nice bit of scratchery with the swingarm, sorry can not help with the razor saw question, I have a cheap thing with 3 different blades I got off ebay but never used it for metal.

Andy.
 

Tim Marlow

Little blokes aficionado
SMF Supporter
Joined
Apr 27, 2018
Messages
16,777
Points
113
Location
Somerset
First Name
Tim
Looking good Simon. Great work on the tank and swingarm.

Razor saws….I would go with X-acto every time. They work well with non ferrous metal (brass, nickel silver or copper). I would go with the finer ones (the more teeth per inch the finer they are) as they will be able to cut smaller stock. The rule is that the distance between teeth must be less than the thickness you are cutting or the saw will bind.

If you want to cut steel you will need something else though, steel will quickly blunt a razor saw. If you are only going to cut steel bar a junior hacksaw with fine blades will do the job, but for anything else I would recommend a jewellers piercing saw and a set of assorted blades.
 

simontie

SMF Supporter
Joined
Jan 13, 2010
Messages
997
Points
93
Location
Morayshire Scotland
First Name
simon
Looking good Simon. Great work on the tank and swingarm.

Razor saws….I would go with X-acto every time. They work well with non ferrous metal (brass, nickel silver or copper). I would go with the finer ones (the more teeth per inch the finer they are) as they will be able to cut smaller stock. The rule is that the distance between teeth must be less than the thickness you are cutting or the saw will bind.

If you want to cut steel you will need something else though, steel will quickly blunt a razor saw. If you are only going to cut steel bar a junior hacksaw with fine blades will do the job, but for anything else I would recommend a jewellers piercing saw and a set of assorted blades.
Thanks for the info i will keep an eye open for one
simon
 

simontie

SMF Supporter
Joined
Jan 13, 2010
Messages
997
Points
93
Location
Morayshire Scotland
First Name
simon
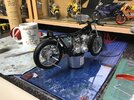
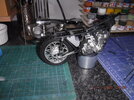
Just a trial fit need to wait for the axles to come, but starting to look like a bike :smiling4: not great picture‘s but my make shift clip on’s turned out quite well and i made a new rear brake rod linkage I also cut the throttle and ht leads down so they fit under the cross bar,
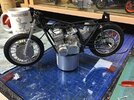
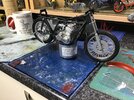
see what the weekend brings wife's a way so might get some of the body work painted or the exhausts done dreading these but they do look quite straight forward
simon 3B290A79-7A63-42DF-86D1-FD1D72E875C4.jpegB4587ACC-C3BF-469E-B608-A039D8688597.jpeg55DF0BF7-4F61-4D7D-9507-1F78A3FCC546.jpeg06D860BD-D2A1-4E44-89F8-EFE4D269BAE3.jpeg
 

Mini Me

SMF Supporter
Joined
Jun 1, 2018
Messages
10,160
Points
113
First Name
Rick
:thumb2: :thumb2:...........best I could do Simon. I have no knowledge of how folks get all these images in place of where the words go.;) The bike is looking really sharp and a clean build. Too bad most of it will be covered with all the bodywork. Keep it coming.
 

simontie

SMF Supporter
Joined
Jan 13, 2010
Messages
997
Points
93
Location
Morayshire Scotland
First Name
simon
k well just about there!!!
my axle rod arrived on Monday so I have fitted both wheels and fitted the rear end permanently shocks and wheel along with the rear brake rod I made.
DSCF6835.jpegDSCF6833.jpeg

The exhausts these had grills moulded into them so I scrapped and sanded these off along with the heavy seem I think to represent the folded cans on the road version but not on the racing pipes, all four took ages... I cut off the frame that they mount on, so I will come up with a bracket to hold them at the rear so for now they are hanging a bit low, but I also have a fairing bracket to make as well so I thought I would catch 2 birds with one stone or hope so any way
DSCF6820.jpegDSCF6822.jpeg

front end was ok really I did think it would be a nightmare but it went together well including the calliper's and mud guard mounts there is still a couple of stays to put on the mudguard at the front and rear. but looks ok and the wheel fits :smiling:

DSCF6839.jpeg
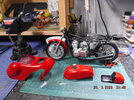
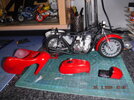
I painted all the fairings and seat over the weekend need to clear coat them so I can start the decals but all in its looking ok and finally coming together
DSCF6840.jpegDSCF6845.jpeg
simon
 

Airborne01

SMF Supporter
Joined
Mar 30, 2021
Messages
3,161
Points
113
Location
Essex
First Name
Steve
Oh Yum! I would buy that from you if it were for sale! Shaping up gorgeously!
Steve
 

Mini Me

SMF Supporter
Joined
Jun 1, 2018
Messages
10,160
Points
113
First Name
Rick
Nice looking "machine" Simon.....keep it coming. :thumb2:
 

simontie

SMF Supporter
Joined
Jan 13, 2010
Messages
997
Points
93
Location
Morayshire Scotland
First Name
simon
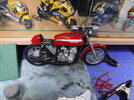
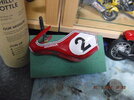
hi all couple of more pictures tank and seat now fitted with decals applied looks quite nice so far. these when on no bother and the mud guard one was the same still setting but easy to apply, the exhausts I bonded to the under side of the frame to hold them in place the fairing will also support them DSCF6858.jpeg
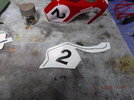
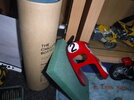
ok so the front fairing nightmare front roundel looks dog softened heated softened heated pulled and pushed but still looks like :poop: the side fairing decal was the same I have soaked them in softener and ill see if the settle down overnight but I have a feeling I am going to strip them off and air brush them instead they were huge. only fitted on one side will see what the morning brings scunnered with them tonight, (Scottish for well hacked/tired off politely speaking)
DSCF6856.jpegDSCF6861.jpegDSCF6866.jpeg

off to bed
catch up Friday or the weekend
Simon
 

Mini Me

SMF Supporter
Joined
Jun 1, 2018
Messages
10,160
Points
113
First Name
Rick
Simon....that thing looks fast while it's parked on your bench.....Gonna be a real "head turner" when completed. :thumb2:
 

tigersteve

SMF Supporter
Joined
Jan 29, 2018
Messages
511
Points
93
First Name
Steve
Looking lovely - those older fairings were such a great shape !
 
Top