- Home
- Forums
- Group Builds
- The New Group Builds (2017 on)
- The User Created Group Builds
- 2023 Builds
- Pete's wheeled cargo movers GB. August - Dec. 2023
You are using an out of date browser. It may not display this or other websites correctly.
You should upgrade or use an alternative browser.
You should upgrade or use an alternative browser.
Ian M's Scania R620 4x2 conversion to a T620 6x4 Italeri and Kit Form Services. 1/24
- Thread starter Ian M
- Start date
As a change of gawdy colour plastic to stare at I made a start on this:
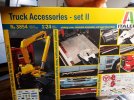
More specially the crane. I might use a couple of the other bits, time will tell.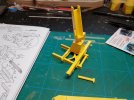 The base. Yet another fun painting exercise. Most of the parts really need painting befor they get built up but they just as much need to be built up befor they get painted!
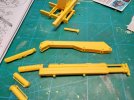 Here you can also see the highly detailed instructions sheet All in one step!
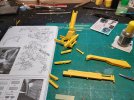
Need to find the steel and chrome paint for this one!
Thanks for looking comments as aways are most welcome.

More specially the crane. I might use a couple of the other bits, time will tell.
 The base. Yet another fun painting exercise. Most of the parts really need painting befor they get built up but they just as much need to be built up befor they get painted!
 Here you can also see the highly detailed instructions sheet All in one step!
Need to find the steel and chrome paint for this one!
Thanks for looking comments as aways are most welcome.
Jim R
SMF Supporter
You're making fine progress Ian. A good idea to first scribe the line to be cut with the razor saw. I find lighter fluid is an excellent degreaser. Just brush it on with a soft brush and it evaporates almost immediately. Deciding how much to assemble before painting is always difficult. I hate glueing together ready painted parts.
It's gonna be a stunner when it's finished.
It's gonna be a stunner when it's finished.
Due to needing some clips to hold the parts for the crane, I threw the motor in.
Oh, after I had cut the cylinder heads off and put them on the right way up. whoops.
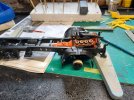
I was wondering why I couldn't get the pipe for the turbo to fit around them. lol
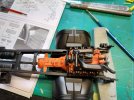
a few pipes to add yet and a couple of things need a touch-up. ( )
)
It's not going to be detailed motor wise as once build it will probably never be seen again...
So While the glue dries... lunch
Cheers.
Oh, after I had cut the cylinder heads off and put them on the right way up. whoops.

I was wondering why I couldn't get the pipe for the turbo to fit around them. lol

a few pipes to add yet and a couple of things need a touch-up. (
 )
)It's not going to be detailed motor wise as once build it will probably never be seen again...
So While the glue dries... lunch
Cheers.
Last ones for today, Better put an hour in out in the garden in a while.
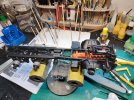
Rear hubs fitted, along with the particle filter, exhaust pipe, and diverse cooling pipes to and from the cooler
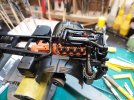
Good job its not real and I am not a fitter, the motor would be very leaky and I would be looking for a new job, lol.
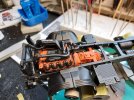
I recall seeing the corrugated flexjoints on newer Scania where Red, anyone know for sure?
Hope you like comments welcome.
Coffee then weeding Yeah lucky me...

Rear hubs fitted, along with the particle filter, exhaust pipe, and diverse cooling pipes to and from the cooler

Good job its not real and I am not a fitter, the motor would be very leaky and I would be looking for a new job, lol.

I recall seeing the corrugated flexjoints on newer Scania where Red, anyone know for sure?
Hope you like comments welcome.
Coffee then weeding Yeah lucky me...
Ditto above, looking fine.
Thanks Andy. I was looking for photos of the V8 and found out that the newer ones are orange, the earlier ones blue. So Orange it was!Looking very clean & crisp. Love the engine colour.
Thanks Paul.Ditto above, looking fine.
Must admit it looks a bit like a truck now and not just a heap of bits.
I painted a handful of plastic spoons with primer to do some colour tests...
There is a Metallic red on the way in the post, and I still have some pearl white... Thinking of either:
Pearl White over a silver base followed by a few coats of clear Red.
Or
Plain metallic red with a couple of coats clear red.
Or
Clear red over one of the following: Gold, Silver, Copper or Bronze
Hence the pile of spoons. I will post the tests and we can all have a laugh.
So I got the internal cab built so I could build the outer shell around it. The kits front panel/windscreen was a fun part as after cutting down, there are only three contact points until the rest or the front went on.
But I got there.
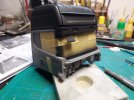 The Resin part from KFS that probably has a proper name, but I don't know it. I could guess at the top of the engine compartment bulkhead... was a bit of fettling to get in the correct place but I got there. Eventually.
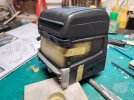
For some silly reason I forgot to prime the one side panel black, have to remember to do that.
more bits to paint...
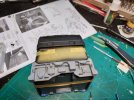
And to finish off today, a quick pic of the new bonnet resting in place.
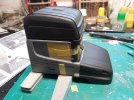
So next up. Prime the door black then start the painting.
cheers.
But I got there.
 The Resin part from KFS that probably has a proper name, but I don't know it. I could guess at the top of the engine compartment bulkhead... was a bit of fettling to get in the correct place but I got there. Eventually.
For some silly reason I forgot to prime the one side panel black, have to remember to do that.
more bits to paint...

And to finish off today, a quick pic of the new bonnet resting in place.

So next up. Prime the door black then start the painting.
cheers.
thanks Mick. It is looking promising.It's really taking shape now Ian
So I was looking through the bits and found there was a rather obvious thing I had forgotten...
The conversion set from KFS is apparently for a 'naked' tractor, that is with no side skirts and all the tanks and things on display... So
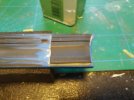 Here is sort of what I had... (I forgot to take a 'before' picture. duh!)
And this is what I needed:
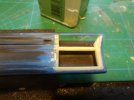
And from a different angle.

Sanded and shaped to try pick up the details in the kits skirt. The heavy scratches in the picture above have been delt with. This resulted in the cover for the particle filter needed "adapting." Next a bit of primer for them and the other odds and sods I found still to add.
Then its colour?
So far I have this.
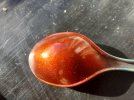
Not a great photo but actually found it quite hard to grab. Either to sunny and it was all refection, or not enough and to dark.
It is Tamiya Bronze as a base with a coat of transparent red mixed 50/50 with clear pearl then a coat or three of transparent red with increasing amounts of clear gloss.
Or shall I just paint it plain old red or black ?
cheers
The conversion set from KFS is apparently for a 'naked' tractor, that is with no side skirts and all the tanks and things on display... So
 Here is sort of what I had... (I forgot to take a 'before' picture. duh!)
And this is what I needed:

And from a different angle.

Sanded and shaped to try pick up the details in the kits skirt. The heavy scratches in the picture above have been delt with. This resulted in the cover for the particle filter needed "adapting." Next a bit of primer for them and the other odds and sods I found still to add.
Then its colour?
So far I have this.

Not a great photo but actually found it quite hard to grab. Either to sunny and it was all refection, or not enough and to dark.
It is Tamiya Bronze as a base with a coat of transparent red mixed 50/50 with clear pearl then a coat or three of transparent red with increasing amounts of clear gloss.
Or shall I just paint it plain old red or black ?
cheers
peterairfix
SMF Supporter
Now if we're me I would try a metallic red as I always seem to go down with easy route but I must admit that color does look nice
- Joined
- Apr 28, 2018
- Messages
- 6,239
- Points
- 113
- First Name
- Bob
Very interesting build Ian with a lot of painstaking hard work Ian. Will look tremendous!
In the photo it does look quite peachy orange but to the eye it is more like a blood red/deep crimson...I'm in the "go big or go home" category. That colour looks peachy.
The same process done over a copper basecoat gives an insane strawberry red! (Nope not going there).
It has, so far, been an enjoyable challenge. Bit nervous about the paint though... For me a good glossy finish is more luck than judgment lolVery interesting build Ian with a lot of painstaking hard work Ian. Will look tremendous!
