Marks A6M3 zero type 22.

Mark1

SMF Supporter
Joined
Apr 17, 2021
Messages
3,565
Points
113
Location
South london
First Name
Mark
Hoorah postman turned up today :smiling3:
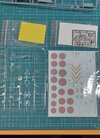
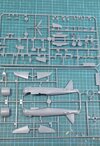
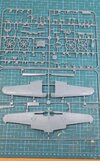
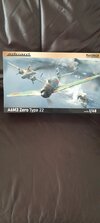
This is what ill be building, eduard 1/48 a6m3 zero type 22. Sprue shots to follow . This was a carrier and land based plane and from what i can gather they took them off carriers and stuck them on land as needed. Ive had a look to see any difference in markings and cant find anything definitive so unless someone has specific info they would like to share i will be painting it in whatever i think looks best from the painting guide .20230509_182550.jpg
 
Last edited:

The Smythe Meister

Born to be WILD....... until about 9pm
SMF Supporter
Joined
Jan 30, 2019
Messages
5,787
Points
113
Location
Devon
First Name
Andy
Very nice Mark. :smiling3:
.... and good to see your determination to get involved in this GB. ;)
 

Mark1

SMF Supporter
Joined
Apr 17, 2021
Messages
3,565
Points
113
Location
South london
First Name
Mark
Glad to be involved,havent done a wingy for a while and have had a hankering! Last plane i built was for the mustang gb and i finished that last November!!
Blimey..these floaties take bl###y ages ! :rolling:
 

Mini Me

SMF Supporter
Joined
Jun 1, 2018
Messages
10,162
Points
113
First Name
Rick
Yeah but the rewards would be huge! I could then do a Jap dio. which would add much interest to my WW2 collection of Mini Models. I'm already looking at the possability of chasing down some 1-87 scale Jap tank kits.......in the dreaded resin. :thumb2:
 

Mark1

SMF Supporter
Joined
Apr 17, 2021
Messages
3,565
Points
113
Location
South london
First Name
Mark
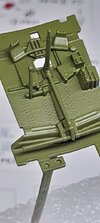
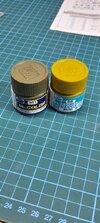
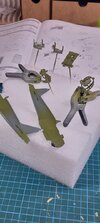
Ok well i did get the cockpit parts built,some detail sanded for etch replacement and painted....only in the wrong colour :confused: interior green mr hobby aqueous h58 or enamel c351. So i grabbed the h58 and gave it a squirt ,the colour was way off compared to the coloured etch(should have checked first i know) dug out some c351 and found they were two totally different colours,20230511_220140.jpg now i gotta spray enamel over acrylic,a coat of tamiya spray can primer and then hope i got no reactions, all was well:smiling6: the paint build is a bit thicker than i would like but all the rivet detail is still there and look a bit better tomorrow time everything dried properly and sunk a bit.20230511_220223.jpg20230511_220323.jpg
 

Andy T

SMF Supporter
Joined
Apr 26, 2021
Messages
2,034
Points
113
Location
Sheffield
First Name
Andy
Definitely a bit of a difference between those two :surprised:

I think you'd have been fine with one straight over the other though. They can both be used with Mr color leveling thinner which is usually a good indication of compatibility.
 

Mark1

SMF Supporter
Joined
Apr 17, 2021
Messages
3,565
Points
113
Location
South london
First Name
Mark
Definitely a bit of a difference between those two :surprised:

I think you'd have been fine with one straight over the other though. They can both be used with Mr color leveling thinner which is usually a good indication of compatibility.
Il do a test piece one day to see for sure but didn't wanna risk it for the sake of a coat of primer
 

The Smythe Meister

Born to be WILD....... until about 9pm
SMF Supporter
Joined
Jan 30, 2019
Messages
5,787
Points
113
Location
Devon
First Name
Andy
Il do a test piece one day to see for sure but didn't wanna risk it for the sake of a coat of primer
Yeah, I'd have done the same re the primer, just to be on the safe side,(although Andy T knows far more about the different paint types than me)...... Can't beat a quick blast of Halfords Grey to sort things out,it does settle nicely doesn't it.... as you said, despite being under all those layers,the detail is still evident :smiling3:
Looking forward to the next update ;)
 

Mark1

SMF Supporter
Joined
Apr 17, 2021
Messages
3,565
Points
113
Location
South london
First Name
Mark
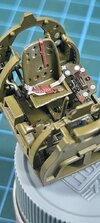
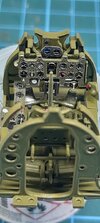
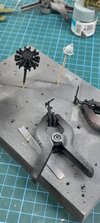
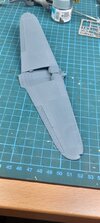
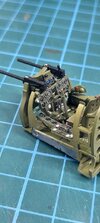
Cockpit is now put together,havent spent to much time on it as your wont see much, got some colour on the engine and mg's, wings are put together so ive got a little bit of detailing on the cockpit area of the fusalge to do and that will be getting stuck together, lacking any real location points on the fusalge halves and my require a little filler along the bottom seam but all doable without to much bother i hope.20230514_122225.jpg20230514_122318.jpg20230514_122431.jpg20230514_122500.jpg
 

The Smythe Meister

Born to be WILD....... until about 9pm
SMF Supporter
Joined
Jan 30, 2019
Messages
5,787
Points
113
Location
Devon
First Name
Andy
Excellent progress there Mark :smiling3:
Cockpit looks great...and the controls are superb!
I'm most envious of you getting to the "joining of fuselage" stage so quickly..... Mine's taking AGES :sad:
Top stuff mate ;)
 

Mark1

SMF Supporter
Joined
Apr 17, 2021
Messages
3,565
Points
113
Location
South london
First Name
Mark
Excellent progress there Mark :smiling3:
Cockpit looks great...and the controls are superb!
I'm most envious of you getting to the "joining of fuselage" stage so quickly..... Mine's taking AGES :sad:
Top stuff mate ;)
Thanks mate, only got there quick cos this is a tiny cockpit and no crew to worry about.
 

Mark1

SMF Supporter
Joined
Apr 17, 2021
Messages
3,565
Points
113
Location
South london
First Name
Mark
Added the mg's, not worried aboit touching up the top as its not seen.
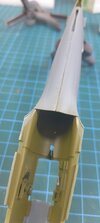
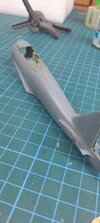
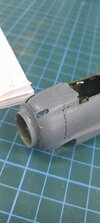
The fusalge has gone together, a bit of filler is required top and bottom,gonna lose a bit of rivet detail i think but it is so fine i think i would probably lose some just with the paint anyway, my main worry was the top nose section as any glue ooze here would have made a right mess of things but thats gone ok, an earlier dry fit would suggest the cockpit should go in ok .20230514_143232.jpg20230514_143134.jpg20230514_143111.jpg20230514_143056.jpg
 
Top