Model photos the easy way

Jakko

Way past the mad part
SMF Supporter
Joined
Apr 28, 2018
Messages
10,906
Points
113
First Name
Jakko
I thought I’d write something about my methods for photographic models. Simple, straightforward, and without expensive equipment or complicated adjustments afterward.

Let’s start with where I take model photos. About ten, fifteen years ago, I bought a folding photo studio in a local photography shop. I don't remember what it cost, but if I look online I see comparable ones for anywhere between €15 and €85. The more expensive ones generally include suitable lamps, which makes them the better buy because lamps like those will set you back a few tenners each as well. A few years ago, I also purchased one of those modern, circular, selfie lamps, intended for putting a phone inside the ring with a little clamp, so that you can film yourself. It cost me €20 at Aldi, when they happened to have them, but I’ve also seen them for similar prices in other shops and you can get them online too for that kind of money. (Note that you will generally also need a USB charger for it — if you’ve got one of those already, just use that, of course. Be warned, though, that if you use a cheap USB charger, don’t leave it plugged in all the time. Yours wouldn’t be the first to spontaneously catch fire.) I did have a problem in that I couldn’t actually put the selfie lamp anywhere, because I didn’t have room to set up the little tripod that came with it. However, a few months ago I remembered that there are flexible mounts for photography, basically bendable lengths of metal. One of those cost me another €20, but I could then neatly screw the lamp onto it.

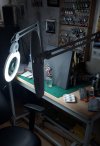
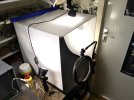
Everything together, that looks like this:
IMG_0962.jpeg

One lamp on each side, the third hangs above it on a length of wire :smiling3: (In a V-shape, wrapped around two things some distance apart so the lamp won’t twist or sway.) They all shine through the white cloth of the photo studio to diffuse the light: if you let them illuminate the model directly, you get very harsh shadows. This is also why the ones on the side are pointed up, as that also reduces the harshness of the shadows.

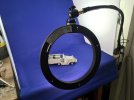
The selfie lamp is at the front, of course, on its flexible mounting so it can be easily moved. An important warning about that: grasp the mounting rod to do that, not the lamp itself! That is usually made from cheap, thin plastic and that will break if you apply even a little force to it. One guess as to how I know this :smiling3: (That’s why there’s a cable tie around the lamp, near where it screws into the mounting.) These lamps have a white plastic cover over the LEDs in them, so they emit diffuse light without the need for a cloth cover.

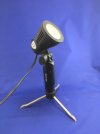
The main photo lamps are cheap ones:
IMG_0973.jpeg

These came with halogen bulbs, but those stop working if you leave them on too long and accidentally knock them over (as I found out when they were used to illuminate something else entirely), so then I put LED lights in them instead. Those can be purchased in a variety of colours, but for photography you want them as white as possible — which is to say, with as a high a colour temperature as you can get. These are 5300 kelvin (“cool white”) and use 7 watts, which makes them bright enough that you don’t want to be looking directly into them.

The colour of the selfie lamp can be adjusted using a button on the cord, but I have it set to the whitest it will go.

I put all of the lamps into one extension cord, so that I can use the button on that to turn them all on and off at once. Well, that really means turning three on and all four off, because the selfie lamp doesn’t turn on automatically when the power is switched on, so you have to press a little button on the cord first. But after turning on each lamp separately for years, this is still much easier :smiling3:

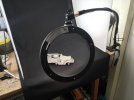
In this type of photo studio, the background is detachable. It’s fixed with two strips of velcro, one at the top in the back and one at the bottom of the front flap, that hangs down off the table. The studio came with a cloth that’s white on one side and blue on the other, the black one is home-made by buying a piece of black cloth and some velcro in a shop and putting them together with a sewing machine. In hindsight, I should have bought a finer weave, though.
IMG_0963.jpegIMG_0968.jpeg

Without the replacement LED bulbs, I think all of this cost me something like €125. I don’t think you can assemble something comparable for a lot less than that, but the selfie lamp at the front isn’t absolutely required — and if you have the room to set up the little tripod it usually includes, you can save yourself the money for the flexible mounting that I do need. The third lamp at the top also isn’t totally required, but it does help a lot to reduce the harshness of shadows and to make the lighting more even.

That, really, is the most important consideration: the ability to light your model evenly, and preferably indirectly. Using light from more than one side, you partly remove shadows, and diffuse lighting means the shadows won’t be as sharp.

You can also achieve this with a lot less gear. By photographing in daylight — outside or at a window — you’ve got a good colour of light (sunlight is 5,000–10,000 K, depending on cloud cover), but don’t do it in the full glare of the sun, because you will get harsh shadows. Wait until the sun shines through a cloud, so that it’s light outside but without sharp shadows, or put up a white bedsheet so your model is in the shade of that. In daylight, you can even light the model from two sides by putting up a white board (a piece of plastic, chipboard, even styrofoam) on the side that the sunlight doesn’t come from. Aim it downward a little so that it reflects the light to the model. This works much better than you might expect, but you will have to find a good way to support it, so that it doesn’t fall onto the model in the first gust of wind …

A background is also easy to get if you go to a shop that sells paper for crafting, which probably will have a large sheets (A2 size or so) of thin card in various colours, or of course a piece of cloth that you may already have around the house. Important for the background is that it’s either a single, neutral colour that isn’t too bright (don’t go for vibrant yellow or something) or has a gradient on it. Don’t use backgrounds with patterns, pictures, or similar because they will distract from the model, and it can even get lost in the background noise.
 
Last edited:

Jakko

Way past the mad part
SMF Supporter
Joined
Apr 28, 2018
Messages
10,906
Points
113
First Name
Jakko
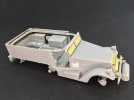
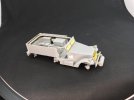
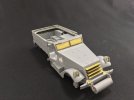
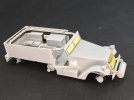
On to actual photography. In the photos above, you can already see the M2 halftrack that I’m currently working on (among other things). I’ll use this as an example for taking pictures and making simple adjustments to them.

I just use an iPad to photograph models with, not a digital single-lens reflex (DSLR) camera that has a hundred thousand settings that all affect each other and which take ages to master. Any phone or tablet of the last ten years that has a reasonable camera on board should give comparable results (for the record, my current iPad is from 2016).

First up, two pictures to show a small, but as far as I’m concerned, important difference in approach:

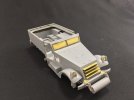
IMG_0964.jpegIMG_0965.jpeg

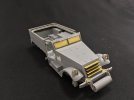
For the first, I photographed the model from up close so that it fits neatly in the picture. The second photo was taken from a bit further away, with the model filling less of the picture (you can even see the edge of the selfie lamp in the lower corners and the white sides of the photo studio in the upper ones).

The first method is the better one if you want a picture that can be used as large as possible, for example if it is to be printed with a magazine article. The second is, as far as I’m concerned, the better if the picture is intended for use on the Internet — because for that, it doesn’t need to be all that big, so you can just crop it afterward to remove everything that shouldn’t be in frame. I will return to that later — first we’ll look at the tools your phone, tablet, or camera offers to help you take photographs.

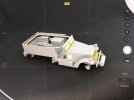
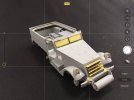
Here is what I actually saw on my iPad’s screen when I took that second photo:

IMG_0966.jpeg

The most important thing is the four lines. Learn how to use those! If you don’t see them on the screen when you open the camera app, you can switch them on: on an iPad or iPhone, go to the device’s settings, scroll down until you find the settings for the Camera, and there, switch on the option called Grid; I don’t know how to do this on an Android device, but I would assume it works in a similar manner. DSLR cameras also all have an option to show the grid lines, so consult the manual if they’re not visible on the screen.

Those lines, you see, serve to help you make good compositions. First of all, they help to get the subject centered: it’s much easier to get it in the centre of the middle rectangle than in the centre of the whole screen without the grid lines. Also, you can use them to get your subject nicely horizontal or vertical: just put one of the grid lines along a line on the model. You can always then move the camera to improve the composition, of course.

But that’s not all. You will get better-looking pictures if you put the point you want to draw attention to, on the intersection of two of the lines, because the eye will get drawn to it more easily. Yes, even when those lines aren’t there, like on the actual photograph :smiling3: You can also put the primary focal point on one intersection and another notable part on the diagonally opposite one. Furthermore, you can use them to balance the composition, especially when taking pictures of things like dioramas: set up the camera so that there is something big in the upper left rectangle, for example, and an empty area in the lower right one. (To be honest, the photo above is not a very good example, because only the intersection at lower right is on a logical part of the model, namely the front axle, but that on the upper left is on nothing in particular, somewhere in the middle of the rear body. The picture would have been better if I had taken it from a bit further away and turned slightly, so that the upper left intersection would have been closer to the rear corner of the body.)

Also note I have HDR (High Dynamic Range) mode switched on, as it says at the top of the picture. On an iPad or iPhone, you turn this on by pressing the HDR “button” at upper right: everything that’s yellow, is on, and white is off. Here from top to bottom: “live” pictures is off, HDR is on, flash is off (which happens automatically when HDR is on, because the two are mutually exclusive), and the button with the two arrows is to switch between the normal camera and the selfie camera. You generally don’t need that last one for taking model photos, is my experience :smiling3: You will not normally want to take live pictures either, because a model doesn’t usually move when you’re taking photos of it (live pictures are “moving” photos, kind of like a very short bit of film — which can be useful if you’re photographing something that’s moving, but not at all for entirely stationary subjects).

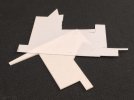
What the iPad does in HDR mode, is take three photographs one right after the other: one is exposed normally, one is overexposed, and one underexposed. It then combines those three into a single photograph of normal exposure, which often looks better than a non-HDR picture. This is mainly useful if you have parts in a light colour which easily get overexposed, like pieces of white plastic card and strip. A lot of detail in these just disappears in a normal photograph, even if you can see it on the real thing. To illustrate:

HDR off:

IMG_0986.jpg

HDR on:

IMG_0987.jpg

These two pictures were lit exactly the same, the only difference was whether HDR was off or on.

Unlike on a DSLR, you can’t adjust exposure time on an iPad, but what you can do, is pick the point at which the camera will focus and which it will use as the basis for lighting the picture. You do this simply by tapping on the screen at the spot you want it to use for this. Here’s a photo of the halftrack, diagonally from the front:

IMG_0977.jpeg

I took this without tapping the screen, so this is how the camera software on the iPad thinks the picture should be lit and focussed — which usually means it picks the centre of the photo for that.

Next, after a tap on the grille at the front, the screen looked like this:

IMG_0978.jpeg

As you can see, there is now a yellow square with a sun next to it, and this will stay on-screen (but less bright after a few second) so you can always see at which point the iPad is focussing. I took a photograph right after, which looks like this:

IMG_0979.jpeg

As you can see, it’s darker than the previous one, because the grille catches a good deal of light, causing the iPad to make the photo darker to keep things balanced. Less obvious is that the background is out of focus a little more, but you will see that better if you compare this to the next picture, which took after tapping on the rear wall of the model:

IMG_0980.jpeg

Here, the rear of the vehicle is in focus but the grill is just out of it, while the grille was in focus in the last photo. This picture is also lighter again overall than the previous one, because the inside of the vehicle’s rear area is darker than the bonnet, so the software compensates by exposing the picture some more so that the part I tapped, will end up lighter.
 
Last edited:

Jakko

Way past the mad part
SMF Supporter
Joined
Apr 28, 2018
Messages
10,906
Points
113
First Name
Jakko
Once you’ve taken some photos, there is a major advantage to using a tablet or phone: you can very easily tweak them on a device itself. Like I mentioned before, the pictures of the halftrack from the side are not very well-composed. Here’s one of them again:

img_0965-jpeg.507478


Parts of the lamp and the photo studio are in the frame, and the halftrack itself is at an angle which makes it look like it’s sagged at the back. But in the camera app, by pressing the small picture on the right, below the big round button that takes photos, you can view the photos you took. By tapping the Edit button there, you get to a screen in which you can tweak the photo. (Again: this is how it works on an iPad or iPhone — an Android device should be able to do this too, but don’t ask me how.)

I won’t be delving into all the various things you can do here, only on how to enhance the composition with some simple adjustments. You can make all kinds of other changes, to the photo’s colours, its exposure, balance, saturation, warmth, definition, and tons of other stuff, but it’s best if you try those for yourself. Important to know here is that on an iPhone or iPad, you can always return to the original picture (again: possibly on Android too, but I have no experience with it). In other words: you can never really ruin a picture, because you can always remove all of the changes you made to get back to the photo as you actually took it.

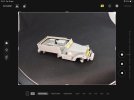
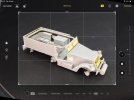
Right, in order to crop a photo, you tap on the symbol with the two arrows in the middle left of the screen:

IMG_0981.jpeg

There’s a yellow dot under it here to indicate it is active. I also tapped the rectangular symbol at the top of the screen, which is yellow here, so that a bar appeared at the bottom with options for the height-width ratio. (Note that the text on these screenshots is in Dutch, because that’s what my iPad is set to and I originally wrote this to post on a Dutch forum. As there is only a little text, I didn’t bother re-taking the screenshots with the language set to English.) In this bottom bar, I tapped ORIGINEEL (“Original”) to select that — what this does, is lock the proportions of width to height to the same as in the original photo. In practice, this means that if you crop the photo to reduce its width, for example, then the height will follow along automatically so you don’t get a very narrow picture. If that is what you want, you should set it to FREEFORM — or just not tap the rectangle button at all, because freeform is the default.

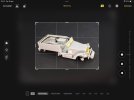
Anyway, what you can do on this screen is crop the picture to remove the parts you don’t want to have on show. You do this very simply by pressing on the thicker parts of the frame (the corners and in the middle of each side), and then dragging towards the centre of the photograph. The picture itself will remain on-screen at the same size, but the frame will become smaller to indicate the area that will be left after cropping.

IMG_0982.jpeg

Note that the grid lines appear here as well, so you can use those in the same way as when you took the photo.

When you let go of the thick part of the line, the app will zoom in on the cropped part after a bit:

IMG_0983.jpeg

This is only so you can better see what you’re doing. If you cropped too much, you can put two fingers on the photo and move them closer together, which makes the photo smaller within the frame. You can also move it around in the frame by putting one finger on the photo and moving it, which drags the photo along. By combining these two, you can improve the composition inside the frame — and, of course, you can also use the thick lines again to make the frame smaller once more.

When you like what you have, just press on DONE at the upper right (here: GEREED, “Ready”) and the changes will be made to the photo:

IMG_0965 cropped.jpeg

(Or, of course, if you don’t want to save what you changed, you press Cancel in the upper left corner — here: Annuleer — to keep the photograph as it was.)

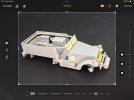
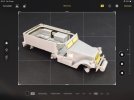
Still, the picture isn’t that great yet, because as I mentioned before, the halftrack is too much at an angle. Luckily that is also easy to correct, again by tapping Edit and again pressing the symbol on the left with the two arrows. Now, though, we won’t use the thick lines on the frame but the slider on the right of the screen. There are three round symbols there: a circle with a line through it and two trapeziums, also with lines through them. The circle is for rotating the photograph, the other two to change its perspective. By tapping the circle, you can then move your finger up or down the slider on the right, which will rotate the photograph:

IMG_0991.jpeg

Inside the round symbol it will show the number of degrees by which the picture has been rotated, and the grid lines appear once more to help you get everything straight. In the screenshot above, it has been rotated 9 degrees to the right (it says −9, because in mathematics, rotating to the right is negative), but I was actually looking at the left vertical grid line because I just rotated until the opening for the door in the cab was approximately parallel to it. This makes the photo a lot better already, because the model doesn’t look as squat as it did before.

Only thing is that it’s now out of balance a bit: the model is too far down, with a lot of black visible above it but not so much below it. That is easily solved by dragging it up a bit with one finger, as I explained above:

IMG_0992.jpeg

You can see the difference quite well by looking at the position of the model relative to the grid lines.

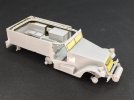
Then just hit Done and the photo looks like this:

IMG_0965 rotated.jpeg

I’m much more pleased with this than with the original photo :smiling3:

This returns to what I was saying at the start: by taking the photo from a bit further away, so that you have more of the background showing, you’ve got the space to make these tweaks. If you rotate a photograph without cropping it first, it will also automatically get zoomed in on to prevent totally empty corners from appearing. That could well result in parts of the model ending up outside the frame, which, of course, you probably don’t want. But by leaving some extra space around the model when you take the pictures, you can easily avoid this.
 
Last edited:

adt70hk

I know its a bit sad but I like quickbuild kits!!!
SMF Supporter
Joined
Sep 4, 2019
Messages
9,523
Points
113
First Name
Andrew
Thanks for sharing Jakko. Just had a quick skim read and looks very interesting.

Will have a proper read when I get a bit more time.

Andrew
 

Jim R

SMF Supporter
Joined
Apr 27, 2018
Messages
13,799
Points
113
Location
Shropshire
First Name
Jim
Very useful and well presented Jakko. Thanks for taking the time to post.
My set up is similar. A booth like yours, three lights plus an Aldi ring light. I do like the arm that holds the ring light. I must look into one of those.
 

Tworrs

SMF Supporter
Joined
Jan 6, 2022
Messages
1,296
Points
113
Location
New Zealand
First Name
Garry
Very well written Jakko, I look forward to seeing some amazing photography from the members here.
 

Jakko

Way past the mad part
SMF Supporter
Joined
Apr 28, 2018
Messages
10,906
Points
113
First Name
Jakko
Thanks, guys :smiling3:

I ought to take more time taking the photos and editing
Those things shouldn’t take very long. After you’ve done it a few times you’ll known what to press and it’ll be very quick, but your photos will be much better for it :smiling3:

I do like the arm that holds the ring light. I must look into one of those.
Thinking about it, it’s probably better than the little tripod, because with this arm I can get the light down to table level, instead of some distance above it, so I can take pictures horizontally if I want to rather than only diagonally from above. I’d consider it a worthwhile investment if you’ve got a ring lamp.
 

Jim R

SMF Supporter
Joined
Apr 27, 2018
Messages
13,799
Points
113
Location
Shropshire
First Name
Jim
it’s probably better than the little tripod,
Definitely. My little tripod is of little use for the reasons you mention. I don't seem to be able to find a flexible mount like yours.
 

David Lovell

SMF Supporter
Joined
Apr 27, 2018
Messages
1,508
Points
113
Location
Poole Dorset
First Name
David
Thanks Jakko intresting reading almost a different hobby in itself ,but way over the top(my head)for me ,I'll stick with my phone to tablet to here but as I said thanks for a intresting article. Dave
 

Jakko

Way past the mad part
SMF Supporter
Joined
Apr 28, 2018
Messages
10,906
Points
113
First Name
Jakko
I don't seem to be able to find a flexible mount like yours.
I found one on Amazon.nl. It’s apparently a “Hersmay 50 cm Magic Arm” but I can’t find it on Amazon.co.uk — other Hersmay items, yes, but not this one.

Did your lamp come with a swivel mount that lets you turn it 90°? I screwed that into the top of the “Magic Arm” and then the ring lamp onto that. Maybe adding that on top of the tripod will let you set the lamp on its side?

way over the top(my head)for me ,I'll stick with my phone to tablet
The whole idea behind these posts is to show that you don’t need more than a phone or a tablet to take quite decent model photos, and that it’s little effort to make small adjustments to them right on that device, which will result in better photos :smiling3:
 

David Lovell

SMF Supporter
Joined
Apr 27, 2018
Messages
1,508
Points
113
Location
Poole Dorset
First Name
David
I found one on Amazon.nl. It’s apparently a “Hersmay 50 cm Magic Arm” but I can’t find it on Amazon.co.uk — other Hersmay items, yes, but not this one.

Did your lamp come with a swivel mount that lets you turn it 90°? I screwed that into the top of the “Magic Arm” and then the ring lamp onto that. Maybe adding that on top of the tripod will let you set the lamp on its side?


The whole idea behind these posts is to show that you don’t need more than a phone or a tablet to take quite decent model photos, and that it’s little effort to make small adjustments to them right on that device, which will result in better photos
 

David Lovell

SMF Supporter
Joined
Apr 27, 2018
Messages
1,508
Points
113
Location
Poole Dorset
First Name
David
I dont think I denied that ,I thanked you for a interesting article just said ill stick with my tablet and phone ie because I dont need more than my tablet and phone(your quote) ,ie photo booth selfie lamp spotlights sorry my thanks seem to have made you so defensive
 

Scratchbuilder

SMF Supporter
Joined
Jul 2, 2022
Messages
1,993
Points
113
Location
Luton
First Name
Mike
Thanks for an interesting article Jakko... I bet a lot of us are sitting after reading it with red faces wondering where on earth they put their camera's. I for one should hang my head in shame.... When I started to post photos they were all taken with the camera on a tri-pod, then edited in Photoshop - then I got lazy and just belted them out with the phone camera and the editing went clear out the window....
Thanks for bringing my shame to the fore..... I will improve I promise...
 

Jim R

SMF Supporter
Joined
Apr 27, 2018
Messages
13,799
Points
113
Location
Shropshire
First Name
Jim
I have managed to find and order something very similar. I'll let you know when it arrives if it does the job. Looks OK and worth a punt at £13.06 :smiling:
 

rtfoe

SMF Supporter
Joined
Apr 29, 2018
Messages
7,532
Points
113
Location
Malaysia
First Name
Richard
Thanks for the article Jakko, it will help many here. Ever since handphones were equipped with a sophisticated camera, I've done away with complicated equipment and just snap from my work table which already has the room light for fill ins, an overhead LED and a side table lamp with white light. For the backdrop I use my trusty old rolled up blue or white card board and pegs to hold it down. Any parts I need highlighting I just use a piece of foam board as a reflector. I snap away loosely for a larger depth of field and let the HP do the rest. Crop it later for any parts I want to feature.
Larger dioramas are shot outside in 9 to 10am sunlight bounced off a wall so I don't need any diffusers. My monkey ambush shots were done like that. Technology has come a long way that even videos are shot with HPs. I never thought it would come to this as I'm used to large format movie cameras on sets...nothing like the sound of a camera rolling.
Your article definitely will open eyes to the art of lighting a perfect photo. I would still edit as I always did for print because that's another whole can of worms.

Cheers,
Wabble
 

Ian M

Administrator
Staff member
Administrator
Moderator
SMF Supporter
Joined
Dec 14, 2008
Messages
19,796
Points
113
Location
Falster, Denmark
First Name
Ian
Thanks for a very illuminating article Jakko. (see what I did there).
I confess that 99% of my photos are taken and edited on my phone's camera and software. Its always handy, can take better photos than the 'propper' camera that cost three times an much as my phone. If I make the effort I use a reflector and or shadow board. And if I have room the infinity background/floor sheet of A0 paper.
I found the setting up of stages, tripods lights and all the other 'bits and bobs' just too much faffing about.
 

Jakko

Way past the mad part
SMF Supporter
Joined
Apr 28, 2018
Messages
10,906
Points
113
First Name
Jakko
Setting up all this kind of stuff is something I wouldn’t want to be doing every time either, which is why I’ve got it all there on the table permanently :smiling3: It’s to my left rear when I’m working on a model, so when I’ve got something I want to photograph, I just take a step back, switch on the lights, and take some pictures.
 

PaulinKendal

SMF Supporter
Joined
Jul 13, 2021
Messages
1,077
Points
113
Location
The Lake District
First Name
Paul
Really interesting post, Jakko, ta.

I just use my modelling lights and a sheet of Styrofoam propped up as background - quick and easy, but not as good results, for sure:

20240507_100449.jpg
I wasn't aware of the HDR function, so I've just tried it.

Here's a picture with the standard settings:

20240507_095902.jpg
And here's one using HDR:
20240507_095940.jpg
Apart from the smartphone shake on the second one (too much coffee), I can't see much difference, tbh.

On my android phone HDR is only available in the auto set-up. I tend to use 'pro' settings, allowing me to adjust metering (but no HDR). And what I do is stop the exposure down about one step, to saturate the colours. I think it looks closer to how the figure looks to the naked eye in 'normal' lighting. Other viewers may think it looks horribly dark:
20240507_100350.jpg
 
Top