Rashida

Tim Marlow

Little blokes aficionado
SMF Supporter
Joined
Apr 27, 2018
Messages
16,777
Points
113
Location
Somerset
First Name
Tim
Thanks for the very kind comments, one and all.

Tim, that's a VERY kind compliment indeed - and I'm far from convinced it's in any way deserved!

But I really do appreciate your thoughtful comments about the shield. I agree she looks best in that three-quarter view - I think it may be because her eye sockets (and the bridge of her nose) look darker in the other shots. I have wondered whether I should lighten these areas a touch? But then, in the three-quarter shot the colouration is fine, and in the flesh she looks good from all angles too. Again, I must emphasise - to myself as much as anyone else! - that I'm painting this to be viewed for real, not on camera.

Re. the shield - I'm definitely not going to use much metallic paint on it, and try to keep my palette relatively pale to contrast with her dark face. Still undecided on actual colours though. Omit it? I don't think so, although I can decided once it's painted up.

Thanks again for your interest, folks.
Of course it’s deserved….and you not thinking it is deserved is the mind set that is pushing your work right up there with the best. Compare your paint job with the box art….… you are selling the sculpt far more successfully than the manufacturer.

I think the reason I’m not sure on the shield is that I can’t think what colour I would paint it myself ;) Too dark and you lose the shape of the head and the undeniable impact that has. On the other hand, too light and it will pull your attention away from her face and dilute the over all impact. Perhaps a mid green grey stonework effect might work best? It would frame the figure, like your backdrop does, and bring out the skin tones? Your model, your rules, of course, and you haven’t put a foot wrong yet……so I am looking forward to your choice.
 

PaulinKendal

SMF Supporter
Joined
Jul 13, 2021
Messages
1,059
Points
113
Location
The Lake District
First Name
Paul
Of course it’s deserved….and you not thinking it is deserved is the mind set that is pushing your work right up there with the best. Compare your paint job with the box art….… you are selling the sculpt far more successfully than the manufacturer.

I think the reason I’m not sure on the shield is that I can’t think what colour I would paint it myself ;) Too dark and you lose the shape of the head and the undeniable impact that has. On the other hand, too light and it will pull your attention away from her face and dilute the over all impact. Perhaps a mid green grey stonework effect might work best? It would frame the figure, like your backdrop does, and bring out the skin tones? Your model, your rules, of course, and you haven’t put a foot wrong yet……so I am looking forward to your choice.
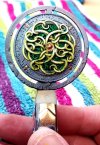
Thanks again, Tim. Interesting thoughts on the shield - at the moment I'm considering a pale stone effect (possibly uneven airbrushed layers of Vallejo Wolf Grey and Brown Sand - one is cool, the other warm) for the rim and the script, the snakes in pale yellows/buffs and behind and between them 'foliage' in muted shades of green. Finished with oil washes to bring out some detail. Maybe even some chipping, to show the raw stone beneath the paint on the snakes? How would I do that?

And that could all change before I next sit at the bench, of course!
 

Tim Marlow

Little blokes aficionado
SMF Supporter
Joined
Apr 27, 2018
Messages
16,777
Points
113
Location
Somerset
First Name
Tim
Thanks again, Tim. Interesting thoughts on the shield - at the moment I'm considering a pale stone effect (possibly uneven airbrushed layers of Vallejo Wolf Grey and Brown Sand - one is cool, the other warm) for the rim and the script, the snakes in pale yellows/buffs and behind and between them 'foliage' in muted shades of green. Finished with oil washes to bring out some detail. Maybe even some chipping, to show the raw stone beneath the paint on the snakes? How would I do that?

And that could all change before I next sit at the bench, of course!
For chipping look up the “sponge” technique.
Here is one vid, I’m sure there are others…


I think it would be more useful to you here than the hairspray technique.
 

PaulinKendal

SMF Supporter
Joined
Jul 13, 2021
Messages
1,059
Points
113
Location
The Lake District
First Name
Paul
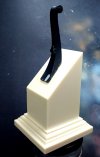
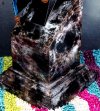
And the plinth. I had to adjust the black scroll to get it sitting upright. Now pinned, glued and Miliputted. I'll probably finish this as black marble, although the plinth has a subtle woodgrain finish - but a marble paint-effect on wood seems entirely appropriate to me.
20220705_154204.jpg
 

adt70hk

I know its a bit sad but I like quickbuild kits!!!
SMF Supporter
Joined
Sep 4, 2019
Messages
9,496
Points
113
First Name
Andrew
That shield really is rather good Paul. Top notch work indeed.

Very well done.

Andrew
 

PaulinKendal

SMF Supporter
Joined
Jul 13, 2021
Messages
1,059
Points
113
Location
The Lake District
First Name
Paul
That shield really is rather good Paul. Top notch work indeed.

Very well done.

Andrew
Thanks Andrew. It helps hugely that it's such a good sculpt. I'd say the first step towards painting a good mini is to select your raw material very carefully!
 

PaulinKendal

SMF Supporter
Joined
Jul 13, 2021
Messages
1,059
Points
113
Location
The Lake District
First Name
Paul
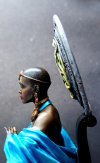
So this is very nearly done. Unfortunately the shield mounted at a drunken angle, so I need to saw it off and re-mount it standing upright. But I'm off on my hols for a week, so you'll just have to be patient - and so will I!
20220708_071432.jpg
 

rtfoe

SMF Supporter
Joined
Apr 29, 2018
Messages
7,509
Points
113
Location
Malaysia
First Name
Richard
I was thinking of a single coloured burnished pewter shield that is neutral so the figure will stand out which is not very far from the background you had in the early images. But you've already made your choice and it looks cool, Paul.

Cheers,
Richard
 

Tim Marlow

Little blokes aficionado
SMF Supporter
Joined
Apr 27, 2018
Messages
16,777
Points
113
Location
Somerset
First Name
Tim
Bit of a blow there Paul. Looks like an easy fix though. I’d be tempted to remount the shield using brass or copper wire fitted into holes drilled into both parts. That way you can glue the wire into one part and then adjust the angle until you are happy with the orientation of the other part. It will also strengthen what will be a weak and vulnerable joint on the figure.
 

Jim R

SMF Supporter
Joined
Apr 27, 2018
Messages
13,726
Points
113
Location
Shropshire
First Name
Jim
It does look as if the joint is a weak point so Tim's idea may well be a good one.
Enjoy your holiday.
 

PaulinKendal

SMF Supporter
Joined
Jul 13, 2021
Messages
1,059
Points
113
Location
The Lake District
First Name
Paul
Bit of a blow there Paul. Looks like an easy fix though. I’d be tempted to remount the shield using brass or copper wire fitted into holes drilled into both parts. That way you can glue the wire into one part and then adjust the angle until you are happy with the orientation of the other part. It will also strengthen what will be a weak and vulnerable joint on the figure.
I was thinking the same, Tim. That's what I'll do. Really annoying, as I should have constructed it properly first time - I rather threw it together last night, hoping to finish it before I went away. Lesson well learnt - you must maintain attention to detail right to the very finish!
 

PaulinKendal

SMF Supporter
Joined
Jul 13, 2021
Messages
1,059
Points
113
Location
The Lake District
First Name
Paul
I was thinking of a single coloured burnished pewter shield that is neutral so the figure will stand out which is not very far from the background you had in the early images. But you've already made your choice and it looks cool, Paul.

Cheers,
Richard
Thanks Richard. The moulding definitely identified the shield as stone (it's not really a 'shield' at all). To be honest, I am still wondering whether she would have looked better without it. I'm sure the recipient would be pleased with it either way.
 
Top