Revell 1/32 Bf-109 G-10 Update 3

C

CharleyGnarlyP290

Guest
My next project.


I must say that I am quite excited about this one. First off, I haven't built a 1/32 scale plane in 30+ years. Second, this will be my first foray into after market stuff in about 25 years. Third, and most importantly, I am going "outside the box" on this one. Literally.


I am not going to be using the kit decals, or paint schemes. I have a little some thing special in store.


View attachment 119133


View attachment 119134


View attachment 119135


View attachment 119136


20150909_191017_zpsxzalcs7v.jpg

20150909_191321_zpsk2joek1m.jpg

20150909_191339_zpsg8vprdeg.jpg

20150909_191500_zpsa0sn5tle.jpg
 
D

dubster72

Guest
I have this partially built in my stash, so I'll be looking for inspiration Charley!


As to the paint scheme ... perhaps no paint at all? ;)
 

tr1ckey66

SMF Supporter
Joined
Mar 6, 2009
Messages
3,686
Points
113
First Name
Paul
Got to be 'Red 5' for me - spinner spiral, mottle, fuselage band all cool. That said there's a few corking schemes on that EagleCal sheet.


I definitely will be watching this. Got a couple of G6s myself and will probably purchase this at some later date.


Good luck with the build Brett you've got yourself some cracking modelling ahead of you.


Cheers


Paul
 

monica

“When there's no more room in hell, the dead will
SMF Supporter
Joined
Oct 30, 2013
Messages
15,111
Points
113
Location
Melbourne
First Name
monica
looks nice,will be waiting to see it on the bench very soon,and what paint schemes.,decals you use, :D
 
C

CharleyGnarlyP290

Guest
Thanks, amigos.


Once I get my ducks in a row, I will post what scheme I am using. Just wanted to do something unique, yet historically accurate.
 

colin m

Moderator
Staff member
Moderator
SMF Supporter
Joined
Dec 26, 2008
Messages
8,608
Points
113
Location
Stafford, UK
First Name
Colin
There's a lot of plastic in those bags. I'm looking forward to seeing this one develop.
 
T

tommy1drop

Guest
Nice choice Brett, looking forward to seeing more of your build.
 
C

CharleyGnarlyP290

Guest
Construction has begun on the Revell Bf109 G-10.


I have been working on the first few steps which involves putting together and painting the cockpit and instrument panel. So far, so good. There are a few minor things that need attention and I will deal with those in the following photos.


The first thing to do is cut the parts off the sprues. One of the first items, are the rudder pedal. As you can see below the parts aren't molded all that great. Quite poorly in fact. But, with a samll bit of work they look fine after they are cleaned up. And I discovered they look quite good with paint. More detail than I first thought.


View attachment 119646


the floor of the cockpit is molded very nicely. Somewhere along the line one of the pegs that the rudder pedal attaches too, was broken off, so I had to get creative. Those extra Panzer IV spare road wheel brackets came in handy.


View attachment 119647


There are a few small, finely detailed parts that attach to the cockpit sidewalls, but all of those were perfect. After all of that was assembled, I turned to the instrument panel. First I painted it then brushed a fine layer of Future on it in preparation for the decals then gathered up everything I need.


View attachment 119648


Here is the result after a few coats of Solvaset.


View attachment 119649


So, there it is so far. If the kit continues on as is, it should be a fun, pleasant build.

Screenshot_2015-09-10-20-36-30_zpsbiogvr5g.jpg

Screenshot_2015-09-10-20-41-00_zpsd3uytsie.jpg

20150914_194938_zps4f9khg8g.jpg

20150915_163311_zpsqr1nza3y.jpg
 
D

dubster72

Guest
There is a lot of flash on this kit - the undercarriage legs spring horribly to mind!


Watch out for the fuel line though - mine was broken on the sprue & Revell wouldn't replace it :sad:
 
C

CharleyGnarlyP290

Guest
Dubster72, I was also concerned about the fuel line before I got the kit. Clear plastic is usually so brittle it breaks easy. Fortunately, mine was intact on the sprue, and when I cut it off, I did so very carefully and managed to keep it in one piece.


I will have to check the other parts you mentioned. I hadn't noticed them having flash.
 
Joined
Apr 27, 2014
Messages
105
Points
43
Good start! I have this kit partially built here (there's a thread on this site somewhere). I also bought the Barracuda exhausts set - they are worth the money alone!
 
C

CharleyGnarlyP290

Guest
Thanks guys.


I hadn't realized until today how long it's been since I posted any updates about this project.


For starters, I am not getting quite as much done as I would like due to a major remodeling project in my house, but I am getting some done.


So far, this kit is going together nicely. I have to say that aircraft model kits are a far cry from my former forays into model building. In the '80s, when I was building with some regularity, I avoided aircraft kits at all costs. I do NOT like filling and sanding and all of that, and it seemed that aircraft kits of yore were quite needy in this area. Not so anymore. Kit manufacturing has come a long way.


First up is an exhaust comparison photo. On the left is the kit part, and on the right is the Barracuda resin replacement. Not too much of a difference from this angle.


From this view you can see that the resin part is a little broader, especially at the curved, base section... a little truer to the real deal.


And here it is looking at the exhaust opening. The kit part is sold and needs to be hollowed out to look right, whereas the resin part is already hollow at the tips. Once painted and the inside of the exhaust blackened, it will look a bit more realistic.


Here is the exhaust installed. Also note in this photo the resin supercharger intake. The kit part isn't too bad and would be usable, but this one is molded in one piece, thereby eliminating a seam mark on the inside of the opening that would be a little more difficult to correct.


During this assembly step, I made a note (hopefully as a help to others) indicating the sequence in which to assemble the landing gear bay parts. I dry fitted the parts a few times and it seemed this way worked the best.


Here are the parts I am working with now. I primed the portions of these parts that I am going to paint prior to further assembly.
 
C

CharleyGnarlyP290

Guest
I got a bit more done over the last couple of weeks... in between the ultimate honey-do project... a living room/dining room remodel.


Now that the fuselage and wings are all together, I started on the next steps, namely the gear struts, stabilizers and control surfaces.


The struts are kind of different on this kit. On past kits I have built, the struts are usually molded as one piece, or at least the main strut is one piece with the scissor part and maybe a brake line molded separately. On this kit, the main part is molded in two halves. Many reviews have lamented this fact, stating fear of a weak strut due to the way it is molded. And then there are seam lines to deal with. I have to say, this really didn't bother me. After test fitting and taking care of the ejector pin marks on the inside of the two halves, I found the fit to be quite good. With careful alignment I was able to get a near seamless join. A very light scrape of the hobby knife and I couldn't even tell it had been cemented together.


The only real cleanup I had to do was on the inside where the ejector marks are. Instead of being recessed, as is often the case, they protruded a bit. After a quick trim with the knife, problem solved. (and yes, I realize I spelt "elector.)


View attachment 123630


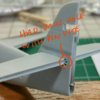
Next, I moved on to the rear stabilizers. I cut the parts off and cleaned them up and cemented them together. Again, very nice fit and very light sanding on the edge was all that was needed. However, when I went to test fit them to the fuselage, I noticed something. As you can see in the photo below there are supposed to be holes in the tail of the plane that allow the rear ailerons to move up and down. These holes were not present on my parts.


View attachment 123631


So, I got out the handy-dandy pin vise and drilled the needed holes. Voila! ready to go.


View attachment 123632


And here is an overall shot so far. I won't be attaching the control surfaces until after I do the painting.


View attachment 123633


Until next time...

Screenshot_2015-10-29-06-24-09_zpscbxan5ae.jpg

Screenshot_2015-10-29-06-19-55_zpsnvdwpa5b.jpg

Screenshot_2015-10-29-06-21-43_zpsxymeb2lr.jpg

20151031_150824_zpsdahvcidy.jpg
 
Last edited:
Top