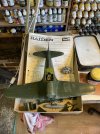
Revell 1/32 Mitsubishi J2M Raiden

Jim R

SMF Supporter
Joined
Apr 27, 2018
Messages
13,787
Points
113
Location
Shropshire
First Name
Jim
Just found this Tony. Great kit for its age. The cockpit looks superb. That seat is a big improvement over the kit one. I look forward to the rest of the build.
 

BarryW

SMF Supporter
Joined
Jul 23, 2011
Messages
5,043
Points
113
Location
Dover
First Name
Barry
Coming along nicely. A nice kit given it age. Might I suggest trying to get a download of the ZM Raiden instructions off Scalemates as they may help identify extra detail you could add.
 

yak face

Wossupwidee?
Staff member
Moderator
SMF Supporter
Joined
Jun 13, 2009
Messages
12,416
Points
113
Location
sheffield
First Name
tony
Coming along nicely. A nice kit given it age. Might I suggest trying to get a download of the ZM Raiden instructions off Scalemates as they may help identify extra detail you could add.
Ive been looking at the zoukei mura instructions online barry , its one of the few online sources of accurate info for the Raiden. There isnt an awful lot of decent info out there . Cheers tony
 

yak face

Wossupwidee?
Staff member
Moderator
SMF Supporter
Joined
Jun 13, 2009
Messages
12,416
Points
113
Location
sheffield
First Name
tony
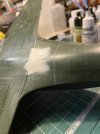
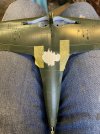
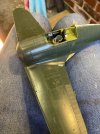
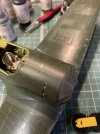
IMG_3358.jpegIMG_3359.jpegIMG_3360.jpegWell the chunky little fella is starting to look more like an aeroplane now .The rear of the one piece wing underside had a little bit of a step where it meets the fuselage bottom so that has had a bit of filler to level it up . The wings to fuselage joints were fine ,they just needed a bit of tweaking to get them flush with the fillet . The tailplanes went on perfectly, no further attention needed .Next up attaching the engine - which all the rest of the nose section attaches to - and adding the exhausts and cowl flaps. The kit is designed to have the top section removable to display the engine , not sure yet if I’m going to go with that or glue it shut
 

yak face

Wossupwidee?
Staff member
Moderator
SMF Supporter
Joined
Jun 13, 2009
Messages
12,416
Points
113
Location
sheffield
First Name
tony
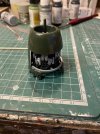
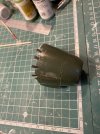
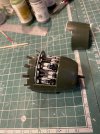
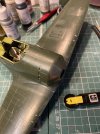
Underside now sanded and this area and any others that need it have had the riveter run over them to replace any lost detail . Ive also been sorting the engine and cowling. The part of the engine that will be seen when the removable panel is taken off has had wiring added to the cylinders . The exhausts and cowl flaps have been fitted and the bottom section and front have been glued together and fitted to the engine. The top piece fits very nicely after a bit of fettling and adding a sliver of plastic card . Im not sure if im going to fit the whole engine after painting or fit it now , the protruding exhausts are going to be a bugger to mask up if I do. Next up fitting the last few bits to the cockpit ( radio behind the headrest , bulletproof screen , gunsight and control column) then I can see about getting the canopies on. IMG_3383.jpegIMG_3384.jpegIMG_3387.jpegIMG_3388.jpegIMG_3390.jpegIMG_3391.jpeg
 

yak face

Wossupwidee?
Staff member
Moderator
SMF Supporter
Joined
Jun 13, 2009
Messages
12,416
Points
113
Location
sheffield
First Name
tony
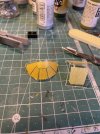
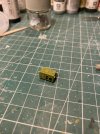
Been looking at the kit radio , again nicely detailed but totally wrong ! So its been sanded and chopped a bit and ive started to add some details . The gunsight is quite accurate but has solid plastic lenses so out with the old holographic confetti to replace these. The kit supplied bulletproof screen , (which sits forward of the instrument panel and gunsight on two poles ) had a whacking great ejector pin mark in the middle. I tried to sand and polish it out but only ruined it so ive had to make a new one from scratch. This and the gunsight need to be fitted before the screen goes on .
Speaking of the transparencies , theyre very nicely done , fit perfectly but have very faint frame lines so my least favourite job - masking canopies - was a little bit harder .IMG_3419.jpegIMG_3418.jpegIMG_3417.jpegIMG_3415.jpegIMG_3416.jpeg
 

yak face

Wossupwidee?
Staff member
Moderator
SMF Supporter
Joined
Jun 13, 2009
Messages
12,416
Points
113
Location
sheffield
First Name
tony
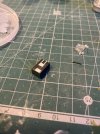
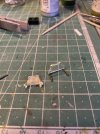
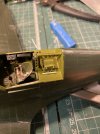
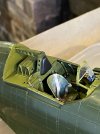
Gunsight and bulletproof screen now fitted and time to look at the radio. This was titivated up a bit and painted . After looking at pics of the Zoukei Mura kit for reference ( there's very little useful info on the net ) I could see that the radio looks like its held in place with A shaped brackets ( or are they elastic bungees ? ) , which I made with some fuse wire bent to shape . Holes were drilled in the side of the radio and small pieces of plastic rod glued in to attach the brackets/ bungees to. I added a couple of wires from fuse wire and routed them to the sidewall . IMG_3455.jpegIMG_3456.jpegIMG_3457.jpeg
 

adt70hk

I know its a bit sad but I like quickbuild kits!!!
SMF Supporter
Joined
Sep 4, 2019
Messages
9,517
Points
113
First Name
Andrew
That's coming on really nicely Tony.

You're right about very little in the web about these. I found the same when I did ancient Tamiya offering. I enjoyed it so much that I've bought another one. Will have to look up the ZM instructions when I get around to building it.

Keep up the good work.

Andrew
 

yak face

Wossupwidee?
Staff member
Moderator
SMF Supporter
Joined
Jun 13, 2009
Messages
12,416
Points
113
Location
sheffield
First Name
tony
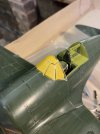
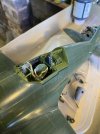
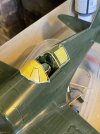
The rear deck and radio have now had an oil wash to darken them up to match the rest of the pit . The windscreen and rear section of the canopy have been fitted , very nice positive fit too . Once the open part of the cockpit is masked up I can get some primer on and see which bits of the airframe need further attention ( or not , hopefully ) .
I’m still undecided about whether im going to have the engine viewable or glue the cowling panel shut , either way I think I might leave the engine assembly off till last to make masking the exhausts easier . IMG_3477.jpegIMG_3476.jpegIMG_3486.jpeg
 

The Smythe Meister

Born to be WILD....... until about 9pm
SMF Supporter
Joined
Jan 30, 2019
Messages
5,778
Points
113
Location
Devon
First Name
Andy
Just caught up with this Chunky Monkey Tony, looking excellent :thumb2: ,
Like Ian said, I'm looking forward to seeing the paint started :cool:.
 

yak face

Wossupwidee?
Staff member
Moderator
SMF Supporter
Joined
Jun 13, 2009
Messages
12,416
Points
113
Location
sheffield
First Name
tony
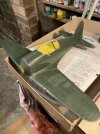
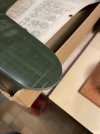
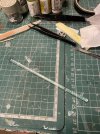
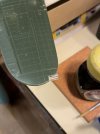
Got the cockpit masked up ready for primer then realised I still had a bit of work to do on the airframe . The navigation lights on the kit are just solid , whereas the ones on the aircraft are clear with a coloured bulb . So out with the spares box and a suitable piece of clear plastic was found in the shape of a cocktail stirrer . Cut to size and flattened at one side these were then drilled slightly and red and green paint added. Theyve now been superglued in position and will be sanded to shape and polished .IMG_3489.jpegIMG_3490.jpegIMG_3492.jpegIMG_3494.jpegIMG_3495.jpeg
 

Waspie

SMF Supporter
Joined
Mar 13, 2023
Messages
2,569
Points
113
Location
Portland - Dorset
First Name
Doug
I'd never heard of the Raiden before this. It's been great watching it progress. Can't wait to see the complete aircraft finished. It's certainly looking good Tony.
 
Top