Revell 1\32 P51 Phantom Mustang (clear)

peterairfix

SMF Supporter
Joined
Jul 19, 2012
Messages
7,356
Points
113
Location
Taunton
First Name
peter
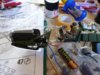
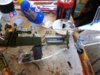
As per vote I will be keeping this one clear but the internals will be done as normal build the firs things I have done is the gearing for the landing gear and the bomb dropping mechanism this s fully working kit ie: raising and lowering landing gear working prop and dropping bombsP1030020.JPG P1030021.JPG P1030022.JPG P1030023.JPG P1030024.JPG P1030027.JPG P1030026.JPG
 
Last edited:

eddiesolo

It's a modelling time!
SMF Supporter
Joined
Jul 2, 2013
Messages
11,070
Points
113
First Name
Si.
Interesting Peter, like this, something very different.
 

peterairfix

SMF Supporter
Joined
Jul 19, 2012
Messages
7,356
Points
113
Location
Taunton
First Name
peter
After a couple of hours taking apart and reassembly I have finally got the battery box,langing gear motor and bomb dropping mechanism in place and working and the next up will be the landing gear internals for the wing.P1030028.JPG P1030029.JPG P1030030.JPG P1030031.JPG P1030033.JPG P1030034.JPG P1030035.JPG
 

peterairfix

SMF Supporter
Joined
Jul 19, 2012
Messages
7,356
Points
113
Location
Taunton
First Name
peter
I have just finished the landing gear and is now fully installed and tested and I will be starting on the tail wheel flaps everything is going to be painted as it would be on a normal build.
And there will be the added addition of some lights.P1030041.JPG P1030040.JPG P1030039.JPG P1030038.JPG P1030037.JPG
 
T

Trekkie_John

Guest
This build is a little transparent...................... i'll get me coat.

Looks like you're off to a great start Peter, going to keep an eye on this one mate.

Have fun, John
 

flyjoe180

Joe
SMF Supporter
Joined
Jan 18, 2012
Messages
12,419
Points
113
Location
Earth
First Name
Joe
Nice work Peter, this is going to looks very cool.
 

peterairfix

SMF Supporter
Joined
Jul 19, 2012
Messages
7,356
Points
113
Location
Taunton
First Name
peter
All internal pieces are now finished and its now ready for the other side to be put on.
 

Attachments

  • P1030048.JPG
    P1030048.JPG
    107.8 KB · Views: 9
  • P1030049.JPG
    P1030049.JPG
    108.4 KB · Views: 9

Peej

SMF Supporter
Joined
Aug 16, 2014
Messages
1,028
Points
113
First Name
Paul
Looking good Peter. Interesting build. Thanks for the updates.
 

monica

“When there's no more room in hell, the dead will
SMF Supporter
Joined
Oct 30, 2013
Messages
15,111
Points
113
Location
Melbourne
First Name
monica
interesting and different build,Peter,coming along nicely so far,
will you be try to define the pan lines and rivets,a bit ? with a wash,
 

peterairfix

SMF Supporter
Joined
Jul 19, 2012
Messages
7,356
Points
113
Location
Taunton
First Name
peter
interesting and different build,Peter,coming along nicely so far,
will you be try to define the pan lines and rivets,a bit ? with a wash,
I am going to leave as is as the panel lines and rivets are raised
 

peterairfix

SMF Supporter
Joined
Jul 19, 2012
Messages
7,356
Points
113
Location
Taunton
First Name
peter
I have decided to leave out the lights but I Will be painting one half of the place so it covers up the glue marks on one side.
So far I have the two halves together and the tail wheel fitted.
The bomb dropping mechanism is now finished jus awaiting the gun bays witch are finished and the connecting piece to operate the tail wheelP1030051.JPG P1030054.JPG P1030055.JPG P1030057.JPG P1030056.JPG P1030058.JPG P1030059.JPG P1030060.JPG
 

peterairfix

SMF Supporter
Joined
Jul 19, 2012
Messages
7,356
Points
113
Location
Taunton
First Name
peter
Just managed to get the plane all together and masked up ready for the half and half paint the undercoat is green followed by the chrome top coatP1030061.JPG P1030062.JPG P1030064.JPG
 
Top