Revell 1/48 BF 110

T

T. van Vuuren

Guest
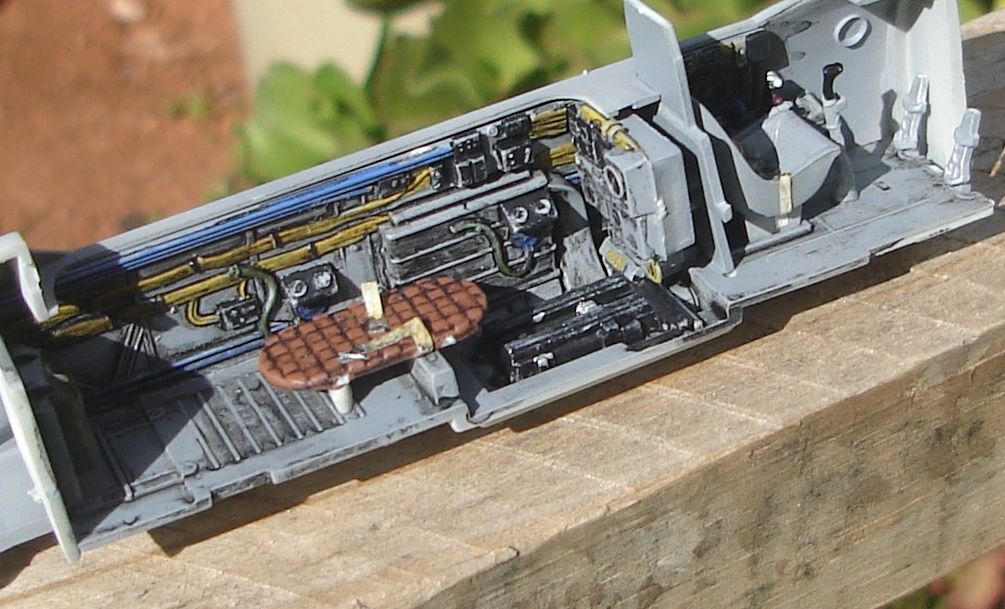
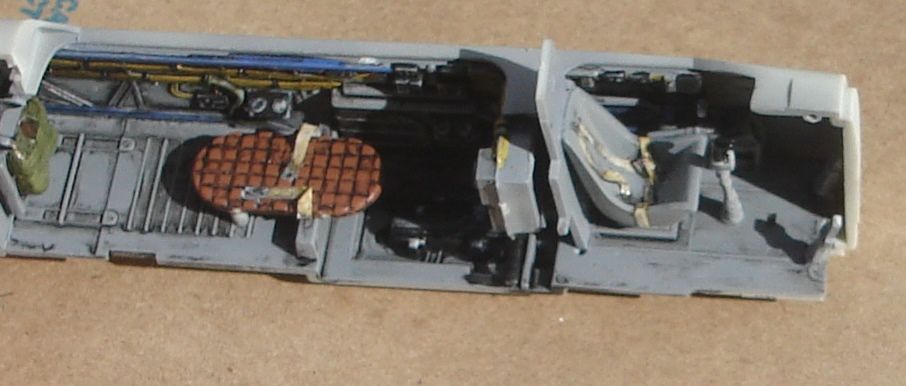
Cockpit after pinting and some pinwashes then matt clearcoay to seal it all. I didnt have to add anything except the maskingtape seatbelts. 
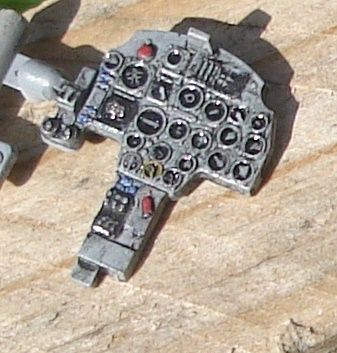
The IP was done the same but with acrylic clear on the instrument faces. This is an interesdting kit in that in some areas the moldings are very crisp and in others there is loads of flash to be cleaned off. Also the reccesed detail on the bottom of the left wing is allot lighter than the right wing, a little scribing will be needed here.Theuns
 
T

T. van Vuuren

Guest
I have found that using a white correction pen as a fillr for seams, the sanding becomes less of an issue. Look at the top of the necell to see.


The fit of the parts was a little chalanging, but if you glue it is sections it works out OK.


Theuns

DSC00621.JPG
 
K

Kressy_13

Guest
Coming along nicely mate. The interior looks great, nice detail.
 

colin m

Moderator
Staff member
Moderator
SMF Supporter
Joined
Dec 26, 2008
Messages
8,604
Points
113
Location
Stafford, UK
First Name
Colin
Is there no stopping him. You would think he would like a rest after that 1:32 Mustang. All looks very nice by the way.
 
T

T. van Vuuren

Guest
Ta Colin.


These builds are actually "therapy" ,mate. I have been waiting for a plane to come off the line so I can start working on it but have been held back for a few weeks now. If you are an indebendent contractor like me who only gets paid when you work it becomes "troublesome" quite fast and I need something to stop me going mad ;)


Theuns
 
T

T. van Vuuren

Guest
I primed the 110 to see if my rescribing was OK... It went on a little rough so I sanded it withy wet 2000 paper... Needless to say I went through the primer in some places   But then the idea struck me - I am going to try a nw tecnique where I use the light spots and add some dark spots to simulate how the paint might fade....hope it works.
Theuns


C

cybershed

Guest
Hi Theuns.


I won a Revell bf110G in a competition about 18 mnths ago. It came without decals and Revell kindly replaced them. Although a couple of the decals were damaged and unusable. However, luckily I have a couples of spares fro another kit that I can use.


I am dealing with a lot of flash too. But, the worst thing is a really poor fit between top halves of both wings and the fuselage.  The worst example I've ever seen. Had to use a load of filler.


Anyway, lovin your work on the cockpit interior. It's much better than my effort, although I'm happy enough with what I have done so far.


What variant of the 110 are you building?
 
T

T. van Vuuren

Guest
Hye Bruce.


I had no hassles with the fit on my top wingroot, maybe just lucky. I have found if I have to fill something like that is to use stretched sprue and thin cement. It has the same consistancy at the rest of the plastic and sands at the same rate.


As for the colour scheme, I am not sure yet....


Theuns
 

yak face

Wossupwidee?
Staff member
Moderator
SMF Supporter
Joined
Jun 13, 2009
Messages
12,394
Points
113
Location
sheffield
First Name
tony
Great start Theuns , its a nice kit isnt it ? , Ive got the same kit but in the G-4 Nightfighter Promodeller boxing .I'll be watching to get some tips for when I do mine . cheers tony
 
T

T. van Vuuren

Guest
Tony the kit is not fantastic but with a little work it is a great canvas to try new things. Like with most monogram stuff of the 90's the detail is actually very nice, the fit is substandard but workable.


Theuns
 

papa 695

Moderator
Staff member
Moderator
SMF Supporter
Joined
May 9, 2011
Messages
20,353
Points
113
Location
Doncaster, South Yorkshire
First Name
Ian
It's coming along nicely Theuns, and i would like to see how the primer effect looks when painted. A nice idea if it works.
 
B

Builder

Guest
Super job on the interior there Thuens. You do interiors very well, as you did with your Seaking too. Really looking forward to this one mate. 
 
T

T. van Vuuren

Guest
My camera is old and the natural light just after the hailstrom we had not the best but you can just about get the look in these pix....
The greay came out well "patchy" with the light parts of the base coat shining through but on the green I sprayed the green and it was to "even" so I added a drop of white to the green in the pot and sprayed a few random areas to simulate the paint fading, I hope the clear glosscoat does not tahe this effect away.


The mottle is a combo of grey abd green to make the demarcation line between the upper and lower paints a bit softer.


Next will be the acrylic clearcoat for pinwash and decals.


Theuns
 

colin m

Moderator
Staff member
Moderator
SMF Supporter
Joined
Dec 26, 2008
Messages
8,604
Points
113
Location
Stafford, UK
First Name
Colin
Looking nice. Splinter camouflage is great isn't it ? so much easier to mask than wavy lines.
 
K

Kressy_13

Guest
Nice work on the paint. The patchy look has come through well.
 
Top