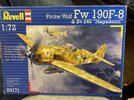
Revell 1/72 FW190 -F8 with BV 246 Hagelkorn

yak face

Wossupwidee?
Staff member
Moderator
SMF Supporter
Joined
Jun 13, 2009
Messages
12,415
Points
113
Location
sheffield
First Name
tony
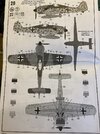
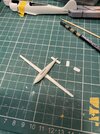
Heres the Revell FW190 -F8 on the bench at last. Some may remember this was the kit I nicked the desert decals for the Airfix A-8 I did a while back . Its now getting done with the other decal option - an F8 with the experimental Blohm und Voss bv246 ‘Hagelkorn’ ( hailstone) glide bomb. This fascinating weapon featured a standard bomb but with added reinforced concrete wings and a basic guide system , theres an actual one at the RAF Cosford Museum . The aim was to release the bomb well out of harms way .
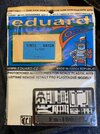
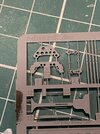
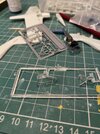
Ive got an Eduard etched set but not sure how much of it is going to be useful as its not painted and a lot of the details are either too small or no improvement on the kit parts .
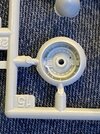
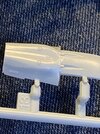
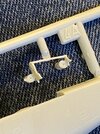
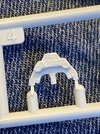
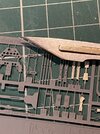
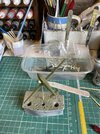
On to the kit - its an older tooling from 1997 with the hagelkorn parts added a year later. As such its not bad ,featuring recessed panel lines and reasonable detail but the age of the moulds tells in areas of flash and excessive seam lines . As with the Airfix the kits designers have given you a tricky clean up with the nose ring sprue attachments , these encroaching right onto the front surface. Some other parts have excessive seams to clean up too like the delicate headrest assembly !D85BB741-768A-4CDE-8720-DCBD9EE08C64.jpegA1C4A734-6EC8-4AD2-BD48-EA16568C347D.jpeg4C9D42DC-CCB7-485B-8332-D13377EFFCA5.jpegCEE15A37-D157-41A3-B071-E5182F0914A3.jpeg1EB1AAB3-E933-454E-A25E-A99437B9EFAC.jpegFF6843ED-7F4C-4D9C-9811-F6056609E5D1.jpeg1F925C14-81C3-48B7-B111-E992682BCC88.jpeg
 

yak face

Wossupwidee?
Staff member
Moderator
SMF Supporter
Joined
Jun 13, 2009
Messages
12,415
Points
113
Location
sheffield
First Name
tony
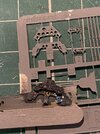
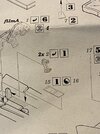
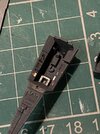
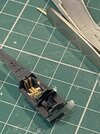
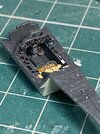
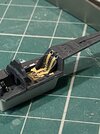
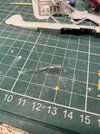
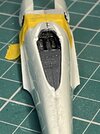
I actually started this a week or so ago but didnt want to overload the opening post so heres a bit of progress. Ive got the cockpit painted up RLM 66 and been looking at the etched fret . I dont think im going to use much for the pit apart from the belts. The kits instrument panel isnt bad at all and has painted up nicely and the TINY etched rudder pedals are an impossible exercise in PE Origami and barely visible once fitted so they might not make the cut either! I mean threading the buckle on the foot straps !!? The whole thing is about 2mm in total!
A major drawback on this kit is the clear parts . For one they arent the clearest , but the main gripe is that Revell have only supplied the glass part of the rear canopy , the sliding frame is moulded with the fuselage half meaning the only option is for a closed canopy and a messy clear part joint. Luckily the aforementioned Airfix A8 had two canopy options so the spare blown canopy from this is going to be used.
This will involve cutting off the Revells canopy frame but this shouldnt be a problem . While im altering things ,the kits headrest is incorrect for a blown canopy F8 , it should have the added armour wrapped around it and slides back with the canopy so this will need sorting too. CC882074-D279-41F1-A479-F45EA4825BC8.jpegE185A2C7-2FEA-4FBB-B070-BEC80D62B059.jpegE0143FC0-D531-4001-AFE5-F13D757F5300.jpegCCB87EAB-09C5-4F99-BC36-EB99FBF8720D.jpegE77FD4C8-B9D6-4CF4-9BD4-571DB453C976.jpegAEFD904B-BFEF-4224-AF4D-BFDC887472B1.jpeg728767EC-EBB9-41B1-A07F-B61C54C53AE4.jpeg
 

Jim R

SMF Supporter
Joined
Apr 27, 2018
Messages
13,754
Points
113
Location
Shropshire
First Name
Jim
Any thread with Hagelkorn in the title deserves looking into, if for no better reason than to find out what it means. ;)
You've given this a lot of thought and made a great start. The instrument panel looks really nice.
 

Allen Dewire

Proud Rabble Member
SMF Supporter
Joined
Apr 27, 2018
Messages
4,105
Points
113
Location
Bamberg
First Name
Allen
I'll try and keep up with this one Tony. Nice IP work. I can't blame you for not using much, if any, of the etch as it's tiny. At least Eduard had forethought with the name plate. Now you won't forget what you've built!!! BTW, what is part 4A on the sprue shot above???...

Prost
Allen
 

yak face

Wossupwidee?
Staff member
Moderator
SMF Supporter
Joined
Jun 13, 2009
Messages
12,415
Points
113
Location
sheffield
First Name
tony
BTW, what is part 4A on the sprue shot above???...
Thats the armoured headrest and support allen , see what i mean about flash , seam lines and a couple of moulding pins to contend with?! Luckily this is one of the bits I’ll be altering when I sort the canopy.
 

yak face

Wossupwidee?
Staff member
Moderator
SMF Supporter
Joined
Jun 13, 2009
Messages
12,415
Points
113
Location
sheffield
First Name
tony
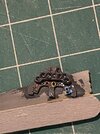
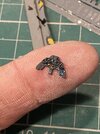
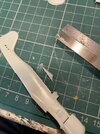
Cockpit now done , i used the PE rudder pedals after all ( but didnt faff with the straps ) and the seat belts were a pain , tiny contact points for the shoulder harnesses and the lap belts had to be cut flush with the side of the seat or it wouldnt fit in the tub . Anyhoo its done and as can be seen ( or not ) most of it is hidden once the fuselage goes together. Before I glued the fuselage I had to sort the canopy issue. As said earlier , the Revell kit has the sliding section of the canopy moulded with the fuselage , not a great idea at the best of times but the clear section of the canopy was not very clear at all . Luckily the Airfix fw190 I did a bit back had two canopies , the unused one being correct for this aircraft. So the kit frame was razor sawed off and cleaned up . 93334441-18F1-4C2A-B46C-F470C9C0B2EA.jpegC4C1484B-266D-482C-A669-5CC19C19CCDA.jpegEA12C72C-99F6-4425-B16E-49DE1226148C.jpeg42414D4D-A0A3-431B-AFE5-3DB14B361BA5.jpeg0F6589BE-4884-4DB0-8868-187F0D8C7349.jpegFA338BC5-C122-498D-8165-13159652A9B1.jpegE50B414C-F243-4F49-8532-EA844F952412.jpeg
 

Allen Dewire

Proud Rabble Member
SMF Supporter
Joined
Apr 27, 2018
Messages
4,105
Points
113
Location
Bamberg
First Name
Allen
Wow Tony, that is some good progress and luckily you had a clear piece to replace the canopy rear area. It's hard to believe you hacked off the old piece so cleanly too!!! You're really good at this 1/72 miniature madness wing thingy stuff...

Prost
Allen
 

yak face

Wossupwidee?
Staff member
Moderator
SMF Supporter
Joined
Jun 13, 2009
Messages
12,415
Points
113
Location
sheffield
First Name
tony
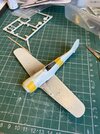
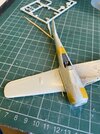
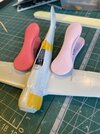
Engine cowling and nose ring now fitted and the one piece lower wing has been glued on . The lower rear fuselage joint needed a bit of filling as there was a step but no real problems. The wing tops however , when fitted with the locating pins , had a big gap . So off with the locating pins and glue the wing tight up to the fuselage, the slight misalignment caused at the wingtip will be easier to sort than filling a wingroot! 65C4C68A-D4CD-40A2-BA36-E43135540D35.jpegB884458C-0ECD-4C08-80BD-E9D831A10A10.jpegE4935802-38B1-4F1E-8EDC-9D3031A05D5E.jpegC3EF1A9A-38D5-4AF0-A4F0-4C55225BC0AA.jpeg
 

adt70hk

I know its a bit sad but I like quickbuild kits!!!
SMF Supporter
Joined
Sep 4, 2019
Messages
9,507
Points
113
First Name
Andrew
Coming on nicely Tony. Not be heard of the bomb thingamajiggy whatsitt before. Will follow with interest!
 

adt70hk

I know its a bit sad but I like quickbuild kits!!!
SMF Supporter
Joined
Sep 4, 2019
Messages
9,507
Points
113
First Name
Andrew
Decant it out into old Tamiya/Vallejo bottles ;)

Daft question..... Never done it.......but is it as simple as spraying into the offending receptacle? What about cleaning the AB?

As I think you know, I currently only use water based products through the AB.

thanks!


Tony - apologies the slight detour
 

yak face

Wossupwidee?
Staff member
Moderator
SMF Supporter
Joined
Jun 13, 2009
Messages
12,415
Points
113
Location
sheffield
First Name
tony
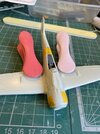
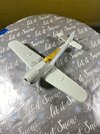
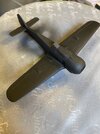
I decided to give it a coat of Halfords finest as I do find it helps everything else to stick better. Ive used the black primer before on bare plastic and found that it doesnt adhere as well as i’d like so I put it on top of the Halfords grey . Its now curing ready for the first colour to go on , RLM 76. The Hagelkorn bomb has also been sprayed - RLM 02 . 4593E776-9847-4448-A2DA-FEBE45DE29C6.jpeg3176638F-5A69-410F-92AB-C2337E18D1C5.jpeg
 

colin m

Moderator
Staff member
Moderator
SMF Supporter
Joined
Dec 26, 2008
Messages
8,605
Points
113
Location
Stafford, UK
First Name
Colin
Photo etch in 1:72 is the Devil's own work. I was nearly going to have to ask what a Hagelkorn was. Great name.
 

yak face

Wossupwidee?
Staff member
Moderator
SMF Supporter
Joined
Jun 13, 2009
Messages
12,415
Points
113
Location
sheffield
First Name
tony
Photo etch in 1:72 is the Devil's own work. I was nearly going to have to ask what a Hagelkorn was. Great name.
Not wrong there colin , out of the whole PE fret I think only the belts and the rudder pedals were used - and I nearly didnt use the pedals ! The rest of it is either microscopic ,not needed for this version or no real improvement on the kit part ( instrument panel ) plus the flat nature of PE makes certain things look unrealistic . Dont get me wrong, its very useful most of the time but youve got to weigh up the pros and cons .
 
Top