Rick's Airfix 1/72 English Electric Lightning F6

rickoshea52

SMF Supporter
Joined
Dec 20, 2011
Messages
3,970
Points
113
Location
North West
First Name
Rick
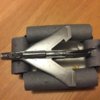
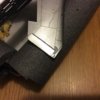
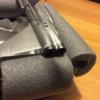
Buttoned up the fuselage tonight and added the resin engine kit and had a play around with the scratch built one that I made just to see if something could work. The compartment on the right hand side behind the cockpit has a scratch made back panel and will have some LRU's and other bits added in due course.


image.jpeg

image.jpeg

image.jpeg

image.jpeg

image.jpeg

image.jpeg
 

rickoshea52

SMF Supporter
Joined
Dec 20, 2011
Messages
3,970
Points
113
Location
North West
First Name
Rick
I've had a go at replicating the other engine on this model using evergreen plastic tube, strip and lead wire. I had to make a bulkhead for the aft wall of the engine bay, when filled and sanded back this will have a bit of detail added.


The avionics compartment has also been filled with some plastic rod etc.


image.jpeg

image.jpeg
 

rickoshea52

SMF Supporter
Joined
Dec 20, 2011
Messages
3,970
Points
113
Location
North West
First Name
Rick
\ said:
Ohhh I like this I thought that the new mould was going to be good from Airfix but your doing a cutaway with engine showing now that's perked me up on attention. The cuts seem to be very good ( was the plastic soft enough) Airfix new plastics seem to be not as brittle as older Airfix kits ( my opinion )
I'm in on this


Robert
The plastic is fairly soft and has a degree of pliability to it. This has a drawback though as any burrs around filed edges can be tricky to smooth out.
 

rickoshea52

SMF Supporter
Joined
Dec 20, 2011
Messages
3,970
Points
113
Location
North West
First Name
Rick
Wings on and the scratch built engine fitted with some plasticard added to the rear bulkhead to represent stiffeners. When dry the engine will get some touching in with paint. I'm not concerned about the yawning gap between the engine and fuselage as I only intend for the exposed section to be seen from "ground level".


image.jpeg

image.jpeg

image.jpeg
 

rickoshea52

SMF Supporter
Joined
Dec 20, 2011
Messages
3,970
Points
113
Location
North West
First Name
Rick
After what seems like an age away from the workbench I found some time today to apply gloss black primer to this model, I am trying the Vallejo metallic paints for a bare metal finish on this. The instructions say that you should allow 12 hours curing time but I had a little go with Alumimium on the belly fairing to see how it looks......and it looks good.


image.jpeg

image.jpeg
 
Last edited by a moderator:

papa 695

Moderator
Staff member
Moderator
SMF Supporter
Joined
May 9, 2011
Messages
20,353
Points
113
Location
Doncaster, South Yorkshire
First Name
Ian
I use the metal colours all the time now Rick there a little more forgiving than the Alclad. The Lightning is looking very good by the way.
 

rickoshea52

SMF Supporter
Joined
Dec 20, 2011
Messages
3,970
Points
113
Location
North West
First Name
Rick
I'm not too happy with my painting and masking...again. I applied Aluminium then masked for the jet pipes, intake capping ring and the ailerons. I sprayed Chrome on the intake, Jet Exhaust on the jet pipe and Duralimin on the ailerons. When the masking was removed some of the Aluminium came away too, humph!


image.jpeg

image.jpeg

image.jpeg

image.jpeg


Also painted but not shown are the intake cone and blank.
 

colin m

Moderator
Staff member
Moderator
SMF Supporter
Joined
Dec 26, 2008
Messages
8,604
Points
113
Location
Stafford, UK
First Name
Colin
Dam it, annoying. But ok, a positive spin, means you can spray again, giving a bit of variance to the final coat of paint.
 
Top