Scotties Tamyia Centaur.

scottie3158

SMF Supporter
Joined
Apr 27, 2018
Messages
12,692
Points
113
Location
Spalding
First Name
Paul
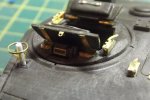
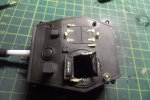
I picked this kit up with another one for a very low price not long ago. After the woes of the RL it is nice to build a kit that fits together. The kit has already been part built so there is no point showing sprue pics. All the main parts have been added and luckily for me fairly well. I decided to do my normal and get a PE set. So I made a start on the turret which was already built. I fashioned a new barrel as the kit one wasn't round. The Besa co-axial had the barrel drilled out. All the kit hinges were removed as were the hatch catches. These were replaced with etch offerings the hinges do work but the hatches have been secured in place for strength.
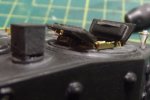
DSCF4103.JPG

DSCF4104.JPG

DSCF4105.JPG

I hope you will join me along the way.

cheers
Scottie
 

Si Benson

SMF Supporter
Joined
Apr 27, 2018
Messages
3,322
Points
113
First Name
Si
first in by the look of it :cool:
Always good To watch your work your magic with the Photo etch :thumb2:
 
  • Like
Reactions: JR

Graeme C.

SMF Supporter
Joined
Apr 29, 2018
Messages
1,485
Points
113
First Name
Graeme
It's a bit different to the RL, Paul, I've got a few Tamiya Cromwell/Centaur in the stash, will follow along.
 

Jakko

Way past the mad part
SMF Supporter
Joined
Apr 28, 2018
Messages
10,791
Points
113
First Name
Jakko
Wow, working hinges at that size … :smiling3:

One thing, though, is that the catches look like they’re too far away from the hatches. The detents in them are where the rim of the hatch goes, to keep it vertical. Especially the catch at the rear of the loader’s hatch is so far away from it that it would never be caught by the catch at all :smiling3:
 

Richard48

SMF Supporter
Joined
Apr 27, 2018
Messages
1,406
Points
113
Location
Clacton on sea
First Name
Richard
Got my chair for this one Paul.Do like the Centaur and Cromwell.I like them with the wading gear and towing a porpoise.
Good start mate.
Richard
 

Jakko

Way past the mad part
SMF Supporter
Joined
Apr 28, 2018
Messages
10,791
Points
113
First Name
Jakko
Oh yeah, wading gear :smiling3: If you want to have a go at scratchbuilding that, I’ve got a PDF of the real instructions :smiling3:
 

scottie3158

SMF Supporter
Joined
Apr 27, 2018
Messages
12,692
Points
113
Location
Spalding
First Name
Paul
first in by the look of it :cool:
Always good To watch your work your magic with the Photo etch :thumb2:
Si, thanks mate at least you will get first dibs on the biscuits.
Settling in next to Si. We'll share the biscuits. Love the pe work. Very neat and precise.
Thanks Jim, I will get the kettle on to wash them down.
Always something to learn from Scottie so I'll be hovering about!!
Doug, not sure about learning anything but welcome aboard.
Off to an impressive start already.
Thanks Andy.
It's a bit different to the RL, Paul, I've got a few Tamiya Cromwell/Centaur in the stash, will follow along.
Graeme, it certainly is. It's a typical Tamyia fit.
Just pulled up my chair Paul, a cracking start by the way.
Ian, welcome mate.
Wow, working hinges at that size … :smiling3:

One thing, though, is that the catches look like they’re too far away from the hatches. The detents in them are where the rim of the hatch goes, to keep it vertical. Especially the catch at the rear of the loader’s hatch is so far away from it that it would never be caught by the catch at all :smiling3:
Jakko, I was trying to work that out as well but they are placed where the plastic kit renditions were moulded.
Got my chair for this one Paul.Do like the Centaur and Cromwell.I like them with the wading gear and towing a porpoise.
Good start mate.
Richard
Richard, they are a good looking tank. I think the kit must show a vehicle after all that has been removed.
Oh yeah, wading gear :smiling3: If you want to have a go at scratchbuilding that, I’ve got a PDF of the real instructions :smiling3:
Jakko that might be cool. Can you ping them over to me and I will see if I fancy doing it.
Paul,
I'm in, taking a seat right now !
Ron welcome good to see you again.
 

Jakko

Way past the mad part
SMF Supporter
Joined
Apr 28, 2018
Messages
10,791
Points
113
First Name
Jakko
I was trying to work that out as well but they are placed where the plastic kit renditions were moulded.
I guess they did that so the hatches will open?

that might be cool. Can you ping them over to me and I will see if I fancy doing it.
Send me a private message with your e-mail address and I’ll mail you the PDF. On a quick look, it entails making not just the in- and outlet ducts, but also waterproofing fabric around the guns and ventilators, plus tape over all kinds of openings.
 

scottie3158

SMF Supporter
Joined
Apr 27, 2018
Messages
12,692
Points
113
Location
Spalding
First Name
Paul
I guess they did that so the hatches will open?


Send me a private message with your e-mail address and I’ll mail you the PDF. On a quick look, it entails making not just the in- and outlet ducts, but also waterproofing fabric around the guns and ventilators, plus tape over all kinds of openings.
Jakko, If I do it, it would only be the ducting, having said that I guess everything would have been removed at the same time post landing.
 

JR

Member of the Rabble and Pyromania Consultant
SMF Supporter
Joined
May 26, 2015
Messages
17,275
Points
113
Location
lincs
First Name
John
I'm in Paul.
 

Jakko

Way past the mad part
SMF Supporter
Joined
Apr 28, 2018
Messages
10,791
Points
113
First Name
Jakko
I guess everything would have been removed at the same time post landing.
The ducts would be the first to go, then the canvas over guns, vents etc. and everything else only later, when there was time. That’s why I went to all that trouble with my Churchill AVRE with SBG bridge :sad:
 

Jakko

Way past the mad part
SMF Supporter
Joined
Apr 28, 2018
Messages
10,791
Points
113
First Name
Jakko
The ducts would be the first to go, then the canvas over guns, vents etc. and everything else only later, when there was time.
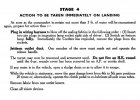
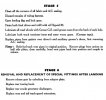
OK, got it the wrong way round: first the waterproof covers, then the ducts. Here’s what the manual actually says:

Centaur Cromwell Wading page 38.jpeg
Centaur Cromwell Wading page 39.jpeg

Inserting plugs and switching on lamps is because these connect to leads going to electrical detonators, that will set off lengths of Cordtex (detonating cord) behind the waterproof fabrics over various openings. Stages 5 and 6 are clearly intended to be done when the action has died down, so if you add ducts to a model, everything that is only removed in those stages would still need to be present as well. That quickly turns into a lot of work, though.
 

Scratchbuilder

SMF Supporter
Joined
Jul 2, 2022
Messages
1,935
Points
113
First Name
Mike
Oh no! not another of these got to replace everything including the kitchen sink builds.... Notice the front rank scroungers were first on the scene grabbing all the biscuits and leaving the broken ones for the rest of us - you know who your are Si and Jim....
Looking good Paul, another one of your masterpieces by the look of it.
Mike
 

Mini Me

SMF Supporter
Joined
Jun 1, 2018
Messages
10,160
Points
113
First Name
Rick
Not to be left out, I'll muck in with the rest.....pass the Hob Nobs please. ;)
 
  • Wow
Reactions: JR
Top