David Lovell
SMF Supporter
Following on from my mention on whats on the bench.......
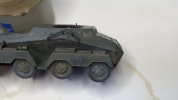
The Roden 231 was a fleabay steal underw eight quid inc postage ,not a particularly popular manufacturer it seems with a lot of people but hey for that money im not going to criticise infact fit of parts was all good ,strange white and black plastic detail was a bit soft in place's and my pet hate moulded on tools but a nice little kit.
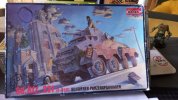
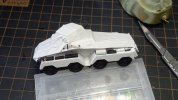
Yep mr slobby can you see the little pools of CA on the drill bit box
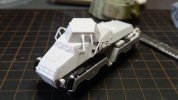
Nothing else to say I'm sure once primed up it won't look so strange/stupid in the white and black.
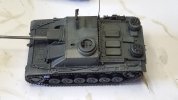
STUGIII AUFS G MY BUILD REVIEW
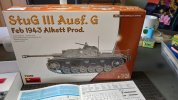
So is this the all dancing all singing kit we were all (well us tru scalers) hoping/ led to belive it would be. With a lot of the bigger manufacturers now pushing into the 72nd market trying to out do each other with their moulding technologies things are looking good ,but prices now pushing twenty pounds plus for 72nd stuff does a box of over engineered tiny parts make them any better or even value for money.
Now dont get me wrong whats in the box is as good as the rest so let's see if it stays as shiny as it looks.
Yep tru to the cad shots they've put the manufacturers name on the road wheel rubber
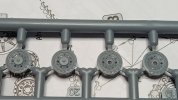
Outstanding stuff but honestly! would anybody notice if it wasn't pointed out ,as I said dont get me wrong some of it is worthy of a Oscar but does it make for a good kit no problems so far some of it won't suit thoes with tweeser phobia personally I prefer to stab with my steely knife
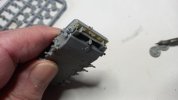
Detail is outstanding but you won't see 95% of this ,also I dont think much of the photo etch detail was ok but if this makes sense its like a bit of bling from a Christmas cracker.
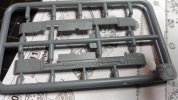
So moving on KIDDIE ALLERT my pet hate after showing us how clever they were with the road wheels why on earth are they incapable of moulding a separate shovel and axe no lets reduce it to a kiddie toy it won't matter what you do or how good you are this will always look like molded on tools
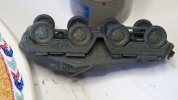
My pet hate so my opinion, any way bashed on with the running gear quite fiddly trying to get the keyway to line up on the road wheels was it really necessary to even have this feature ,was it a feature of just down scaling parts from their 35stuff then to cap that off the holes weren't big enough to fit over the axel stubb thingy's not expected. So the link and length set ups are diffrent for each side I suppose in real life due to the torsion bars being off set so warning to anybody else going to build one stick to the instructions glad I did for once. As with all the tracks I build I always finish underneath much easier to join the ends and any cock up/butchery is easily hidden. I'd completed one side before I thought of some pics but heres my way of doing things.
I glue all the parts in one strip apart from the bottom length
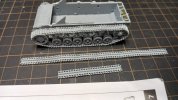
Using TET i leave it to firm up you'd be surprised how long you can leave it
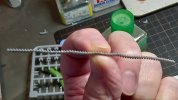
Once self supporting like this (I do the same if working 35th) I get them/it in position ready to wrap
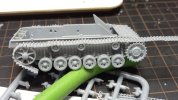
Fitting bottom run last.
Probably me being thick but couldn't get my head around the commanders hatch ,I used some masking fluid on the vision slots/scopes thingy's as they were moulded in clear plastic(unusual in this scale)now I thought they were around the rim kind of thing with a hatch on top so you could look 360 so to speak without poking your noggin out but no the hatch lid is down inside but hey as per the instructions ,whilst building this hatch coupla thingy there was a sort of snowflake symbol checking the legend this it means if you want one build it yourself ,so they can mould manufacturers logos on road wheels but not a hatch handles
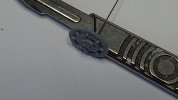
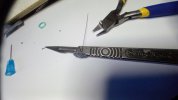
OK a bit small granted but to omit it and expect you if you want one to do it yourself with your own stuff not very impressive but hey also had to buid a handle for the inside of the MG shield ,not knick picking honest just telling how I found it ,some most of the spru gates were huge
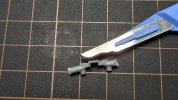
Another pet hate how on earth do manufacturers think you can somehow fit/glue a aerial to these tiny mounts is honestly laughable
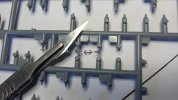
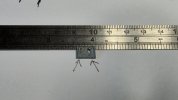
So guess what these are
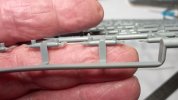
Yep the end loops for the tow cables wich indecently surprise surprise aren't supplied ,so found a piece of brass rod that fitted the holes but looked stupid wouldn't have towed a escort off of your driveway let alone a tank so drilled out and used something a bit more beefy ,my feelings on this kit are a bit its a 35er cad/cam scale down things like the MG shield have two miniscule contact points to the casement roof
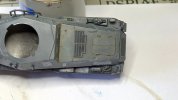
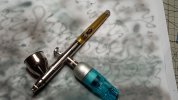
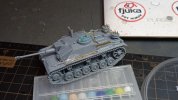
This picture taken as you can guess after being knocked off I'd have thought the airbrush would have knocked it off anyway ,this if you look at the built kit I cured with a little bit of rod you only know its there because I told you once the mg's fitted it'll dissappear anyway.
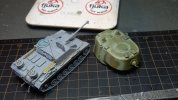
The KV turret is1/48 also my test crash dummy before taking paint to the real thing
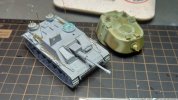
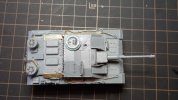
Although not mentioned in the instructions I fitted the canvas gusset on the back of the mantlet ,talking of wich the way the whole gun assembly/ carriage was designed was probably ok in 35th but very weak in 72nd good job I dont lay on the carpet making brmm brmm pew pew noises it would have fallen off ive just glued it in permanent position.
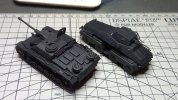
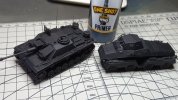
So if this was a school report it would be a could have done better not that its bad its a good looking little kit now its got this far ,for all the pre release pictures its good but perhaps I was looking for something a bit special. Dave
Apparently I've filled my quota so see you when we've laid some primer down
The Roden 231 was a fleabay steal underw eight quid inc postage ,not a particularly popular manufacturer it seems with a lot of people but hey for that money im not going to criticise infact fit of parts was all good ,strange white and black plastic detail was a bit soft in place's and my pet hate moulded on tools but a nice little kit.


Yep mr slobby can you see the little pools of CA on the drill bit box

Nothing else to say I'm sure once primed up it won't look so strange/stupid in the white and black.
STUGIII AUFS G MY BUILD REVIEW

So is this the all dancing all singing kit we were all (well us tru scalers) hoping/ led to belive it would be. With a lot of the bigger manufacturers now pushing into the 72nd market trying to out do each other with their moulding technologies things are looking good ,but prices now pushing twenty pounds plus for 72nd stuff does a box of over engineered tiny parts make them any better or even value for money.
Now dont get me wrong whats in the box is as good as the rest so let's see if it stays as shiny as it looks.
Yep tru to the cad shots they've put the manufacturers name on the road wheel rubber

Outstanding stuff but honestly! would anybody notice if it wasn't pointed out ,as I said dont get me wrong some of it is worthy of a Oscar but does it make for a good kit no problems so far some of it won't suit thoes with tweeser phobia personally I prefer to stab with my steely knife

Detail is outstanding but you won't see 95% of this ,also I dont think much of the photo etch detail was ok but if this makes sense its like a bit of bling from a Christmas cracker.
So moving on KIDDIE ALLERT my pet hate after showing us how clever they were with the road wheels why on earth are they incapable of moulding a separate shovel and axe no lets reduce it to a kiddie toy it won't matter what you do or how good you are this will always look like molded on tools

My pet hate so my opinion, any way bashed on with the running gear quite fiddly trying to get the keyway to line up on the road wheels was it really necessary to even have this feature ,was it a feature of just down scaling parts from their 35stuff then to cap that off the holes weren't big enough to fit over the axel stubb thingy's not expected. So the link and length set ups are diffrent for each side I suppose in real life due to the torsion bars being off set so warning to anybody else going to build one stick to the instructions glad I did for once. As with all the tracks I build I always finish underneath much easier to join the ends and any cock up/butchery is easily hidden. I'd completed one side before I thought of some pics but heres my way of doing things.
I glue all the parts in one strip apart from the bottom length

Using TET i leave it to firm up you'd be surprised how long you can leave it

Once self supporting like this (I do the same if working 35th) I get them/it in position ready to wrap

Fitting bottom run last.
Probably me being thick but couldn't get my head around the commanders hatch ,I used some masking fluid on the vision slots/scopes thingy's as they were moulded in clear plastic(unusual in this scale)now I thought they were around the rim kind of thing with a hatch on top so you could look 360 so to speak without poking your noggin out but no the hatch lid is down inside but hey as per the instructions ,whilst building this hatch coupla thingy there was a sort of snowflake symbol checking the legend this it means if you want one build it yourself ,so they can mould manufacturers logos on road wheels but not a hatch handles


OK a bit small granted but to omit it and expect you if you want one to do it yourself with your own stuff not very impressive but hey also had to buid a handle for the inside of the MG shield ,not knick picking honest just telling how I found it ,some most of the spru gates were huge

Another pet hate how on earth do manufacturers think you can somehow fit/glue a aerial to these tiny mounts is honestly laughable

So guess what these are

Yep the end loops for the tow cables wich indecently surprise surprise aren't supplied ,so found a piece of brass rod that fitted the holes but looked stupid wouldn't have towed a escort off of your driveway let alone a tank so drilled out and used something a bit more beefy ,my feelings on this kit are a bit its a 35er cad/cam scale down things like the MG shield have two miniscule contact points to the casement roof

This picture taken as you can guess after being knocked off I'd have thought the airbrush would have knocked it off anyway ,this if you look at the built kit I cured with a little bit of rod you only know its there because I told you once the mg's fitted it'll dissappear anyway.


The KV turret is1/48 also my test crash dummy before taking paint to the real thing


Although not mentioned in the instructions I fitted the canvas gusset on the back of the mantlet ,talking of wich the way the whole gun assembly/ carriage was designed was probably ok in 35th but very weak in 72nd good job I dont lay on the carpet making brmm brmm pew pew noises it would have fallen off ive just glued it in permanent position.
So if this was a school report it would be a could have done better not that its bad its a good looking little kit now its got this far ,for all the pre release pictures its good but perhaps I was looking for something a bit special. Dave
Apparently I've filled my quota so see you when we've laid some primer down

 ,
,
