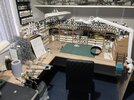
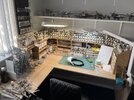
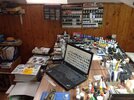
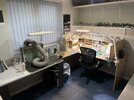
Things we know that help, but do we do actually do them?

Ian M

Administrator
Staff member
Administrator
Moderator
SMF Supporter
Joined
Dec 14, 2008
Messages
19,772
Points
113
Location
Falster, Denmark
First Name
Ian
?!!!!..... You're RETIRED man....
..... You have all the time in the world!!! :smiling3: ;)
There is no such thing as a retired home owner. You are self employed, on call 24-7-365, underpaid builder/pipefixer/wood butcher/gardener. I wonder how I had time to go to work befor.

One of my old bosses had a habit of saying tidy desk tidy mind. Then HIS boss came by once and replied ; "yes, but a busy desk shows a busy mind and an empty desk.....".
he never said it so much after that.

I try to keep things in place and have a tidy up between builds. During a build my desk looks like a bomb has gone off. lol-
Agree about the dust though.
 
Last edited:

BarryW

SMF Supporter
Joined
Jul 23, 2011
Messages
5,042
Points
113
Location
Dover
First Name
Barry
There is no such thing as a retired home owner. You are self employed, on call 24-7-365, underpaid builder/pipefixer/wood butcher/gardener. I wonder how I had time to go to work befor.

Old of my old bosses had a habit of saying tidy desk tidy mind. Then HIS boss came by once and replied ; "yes, but a busy desk shows a busy mind and an empty desk.....".
he never said it so much after that.

I try to keep things in place and have a tidy up between builds. During a build my desk looks like a bomb has gone off. lol-
Agree about the dust though.
You should tell him that a busy desk can still be a tidy desk Ian.

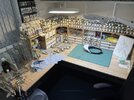
Below is how I left my bench last night. On the left my interior parts have had the detail painted by hand brushed acrylics and paint pens awaiting a semi-gloss coat ready for washes, next are a couple of small parts on a lolly stick needing some black primer (I removed some vulnerable moulded in aerials to be painted and glued back as final fittings). Then in a pot are black painted guns needing to be dry brushed with steel metal pigments.

The desk will get busier today because after spraying, thanks to MRP drying so quickly, I will be able to apply the enamel washes in the same session and as I like to leave enamels 24 hours before I apply a semi-matt varnish for dry brushing my next session (maybe two) today will be cutting and cleaning up parts pulling some more subs together. So the bench will be a lot busier but still relatively tidy, clean and organised.

I will post a picture mid-way through today’s work to show what it looks
like and another of how I leave it at the end of the day ready for another spray booth session in the morning.

A6D155D4-282C-4DC7-8FC6-173641028B6E.jpeg
 

SteveH

SMF Supporter
Joined
Apr 28, 2018
Messages
1,293
Points
113
First Name
Stephen
Super set up Barry.
Just what you need to produce such great planes.
Have you planning permission from the local council for the extension to build the Border models 1/32 Lancaster?
That will be a build to watch.
Enjoy your current project
Regards
Steve H
 

BarryW

SMF Supporter
Joined
Jul 23, 2011
Messages
5,042
Points
113
Location
Dover
First Name
Barry
Super set up Barry.
Just what you need to produce such great planes.
Have you planning permission from the local council for the extension to build the Border models 1/32 Lancaster?
That will be a build to watch.
Enjoy your current project
Regards
Steve H
Thanks Steve. The Border Lanc's wings are removable, so it is easy to display. Even bigger though is the Hobbyboss B24, the wings are not designed for removal, but I know some modellers have adapted it. My plan for that one is to first to see if the front to undercart will fit on my wide shelves, if so, that's how I will handle the size with it on the shelf over my workbench with it sat out of the way. My rough calculation suggests that will work and I will take a better look when I start kit. Otherwise, I will adapt the wings for removal.
 

Jim R

SMF Supporter
Joined
Apr 27, 2018
Messages
13,779
Points
113
Location
Shropshire
First Name
Jim
Some entertaining and interesting posts. I know the running joke about the Tidy Bench Club, of which I am founder and president, but in Barry's initial post I recognise a lot of what I do. I hoover the bench regularly, I keep tools in groups in pots, I use old butter tubs for parts, tidy up at the end of each modelling session etc, etc. What is interesting is that there seems to be absolutely no correlation between the tidiness of the work area and the quality of the modelling. Some of the most inpressive builds come from the seemingly chaotic benches.
 

Panzerwrecker

SMF Supporter
Joined
Mar 2, 2022
Messages
362
Points
93
First Name
Los
Tis all well in theory, and no doubt a clean bench should work more efficiently. However, putting that into practice time after time, build after build etc is not always possible for me personally. TBH, as others have already stated, I seem to be far more creative if I DON'T continuously tidy up around me. It’s simply a distraction! Sure, I do clean up occasionally and it will usually be a big clean up, but although I know deep down it probably would be an easier space to manage without all the accumulated clutter, I’m not fastidious about routines. ADHD sees to that!

Dealing with my condition when it comes to the hobby can sometimes be frustrating. I start way more than I finish and am annoyingly precious about keeping unfinished work in a state so that I can regain momentum quicky. My finished builds go in cabinets in the house, unfinished projects remain in well-marked storage boxes in the cave. That process for some unexplained reason, I keep on top of!

My dedicated garden mancave is smaller than many children’s bedrooms at less than 3x2m internally and has undergone some major changes since it was built. I like to think each one has improved my ability to carry out tasks more efficiently, but the reality is, the more 'stuff' I have, the harder it is to manage! Consequently, I do separate my space into work areas. Being right-handed it naturally flows left to right. First space is the 'build area' the next is the 'prep for paint', followed by the spray booth, a 'finishing' area and finally a little worktop photo both. Often if I am on a 'role' with a project the build area won't get cleaned as I move onto the prep area. I know it will be a distraction and God forbid if I discover anything whilst cleaning up, that rabbit hole will be explored!:upside:

So, to the original question. 'Do we actually do them'. For me, yes, not all and I suspect not in a way many could cope with, but it works for me. It is however great to see other modellers benches and to see how others work. I copied someone else’s arrangement for splitting my bench into different work areas and it instantly helped. The very fact I DON'T have to tidy up the build bench to instantly progress to the next stage helps workflow and I like to think I’m a fraction more productive because of it.

Happy days

Los
 

Panzerwrecker

SMF Supporter
Joined
Mar 2, 2022
Messages
362
Points
93
First Name
Los
Some entertaining and interesting posts. I know the running joke about the Tidy Bench Club, of which I am founder and president, but in Barry's initial post I recognise a lot of what I do. I hoover the bench regularly, I keep tools in groups in pots, I use old butter tubs for parts, tidy up at the end of each modelling session etc, etc. What is interesting is that there seems to be absolutely no correlation between the tidiness of the work area and the quality of the modelling. Some of the most inpressive builds come from the seemingly chaotic benches.
That I most definitely concur with 100% :smiling5:
 
  • Sad
Reactions: JR

Scratchbuilder

SMF Supporter
Joined
Jul 2, 2022
Messages
1,973
Points
113
Location
Luton
First Name
Mike
For instance yesterday I had the experience of finally evicting the damned spider that has been going around my room and leaving its web across everything. So out came the hoover and the extension pipe and around all four walls I went sucking up webs and finally cornerd the offending eight legged individual before evicting it up the pipe.... I am not a house proud modeller, even SWMBO refuses to spend as little time as possible in my room, and finally after much huffing and puffing from her I finally took down the lamp shade to dust it - after three years!!! She called it dust, I called it insulation.... When she comes past the open door she gives a grunt or sigh of disaproval and then seems to catch the door so it closes so that I do not infect the rest of the house.... There is a place for everything and everything in a place - but not in my room, I know where things are that I need, and those I do not need are away. But I got away without dusting the top ornaments/car key shelf - that is for another day when I can say "Look dear! I am having a clean up...."
 

BarryW

SMF Supporter
Joined
Jul 23, 2011
Messages
5,042
Points
113
Location
Dover
First Name
Barry
I promised a photo after my second session

A lot busier but still tidy and organised. I had a quick run around with the desktop vac before putting down the tools. I have another cutting, sanding and glueing session later today so I just left the tools I used out. It will be busier still after my next session with more subs done.
7E56435E-5C7F-4C65-A0DF-25BEC935A95A.jpeg

another photo later of how I leave it overnight.
 

Allen Dewire

Proud Rabble Member
SMF Supporter
Joined
Apr 27, 2018
Messages
4,105
Points
113
Location
Bamberg
First Name
Allen
Great and interesting thread Barry! I'm a bit like Mike, but I'm single. I live in a small Flat, as you would say on the Insel, and under the roof to boot. I only wish I could have a cave or a real bench to enjoy building my kits. I work at my dining table, and it has grown into my corner of the world. I do have to move my current build so I can have my meals daily. I work with A4 mats as they are easy to move and using anything bigger wouldn't fit the space. Here's a pic of my world (Caution, not for the weak at heart),

IMG_3255.JPG
Yes, I actually do clean it up and have some organization, but mostly when I finish the current build I'm working on. My tools are kept in the box on the right (with the clothespins on it). The paints go back in the racks where they belong as well as the glues used. The table gets a good wipe down too. Where I sit is filled with various kits, references and other stuff. It also needs to be cleaned up. On the top left is a shelf for all my bigger tools and too many plastic containers with different parts and scratchy stuff in them. I need to add a second shelf below it for more space to store them. My reference materials are in/on the stand on the floor. That too is full and I need to do something for more storage. Behind the laptop is my iPad that I use to take all the lousy pics I post. When I finish the 1/2 track build, I will do a massive clean-up and post another picture for your perusal. Yes, it looks messy, but it's nice to have everything you need at your fingertips during the build...

Thanks too Barry for the tip about the mini vacuum. Definitely need to get one of those........

Prost
Allen
 

zuludog

SMF Supporter
Joined
Mar 6, 2015
Messages
279
Points
43
Hmmmm ..... I really must learn how to post photographs. Meanwhile a few comments

I work on a small office desk
lighting is 2 Anglepoise lamps with daylight bulbs
most tools, materials & paints are kept in the drawers
But frequently used tools are in a desk tidy that I scrounged off my daughter when she decided she had become too grown up for pink
The actual model constructing surface is the glass oven door off an old cooker
Generally I try to be tidy & organised & keep the desk as clear as possible, but inevitably dust, tools, etc, etc accumulate and spread, so now & again during construction I have a tidy up
Parts & sub assemblies that have been painted or glued are placed on another sheet of glass to dry
Sprues of 'raw' parts are kept in the kit box, and most trimmed/sanded parts that are ready to go are kept in a small stainless steel tray that I think was originally an ash tray.
I have a cheap, soft #8? paintbrush, squirrel or camel or something that I've had for years & years. I use it to dust models & parts as I'm working on them.
Search t'Net & YT for 'jeweller's bench' and there are various ideas for desks with drawers & racks & storage for small items
As I sit at my desk, instructions are to the left; tools are to the right; parts & sub assemblies are across the top of the actual construction area

Speaking of which, I notice from the pictures of BarryW, Allen Dewire on this Thread, and other pictures on this Forum and YouTube that the actual working areas seem quite small - I like to have more clear space.
 
Last edited:
  • Like
Reactions: JR

BarryW

SMF Supporter
Joined
Jul 23, 2011
Messages
5,042
Points
113
Location
Dover
First Name
Barry
Speaking of which, I notice from the pictures of BarryW, Allen Dewire on this Thread, and other pictures on this Forum and YouTube that the actual working areas seem quite small - I like to have more clear space.
The pictures are deceiving. My workspace is quite large bearing in mind that while I am currently working in 1/48, I mainly build 1/32 scale aircraft and do like to spread.

This picture perhaps chives a better perspective. My ‘work area’ in the build section in front of my chair is actually about 4ft wide by 23 inches deep, plus the ‘turn’ on the left of my seat and then there is the separate spray area.
image.jpg
 

BattleshipBob

Bob, bob, bobing along!
SMF Supporter
Joined
Apr 28, 2018
Messages
6,220
Points
113
First Name
Bob
The pictures are deceiving. My workspace is quite large bearing in mind that while I am currently working in 1/48, I mainly build 1/32 scale aircraft and do like to spread.

This picture perhaps chives a better perspective. My ‘work area’ in the build section in front of my chair is actually about 4ft wide by 23 inches deep, plus the ‘turn’ on the left of my seat and then there is the separate spray area.
View attachment 466974
Do you many issues with dust on the bottles etc Barry
 

BarryW

SMF Supporter
Joined
Jul 23, 2011
Messages
5,042
Points
113
Location
Dover
First Name
Barry
Well I said that I will show a picture of my desk as I leave it at the end of the day.

Here it is.
936B0BE3-AED4-4D5C-85DB-2DF49FA4B684.jpeg

As you can see the internal parts are to the left ready for a semi-matt varnish. A lot more sub-assemblies are all ready. All tools are away and I have run around the area with my vac.

Tomorrow after I have done the semi-matt varnish and the metal powder dry brushing tomorrow will be a day of build-up.
 

Tim Marlow

Little blokes aficionado
SMF Supporter
Joined
Apr 27, 2018
Messages
16,823
Points
113
Location
Somerset
First Name
Tim
Hokayyyy….principally for Andy, though I am sure others will have a passing interest……

The door…
B4F28F7F-CFA5-47D8-9224-8B5A60A16714.jpeg

The build bench…..
E8F3653E-A2D8-4B75-BB34-70E4CE2A516E.jpeg
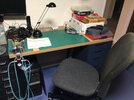
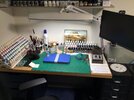
Drawers to the right have the tools etc…..ones to the left have scratch stock and stationary….not much going on, just cleaned up some little chaps and dusted down. They are in the multi compartment box under the optivisor.

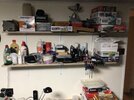
Shelves above….
4B36C146-D3BD-4DD7-AE0B-1A1304EB5CFC.jpeg
Lesser used tool, spares boxes, a few guitar parts, and blue tack….

Spray booth
6357EFD9-579C-42BE-99B2-3E6476A1500E.jpeg
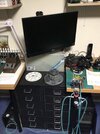
Dismantled at the moment…..note computer under the build bench and screen set to the build bench if needed…..

Painting bench….
5A47D137-A84A-415D-A7F3-1B2AF3F6C2A5.jpeg
My most used paints are the Vallejo. They are in the two stands, with the whirlymix on the right and the figure and brush stands on the left. Best light on this bench. Drawers on the right have figure bits and bobs and airbrush spares in them. There are some on the left with painting trays, wet pallet spares, masking tapes, coloured pencils etc, but they don’t show up :tears-of-joy:

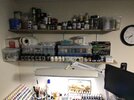
Shelves above…..
D00EEEE6-808C-4B19-9365-A9E2FCBF93BF.jpeg
Top shelf is mostly primers, thinners and Alclad. Some powder paint on the left (great for pre colouring base dressing. First shelf is lesser used paints. Heavy body oils and acrylics on the left, Tamiya next, then enamels and odds and sods. Along the front are metallics and inks with some Vallejo box sets along side.

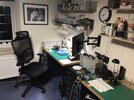
Down the right, so you can see how it all fits….
715A6972-DEDC-4106-83CF-03A18570F220.jpeg
Gimlet eyed JD 3rd keeps a weather eye on me…..

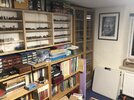
Behind the desks,
37E4B944-0207-4927-A44E-F4DD88E990C6.jpeg
2DA5F239-CC83-4F2F-A681-3175B69164AC.jpeg
242783E6-56C6-467E-9D33-49AAFEEAFC7C.jpeg
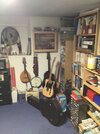
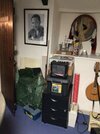
Usual pile of books, stash, guitars, etc. overseen by Old Muddy and Young Muddy……. Figures and completed models are in the glass fronted cases. Everything else is subject to change (and needs a damn good clean up now I’m getting fitter).
Last filing drawer cabinet holds basing materials, paint stands, flock, tufts, etc….

The room is about 14 foot by 12 foot in old money, and has a great view of King Alfred’s tower in daylight :smiling5:

Just remember, this is the culmination of about forty years active modelling and about two years thinking through. I certainly didn’t buy it all at once :tongue-out3:

Hope it was of some interest. Don‘t hesitate to ask if you need to know more….
 

The Smythe Meister

Born to be WILD....... until about 9pm
SMF Supporter
Joined
Jan 30, 2019
Messages
5,772
Points
113
Location
Devon
First Name
Andy
Hokayyyy….principally for Andy, though I am sure others will have a passing interest……

The door…
View attachment 467054

The build bench…..
View attachment 467055
Drawers to the right have the tools etc…..ones to the left have scratch stock and stationary….not much going on, just cleaned up some little chaps and dusted down. They are in the multi compartment box under the optivisor.

Shelves above….
View attachment 467056
Lesser used tool, spares boxes, a few guitar parts, and blue tack….

Spray booth
View attachment 467057
Dismantled at the moment…..note computer under the build bench and screen set to the build bench if needed…..

Painting bench….
View attachment 467058
My most used paints are the Vallejo. They are in the two stands, with the whirlymix on the right and the figure and brush stands on the left. Best light on this bench. Drawers on the right have figure bits and bobs and airbrush spares in them. There are some on the left with painting trays, wet pallet spares, masking tapes, coloured pencils etc, but they don’t show up :tears-of-joy:

Shelves above…..
View attachment 467059
Top shelf is mostly primers, thinners and Alclad. Some powder paint on the left (great for pre colouring base dressing. First shelf is lesser used paints. Heavy body oils and acrylics on the left, Tamiya next, then enamels and odds and sods. Along the front are metallics and inks with some Vallejo box sets along side.

Down the right, so you can see how it all fits….
View attachment 467060
Gimlet eyed JD 3rd keeps a weather eye on me…..

Behind the desks,
View attachment 467061
View attachment 467062
View attachment 467063
Usual pile of books, stash, guitars, etc. overseen by Old Muddy and Young Muddy……. Figures and completed models are in the glass fronted cases. Everything else is subject to change (and needs a damn good clean up now I’m getting fitter).
Last filing drawer cabinet holds basing materials, paint stands, flock, tufts, etc….

The room is about 14 foot by 12 foot in old money, and has a great view of King Alfred’s tower in daylight :smiling5:

Just remember, this is the culmination of about forty years active modelling and about two years thinking through. I certainly didn’t buy it all at once :tongue-out3:

Hope it was of some interest. Don‘t hesitate to ask if you need to know more….
Well Tim.....
... What can I say,apart from being very envious!! ;)
What a great set up you have there,and so " warm" looking too :smiling3:
Excellent stuff indeed Sir..... makes my "War office" seem positively puny!!
 
Top