Valerons Arma Hobby Yakovlev Yak-1B 1/72

Valeron

SMF Supporter
Joined
Jan 7, 2022
Messages
620
Points
93
Location
St Albans, Hertfordshire
First Name
Mike
First of all, Thanks to Karl and Andrew for hosting this group build.

I've struggled recently to complete a GB so I'm planning on trying extra hard to do this one.

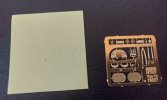
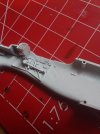
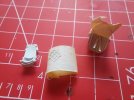
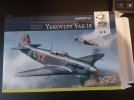
It's a relatively small kit to build but does have some PE included which is completely new to me, so that should add to fun.

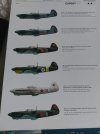
There are numerous colour schemes recommended and I'll make a decision shortly on which Russian one to proceed with.

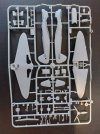
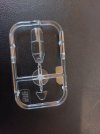
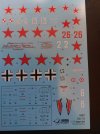
There is a single main sprue, a clear one, decals, masks and PE included.

The kit is also labelled as an expert kit and I guess that is a fancy marketing as I'm certainly no expert.

Mike
1000009870.jpg

1000009876.jpg

1000009871.jpg

1000009873.jpg1000009874.jpg

1000009875.jpg
 

adt70hk

I know its a bit sad but I like quickbuild kits!!!
SMF Supporter
Joined
Sep 4, 2019
Messages
9,523
Points
113
First Name
Andrew
Welcome to the GB build phase Mike!
 

Valeron

SMF Supporter
Joined
Jan 7, 2022
Messages
620
Points
93
Location
St Albans, Hertfordshire
First Name
Mike
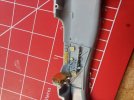
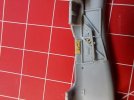
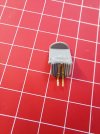
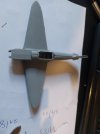
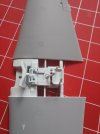
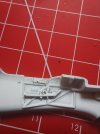
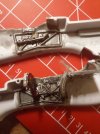
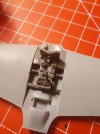
A bit of early progress. I attached the cockpit PE.

It was very fiddly and I probably overdid the superglue in places. This is my first time with the stuff so it's a learning curve.

Next stage is to prime all of this, paint it, add decals etc of which there are a few in the cockpit. Then another piece of PE needs to go over the dashboard decal.

I have lost one piece of PE. A small wheel on one side of the cockpit wall disappeared somewhere when I picked it up. I've searched and searched but it's about 3mm wide and has probably been devoured by the carpet monster.

1000009881.jpg

1000009880.jpg


1000009879.jpg
 

Geoffers

SMF Supporter
Joined
Jan 26, 2017
Messages
1,043
Points
113
Location
Shropshire
First Name
Geoff
Nice start Mike :thumb2:

There are some good marking options, do you know which you are going with?

Geoff.
 

adt70hk

I know its a bit sad but I like quickbuild kits!!!
SMF Supporter
Joined
Sep 4, 2019
Messages
9,523
Points
113
First Name
Andrew
A bit of early progress. I attached the cockpit PE.

It was very fiddly and I probably overdid the superglue in places. This is my first time with the stuff so it's a learning curve.

Next stage is to prime all of this, paint it, add decals etc of which there are a few in the cockpit. Then another piece of PE needs to go over the dashboard decal.

I have lost one piece of PE. A small wheel on one side of the cockpit wall disappeared somewhere when I picked it up. I've searched and searched but it's about 3mm wide and has probably been devoured by the carpet monster.

View attachment 492844

View attachment 492845


View attachment 492846
Coming on nicely!
 

Valeron

SMF Supporter
Joined
Jan 7, 2022
Messages
620
Points
93
Location
St Albans, Hertfordshire
First Name
Mike
Nice start Mike :thumb2:

There are some good marking options, do you know which you are going with?

Geoff.
Sorry for the slow response. I've been too busy to get any bench time.

I'm back on it now though.

I'm going with the scheme shown below. I'm trying to work out what Night Black is though, maybe just a fancy word for Black. Looking on Stalemates though it looks slightly lighter. I'm using Vallejo so looking to mix my black it with something to make it more this colour - https://www.scalemates.com/ru/colors/akan--669/63043-amt-6-black-acrylic-lacquer-matt--8100. Although Vallejo indicate that their Nato Black colour (which I do have) is the same as AMT-6. Anyway, I need to clean up and prime before I worry about this. Any thoughts though would be appreciated. Maybe I'm thinking too much.


Capture1.JPG

Capture.JPG

Capture2.JPG
 

adt70hk

I know its a bit sad but I like quickbuild kits!!!
SMF Supporter
Joined
Sep 4, 2019
Messages
9,523
Points
113
First Name
Andrew
How about mixing it with a mid-blue...... Have a look for my recently completed Tamiya Raiden. This recommended an off-black.... possibly NATO black.

I just mixed three parts black to one part mid-blue.
 

Jim R

SMF Supporter
Joined
Apr 27, 2018
Messages
13,795
Points
113
Location
Shropshire
First Name
Jim
Although I've heard of Arma Hobby I've only seen a few of their kits built. This looks rather nice. I wonder if the "expert" designation is due to the inclusion of pe and the many small, fragile parts.
You're off to a good start.
As for the missing pe wheel. If you stop looking and close up the cockpit the carpet monster may well return the part - it's a contrary little critter.
 

Valeron

SMF Supporter
Joined
Jan 7, 2022
Messages
620
Points
93
Location
St Albans, Hertfordshire
First Name
Mike
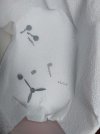
A bit of progress today. The cockpit and associated parts have been fully assembled and primed. I'm just waiting on some paint to arrive in the post so I can paint these parts.

I must sat that the PE stuff is very fiddly and completely new to me. I have left the belts straight and will adjust the shape when I've painted them. I'm not sure if this isn't he correct way to do it but I'd struggle to paint them in their final position.

I also did a lose dry fit before priming and so far so good.

20231026_150734.jpg

20231026_164013.jpg20231026_164029.jpg


20231026_164041.jpg

20231026_164120.jpg
 
Last edited:

adt70hk

I know its a bit sad but I like quickbuild kits!!!
SMF Supporter
Joined
Sep 4, 2019
Messages
9,523
Points
113
First Name
Andrew
Coming on very nicely Mike!!!

ATB.

Andrew
 

Valeron

SMF Supporter
Joined
Jan 7, 2022
Messages
620
Points
93
Location
St Albans, Hertfordshire
First Name
Mike
Slow progress as I keep being distracted by real life.

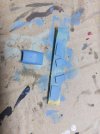
Nearly reading for priming, although my Micro Kristal clear has dried up so I can't fit the canopy yet. Also the canopy mask provided is rubbish and wouldn't line up or stick so I'm making my own.

20231110_112642.jpg

20231110_112634.jpg
 
Last edited:

Geoffers

SMF Supporter
Joined
Jan 26, 2017
Messages
1,043
Points
113
Location
Shropshire
First Name
Geoff
Ah real life, the curse of modellers everywhere :tears-of-joy:

Coming on a treat Mike, shame about the masks though.
Disappointing when you have paid extra for them :rolling:

Geoff.
 

David Lovell

SMF Supporter
Joined
Apr 27, 2018
Messages
1,508
Points
113
Location
Poole Dorset
First Name
David
Good stuff Geoff, very interested in this as I have the same kit amongst my bought and never touched aircraft stash you never know this could be the catalyst........
 

adt70hk

I know its a bit sad but I like quickbuild kits!!!
SMF Supporter
Joined
Sep 4, 2019
Messages
9,523
Points
113
First Name
Andrew
Coming on nicely Mike! No what you mean about real life.....mine has not moved on in about two weeks!

Shame about the canopy masks though.
 

Valeron

SMF Supporter
Joined
Jan 7, 2022
Messages
620
Points
93
Location
St Albans, Hertfordshire
First Name
Mike
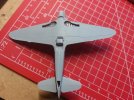
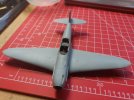
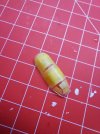
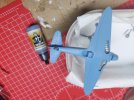
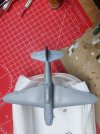
The model has been primed from a rattle can and the underside of the aircraft brush painted with 3 thin coats of Blue Grey. Seams were a problem, well at least for me. The model went together well but I still struggled to remove the seam lines and it required a couple a reprimes to sort them.

All small remaining parts have been tidied up, primed and painting started in them.

I've also made the school boy error of attaching small parts and protecting them. The cannon has already snapped off twice.

I'm enjoying the model and aside from the chappy masks which came with it, it's going together quite nicely overall.

20231112_172428.jpg

20231112_172404.jpg


20231112_172327.jpg

20231112_172313.jpg
 

Valeron

SMF Supporter
Joined
Jan 7, 2022
Messages
620
Points
93
Location
St Albans, Hertfordshire
First Name
Mike
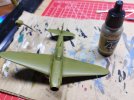
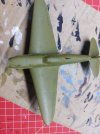
A little more progress. I've applied the green coat for the top of the aircraft. I needed 3 thin brush coats for this. Next up is the dark coat for the camouflage on top of this.

It's going well and a pleasure the paint.

20231113_175722.jpg
 

Valeron

SMF Supporter
Joined
Jan 7, 2022
Messages
620
Points
93
Location
St Albans, Hertfordshire
First Name
Mike
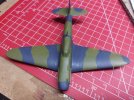
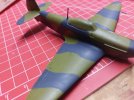
The darker camo has been added. This was brush painted after marking the lines in pencil. All other small attachments have also been painted.

I'm out all day tomorrow meeting friends in London so will attach these parts later in the week, do a little but of touch up required and move to the next stages.

So far so good and this will hopefully be the first GB model I've completed on time in a while.


20231114_171924.jpg

20231114_181331.jpg

20231114_181337.jpg
 
Top