simontie
SMF Supporter
Box art picture still un opened i post the sprues closer to the start date


simon
simon
Yes so i believe, I surprised he wasn‘t in the Razorcrest kit… wouldn’t have been a big ask i built one last year really nice kitThis is the way
I considered this, or the Razorcrest, as exercises in silver, but you've beaten me to this one at least!
BTW Revell are issuing a Scout and Speeder bike this year, with Grogu in a bag option!
 simon
simonYes so i believe, I was surprised he wasn‘t in the Razorcrest kit… wouldn’t have been a big ask i built one last year really nice kit View attachment 501493simon

Great to see you jumping in Simon, looking forward to seeing you get this togetherOk box opened this is my first build of the year really been busy, ok so here is my sprue shots and more to follow once i get the plan in my head
View attachment 508879
Simon


 off to look at LEDS and wiring back soon maybe!,
 port and starboard motors, i have worked out a system for the leds it a bit tight in the wing tips but i think i can ream channels out and squeeze them in, while trying to process i have had to come up with a new build sequence so far it seems to be working and slowly coming together, what i have trialed fits really well she should be a nice build
 Going to cut away the bottom of each part and pour in clear resin and at the same time drop in some leds 2 for 3rd motor 4 each for P & S.
Around 6 and some shades of grey as well …So, how many different shades of silver/metal/shiny can you use?
fingers crossed or a big pile of melted plastic lolHI SI should look good lit up with led's
chrisb
That's what I like to hearAround 6 and some shades of grey as well …
Cant happen Si as LED'S dont give off heatfingers crossed or a big pile of melted plastic lol


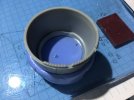
 left it over night to set and it looks good most of it will be hidden with the tail spikes anyway then i read the instructions…. Use a heat gun to remove unwanted air bubbles…


For FULL Forum access you can upgrade your account here UPGRADE