- Home
- Forums
- Military Vehicles
- Military Vehicles Under Construction
- Armoured Vehicles Under Constuction
You are using an out of date browser. It may not display this or other websites correctly.
You should upgrade or use an alternative browser.
You should upgrade or use an alternative browser.
Bronco 1/35 Schwerer Wehrmachtschlepper (SWS) armoured version halftrack
- Thread starter Panzerwrecker
- Start date
Panzerwrecker
SMF Supporter
Cheers Rick
Yep, long overdue
Yep, long overdue

Scratchbuilder
SMF Supporter
Los, appologies for not dropping in to see your build earlier, but what I have seen up to now - brilliant.
That 'Paper Shaper' is a product I wish was around decades ago, it saves so much mess and trouble.
Looking forward to more of your build.
Mike.
That 'Paper Shaper' is a product I wish was around decades ago, it saves so much mess and trouble.
Looking forward to more of your build.
Mike.
Panzerwrecker
SMF Supporter
It's been a while since the sWS got any quality attention but I have been pottering with it on and off this year. The road wheel tyres were airbrushed with Tamiya Tyre Black and individual accessories painted.
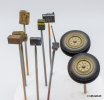
Before the cab assemblies can be fixed together the instrument binnacle, radio and wiring, seats and roof tarp were brush painted with Vallejo acrylics and the instrument decals added. My kit included two sets which was fortunate as decal number one did not represent the large left hand dial in anyway shape or form. Decal number two was used twice to represent the largest dials and some extra placards were also added from my decal spares box.
To seal in the paintwork and prepare for the external decals and all the upcoming weathering stages I turned to my favourite product, VMS satin varnish. This can be airbrushed direct from the bottle with a little thinner giving the model a good wet coat to level. It can be left a couple of hours in-between coats if required.
Exterior decals for this kit include just Wehrmacht number plates which you can add your own individual numbers, a weight stencil, one divisional insignia and a 'Thor' vehicle name seen on one period image. I added just the weight and number plates. These were sealed with another coat of VMS satin varnish.
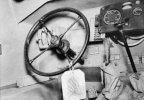
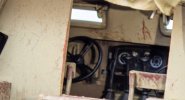
This is the only internal reference pic I have. The instrument binnacle appears to sit a little higher than it does in the open top cargo variant. I'm not convinced a radio was fitted to these cargo vehicles. As I added the one provided in the kit I will now have to find a suitable spot on the exterior to add the aerial mount.
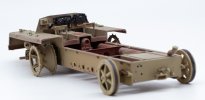
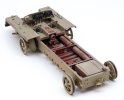
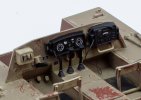
Before the cab received its final weathering and tones down all those severe chipped effects, a light coat of sand coloured lifecolor acrylics was airbrushed over a coat of hairspray over all the sub assemblies and scrubbed back, leaving remnants of the sand colour to simulate the first layers of dust and light dirt build up. A further coat of VMS satin varnish sealed all the work in preparation for the upcoming pin washes.
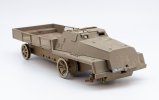
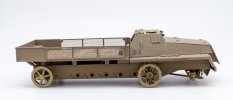
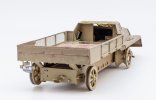
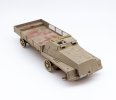
As I would like to represent this vehicle in a late 1944 ETO setting the wet and damp conditions will require a darker coloured pin wash to add to the muddy running gear and lift the contrast to the monochrome base coat. More vibrant colours will be added by way of the accessories in the load area.
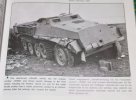
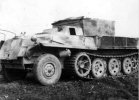
Next up is to complete the cab interior, close it up and get some muddy wet weathering effects on the lower chassis.

Before the cab assemblies can be fixed together the instrument binnacle, radio and wiring, seats and roof tarp were brush painted with Vallejo acrylics and the instrument decals added. My kit included two sets which was fortunate as decal number one did not represent the large left hand dial in anyway shape or form. Decal number two was used twice to represent the largest dials and some extra placards were also added from my decal spares box.
To seal in the paintwork and prepare for the external decals and all the upcoming weathering stages I turned to my favourite product, VMS satin varnish. This can be airbrushed direct from the bottle with a little thinner giving the model a good wet coat to level. It can be left a couple of hours in-between coats if required.
Exterior decals for this kit include just Wehrmacht number plates which you can add your own individual numbers, a weight stencil, one divisional insignia and a 'Thor' vehicle name seen on one period image. I added just the weight and number plates. These were sealed with another coat of VMS satin varnish.
This is the only internal reference pic I have. The instrument binnacle appears to sit a little higher than it does in the open top cargo variant. I'm not convinced a radio was fitted to these cargo vehicles. As I added the one provided in the kit I will now have to find a suitable spot on the exterior to add the aerial mount.


Before the cab received its final weathering and tones down all those severe chipped effects, a light coat of sand coloured lifecolor acrylics was airbrushed over a coat of hairspray over all the sub assemblies and scrubbed back, leaving remnants of the sand colour to simulate the first layers of dust and light dirt build up. A further coat of VMS satin varnish sealed all the work in preparation for the upcoming pin washes.


As I would like to represent this vehicle in a late 1944 ETO setting the wet and damp conditions will require a darker coloured pin wash to add to the muddy running gear and lift the contrast to the monochrome base coat. More vibrant colours will be added by way of the accessories in the load area.


Next up is to complete the cab interior, close it up and get some muddy wet weathering effects on the lower chassis.
Panzerwrecker
SMF Supporter
The cab has been closed up. There are only four tiny locating holes to connect top and bottom cab assemblies and with the lower half having a slight downward bow a few clamps were required to hold it while the glue cured. There is a little clean up required but TBH it could just as well be hidden with dust and debris.
I have taken a few pics looking inside and while these images are always tricky to shoot with so little light available, I think there is just enough to see. While the two halves were separate I used a MIG neutral wash to highlight raised detail with a drop of MIG Dark wash added to darken corners and use to lightly speckly the floor and sidewalls. I still need to use a pencil to add a burnished sheen to a few places
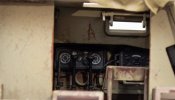
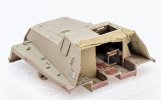
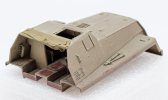
Next up is to get the muddy running gear ref pics out and weather up the chassis and wheels.
I have taken a few pics looking inside and while these images are always tricky to shoot with so little light available, I think there is just enough to see. While the two halves were separate I used a MIG neutral wash to highlight raised detail with a drop of MIG Dark wash added to darken corners and use to lightly speckly the floor and sidewalls. I still need to use a pencil to add a burnished sheen to a few places


Next up is to get the muddy running gear ref pics out and weather up the chassis and wheels.
Very nice updates glad your back at it.
scottie3158
SMF Supporter
Very nice work mate.
Scratchbuilder
SMF Supporter
Nearly missed this great build, lots to look at and read about.

