rtfoe

SMF Supporter
Joined
Apr 29, 2018
Messages
7,715
Points
113
Location
Malaysia
First Name
Richard
Don't worry about the deadline Steven when dealing with so much detail. It needs time for the final touches for everything to blend in...shadows and lighting, placement of the figures. I can understand you pledging a deadline as things can get carried away when an idea just pops up for new additions.
Needless to say this is turning out very nicely.

Cheers,
Wabble
 

Steven

SMF Supporter
Joined
May 6, 2018
Messages
502
Points
93
Location
Frederiksberg Copenhagen, Denmark
First Name
Steven
Hello Chaps thanks for the nice comments
Small update on the building

Last of the bottles are fixed – the brandy
P66DVY0.jpg


In a fortified building, doors and windows are a weak point so the doorway leading out to the balconies are bricked up and will have a outer layer of sandbags on both sides – I wanted to convey a sense of urgency in the construction, All done by men who has neither the experience nor the inclination to produce an esthetically pleasing laying of brick – I think I succeeded :tongue-out:
dG58weh.jpg


Roller-gate Is mounted and has received some damage
R7AJvF0.jpg


All for now - thanks for watching


Steven

SMF Supporter
Joined
May 6, 2018
Messages
502
Points
93
Location
Frederiksberg Copenhagen, Denmark
First Name
Steven
Hello Chaps
Hope you're enjoying your summer
Progres during summer is always slow (even by my standards) but I have managed to get some work done
floor is mounted Sandbags are mounted and partition walls have been added. Insurgents have made passage ways through these to ease movements to and from - this will be clearer on the second floor.
Next come the rubble and debris of war which will consist of ammo crates and some pieces of furniture

1722946098560.png


1722946234927.png


1722946318628.png
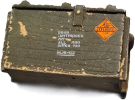
Ammo crates- turned out pretty well - still needs top coat to deal with slight silvering. Will be further weathered with pastels.


1722946568954.png
1722946715043.png
Till next time thanks for watching and stay safe lads.
 

Neil Merryweather

SMF Supporter
Joined
Dec 29, 2018
Messages
4,720
Points
113
Location
London
First Name
Neil
I've said it before Steven , but your attention to all the tiny details is off the chart!
I always look forward to your updates- even if they are widely spaced apart....
 

Jim R

SMF Supporter
Joined
Apr 27, 2018
Messages
14,443
Points
113
Location
Shropshire
First Name
Jim
Always great to see an update from you. Neil is right - your attention to even the smallest of details is second to none.
 

Steven

SMF Supporter
Joined
May 6, 2018
Messages
502
Points
93
Location
Frederiksberg Copenhagen, Denmark
First Name
Steven
Hello Chaps

First of all , thanks for the nice comments - means a lot.

On to the build:

last of the ammo crates done.
1723458055683-png.515756


DOVEBJB.jpg


I went back and forth on where to put it and settled on putting it on the chest of drawers (used as extra protection- filled with sand). To underline this as a firing position i have added some 7,62 mm spent casings on the drawer and some will go on the crate as well and maybe some on the sandbags near the firing slits.
F1RQlHK.jpg


1723458160315-png.515757


crates added and some furniture - including the ubiquitous "white plastic Chair"... Rubble in the process of being added:
Eby5Meq.jpg

ibcDP4G.jpg


Final weathering will consist of washes to the bags ,followed by pastels to well, just about everything- and maybe some fake shadows and highlights on some parts of the rubble and lots of rebar of course
till next time thanks for watching and stay safe.
 

Attachments

  • 1723458055683.png
    1723458055683.png
    26.7 KB · Views: 40

Steven

SMF Supporter
Joined
May 6, 2018
Messages
502
Points
93
Location
Frederiksberg Copenhagen, Denmark
First Name
Steven
Hello guys
So, my plan was to finish the broken slabs of concrete - remnants of the first floor´s, eh, floor and I nearly did it to the extent that what remains is painting/touching up on the rebars and securing remaining rebar with the celluclay paste and dust with mortar dust followed by pastels.
the apartment above the bar has a tiled floor (reality in scale terracotta tiles)and the remains of it would hav that as well so a lot of the work was gluing tiles onto xps pieces
wJUOqo4.jpg

Aoz5aOI.jpg

Mounting the pieces was not easy and required "A Helping Hand"
hDpA9qa.jpg


this pile is form the collapsed floor above
3ALcYMM.jpg

the two major pieces mounted - need to be further secured - I have seen this done with pieces of plaster with pieces of rebar cast into the plaster and the result is very good but I think the whole building would have been required to be cast i pieces of plaster to take the weight - If you have had succes combining foam and plaster elements let me know..
sCX5GRA.jpg

To crash the Counter in the bar below (cf earlier post) some pieces of concrete would have to fall through the roofing with some staying put
KVxRKwk.jpg


Considering this is fusewire,,isolation foam plaster and celluclay - not that bad eh?
d2Wz9a6.jpg

All for now, for variation I might give an overview on the state of progress on the BMP2 - I have not touched the kit in 3 years and honestly can´t remember...
Take care
Steve
 

vizenz

SMF Supporter
Joined
Apr 19, 2024
Messages
361
Points
93
Location
Bavaria
First Name
Andreas
This will be ultra realistic. A dollhouse with a difference! :tongue-out3:
 
Top