The last time I built a Pz.IV was as a twin build after quite a number of new 1/35 scale Pz.IV's were released back in 2019. I compared one of them, Border models Ausf J kit Bt-008 with a mid-noughties Dragon kit, 6575, considered by many Pz.IV enthusiasts as one of their best.
This time I would tackle two more Ausf J kits, only this time by the same manufacturer. In this case Rye Field Models 2 in 1 kit RM-5033 and their full interior kit RM-5043.
View attachment 497407View attachment 497408
I have already made a comprehensive list of production feature changes on the previous Ausf J twin build blog so here is just a brief history of the Ausf J.
View attachment 497421
To give it its full title the Panzerkampfwagen IV Ausführung J (Sd.Kfz. 161/2) was the ninth and last variant of the Panzerkampfwagen IV medium tank family. It was produced from January 1944 to the last days of April 1945. It was distinguished by numerous simplifications from the previous Ausf H in an effort to accelerate production and conserve valuable materials. The biggest change to the Ausf J from the Ausf H was that the single-speed turret traverse electric power drive was replaced with a two-gear manual traverse, in favour of extra space used for fuel storage. Although this change is not really visible on the non interior kit, the change to much lighter wire mesh screens from the steel spaced armour (schurzen) used previously, is. These were introduced in Oct 44. All of these changes were a last-ditch effort to increase Panzer IV production and compensate for tank losses.
Although both Nibelungenwerke (N-Werk from now on

) built 2980 units, and Vomag 180 units, Vomag only built some of the very first vehicles. Due to the production run timescale the Vomag vehicle Fahrgestellnummers (chassis numbers) 86394 to 86573 all had both anti magnetic paste (zimmerit), the original muffler type exhaust and fittings for either type 1 or type 2 steel schurzen. As both RFM kits provides none of these features, if accuracy is to be maintained, out of the box, they can only represent N-Werk built vehicle variants.
In the interest of balance, I will appraise the kits in terms of both accuracy and engineering and I will refer to the excellent Panzer Tracts No.4-3 publication once more. There are still a few gaps in the production timeline in the book, and ambiguity regarding dates that certain features were upgraded or replaced are still up for discussion.
Both kits were released in 2019 and use many of the same external parts from the same sprues. The main difference being that kit 5043 has additional parts to provide a full interior. The hull tubs (Wanne), utilise a flat pack style of engineering to allow the moulding of more internal details. The lower hull side plates look slightly different in each kit. The main turret shell mouldings remain the same and come in just three parts, the gun barrel is in plastic and all the mesh spaced armour, apart from the brackets are represented in photoetch.
The first kit to be release was 5033 and is labelled as a 2 in 1 kit. In addition to the regular Ausf J gun tank, there are parts to build an artillery observation tank (Panzerbeobachtungswagen IV Ausf. J or Pz.Beob.Wg.IV Ausf.J for short These vehicles started to be assembled on the Ausf J in April 1944. Kit 5043 was released soon after and represents just the gun tank, but with a full interior.
Although Ausf J built vehicles were constantly updated throughout their short production history, some changes introduced did not immediately find their way onto vehicles at the time of implementation. As many sub-contractors were involved and factories were temporarily incapacitated due to allied bombing, it was typical to see many vehicles leave the factory with a mishmash of early and late features. What this means is that some of the very last vehicle to leave the N-Werk factory may well have still retained earlier production features.
View attachment 497422
To build straight out of the box, both these kits represent accurate ‘late’ Pz.IV production vehicles. To get an idea of what RFM instruct you to build out of the options available in either kit, here is a breif list of build features for both variants shown in RFM CAD images below.
Kit 5033
Gun tank (pink parts) features the last production run lower hull with extended towing eyes and three return rollers, simple handles on the transmission hatches and full mesh screen spaced armour. Welded upper front panel lifting hooks, a choice of cast idler wheels, regular late style cupola and late production bogie mountings without the two central upper bolt holes.
Artillery observation tank (blue parts) features the earlier lower hull with four return rollers, and bow plate bolted on towing brackets. Upper hull side bolted on lifting hooks. Armoured covers on the transmission hatches and a StuG rotating cupola and additional communications antenna. The choice of fabricated idler wheels and no spaced armour or brackets fitted and the earliy production bogie mountings.
There is a set of workable track links to fit to either variant.
View attachment 497409
Kit 5043
Instructed build features.
Gun tank as per kit 5033 features the last production run lower hull with extended towing eyes and three return rollers, simple handles on the transmission hatches and full mesh screen spaced armour. There are a choice of idler wheels, regular late style cupola , a full interior,clear plastic turret and hull top plate and workable track links..
View attachment 497410
For those who like to invest more time in recreating specific vehicles or want to accurately represent a vehicle that would have fought in a certain operation, it is worth mentioning at this point that as well as choices given in the instructions, and the available backdate options appropriate to both variants that are not, parts are also available on both kit’s sprues to venture into representing Ni-Werk vehicles built at the very beginning of Ausf J production. There will be more tinkering required as witness marks or predrilled holes might need to be re-worked, and Zimmerit will likely need to be added, but parts such as the early style muffler found on their Ausf H kit are included in the box.
One of these ‘appropriate to both’ features is the number of return rollers. Although both kits have you build the gun tank variant with three, four were often seen on many vehicles produced well into 1945. The timeline of production changes in the Panzer Tracts publication shows that a change to just three return rollers was implemented in Oct 44. In the case of kit 5033 you are instructed to build the gun tank with three and the artillery observation tank with four. In reality, both options on the gun tank could be used. Kit 5043 instructs you to build the gun tank with three return rollers, but again, with the witness holes present on the inner lower hull sides, and the return rollers on the sprues, the option is there to add four.
View attachment 497424
Let’s have a closer look at the first kit they released.
Rye Field Model Pz.IV Ausf J #RM-5033
View attachment 497415
Some of the parts below are not called out in the kit instructions but are available in the kit and featured throughout the Ausf J production history.
- Choice of two return roller types.
- Lower hull sides with the option to fit three or four return rollers.
- Choice of either cast or fabricated idler wheels.
- Choice of either bolt on (upper front panel) and welded lifting hooks (upper side panel)
- Late lower hull side extensions with towing eyes or earlier type extensions with bow plate bolt on tow brackets.
- Flame supressing (Flammentoter) and muffler type exhausts.
- Early and late style (top two bolts deleted) mounting castings for the bogies.
- Choice of two styles of rear towing mountings.
- Choice of two styles of flame suppressing exhausts (short and fat or long and thin)
- Choice of transmission hatch armoured covers or simple handles.
- Option to add additional (on later production) engine fan cover handle.
- Choice to add mesh spaced armour and brackets or just bracket blanking plates.
- Choice of turret front plate with visor or panel with visor deleted.
- Three muzzle brakes
View attachment 497412
Upon opening the large box all the sprues are individually packaged and the instruction booklet looks nice and clear. There is a paint and marking guide for five vehicles. There is also a small correction sheet, but it looks to me like it is only applicable to their interior kit 5043.
Checking over the sprues in my kit I was surprised to see a few of the smaller parts covered in small traces of flash. They won’t be too much trouble to clean up, but it is unusual to see in such a recent release. What RFM can be commended on is the positive placement of many of the more delicately moulded items to the sprue gates. Cleaning these parts will be made much easier without sacrificing detail.
Moveable suspension and individual track links.
View attachment 497416
RFM also offer a specific upgrade solution for super detailing. Set RM-2003 can be used both on this kit and their interior kit RM-5043
View attachment 497417
Voyager also offer a specific to kit 5033 PE & resin upgrade set too
http://www.voyagermodel.com/productdetails.asp?itemid=PE351046
For those that intend to build either variant straight out of the box this next section can be skipped.
What ‘late’ Ausf J features are offered in the kit
Now we have established the kit represents a N-Werk built vehicle, there are also a few more visual clues that back this up. Initially N-Werk built Ausf J vehicles all had a unique application of three spare track fittings on the port side of the rear of the upper hull. From around Aug 1944 this switched to a six spare links arrangement on the starboard side. This later feature is the only option offered in the kit.
Likewise, only the wire mesh spaced armour (Drathgeflechtschurzen) is offered, so if it is fitted, it limits the build production timescale for both variants to post Sept 1944. However, the kit does supply bracket blanking plates, so you are given a choice to leave them unfitted, and therefore still represent an earlier build.
Although the earlier horizontal type of exhaust muffler is on the sprues, it is not called out as an option to be fitted. Only the Flame suppressing (Flammentotor) twin vertical exhausts (fitted from Aug 1944) are, so although the Pz.Beob.Wg.IV Ausf.J (artillery observation tank) production started in April 1944, without adding the muffler type exhaust, you can only really represent vehicles built from Aug 1944.
As is evident in so many period images, it was not always a given that updated parts were fitted once the change was announced. There were many contractors providing parts to the builders at N-Werk and existing stock could have been used first. It is therefore possible to see visors present on turrets, along with the original bolted upper hull lifting hooks on vehicles built with the very last produced hulls with three return rollers introduced in Dec 44.
RFM are to be commended on giving us a choice with the return rollers, the ability to backdate the towing point locations and the option to fit the earlier turret front panel with visor. However, it would have been nice to have included an optional rear panel with the early style muffler fixings. These were clearly still present on some ‘later’ built Ausf J’s. I can only assume that the only rear panel moulding with the muffler produced by RFM is designed for their earlier 9./B.W Wanne (hull) on their Ausf H kit. To my knowledge all Ausf J's used the 10./B.W Wanne with the extended floor plate at the rear.
Options to backdate both variants with what is available on the sprues is limited, but there are a few parts which, although only called out to be fitted to the Pz.Beob.Wg variant, would still be relevant for a late 1944 built N-Werk gun tank. For the turret, that included the front armoured plate (part E9) with the vision port. This change to delete it was not fully implemented out by wars end and this is evident in many period images on some of the very last Ausf J’s produced. As for hull tub (Wanne) production, the earlier tow coupling (parts K32, K33 & K92) and the late production Ausf H front sidewall extensions (Parts K56 & K60) without towing eyes, along with rear tow hooks (parts K40 & K41) would have been relevant to all early production Ausf J's. As mentioned above, although the muffler type exhaust is present on the sprues only a rear panel with the holes for the later style Flammentotor exhaust is offered.

Anyway, if I understand it correctly, you kind of need to install the half-shafts from the outside? So why not leave the final drive housings on both sides loose until after the interior has been painted?

 It could be because they fit into slots and not holes and I was worried about alignment. There has to be an explanation so I'll get back to you when I remember myself!
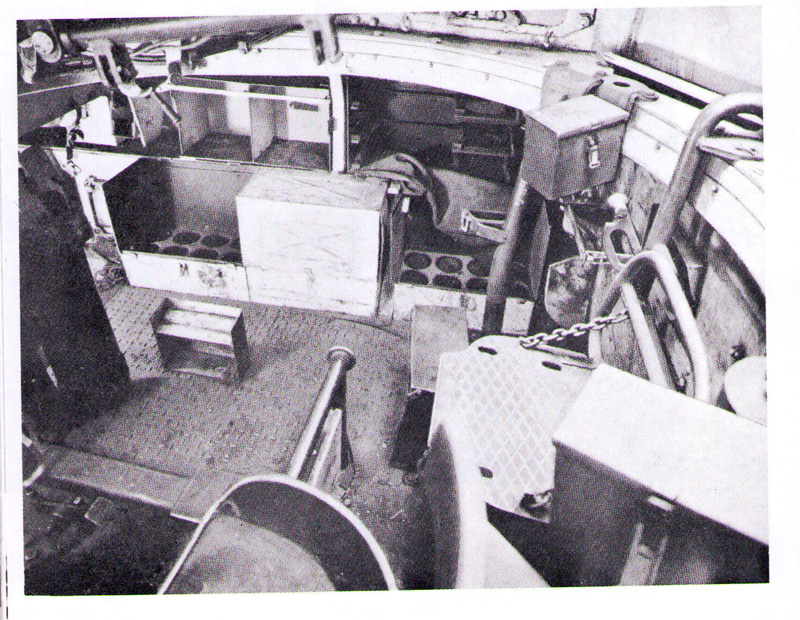
 Unlike the smaller starboard half shaft that will pass through the brake assembly so can be fixed to part Z12, the larger portside half shaft assembly will ony fit through from the inside. Fixing it to the brake assembly means it can be painted and handled into position as one piece. I figured that would be way more easier than trying to blindly align it into its slot in Z12 once the portside brake assembly is fixed to the hull floor

