AFV Club 1/35 Centurion Mk5/2 with 105mm gun

Mickc1440

SMF Supporter
Joined
Apr 27, 2018
Messages
4,257
Points
113
Location
Sheffield
First Name
Mick
Sorry I'm late, I'll settle in with the gathering throng.
Best looking tank ever! I'll watch from the back of the room if I may.
Pete
Just seen this Mick, one of a very small list of post WW2 Tanks that i actually like!!:hugging-face:
.... I`m in mate,looking forward to seeing what you do with it.:thumb2:
Pulling up a chair with the rest of the gang if you don’t mind, Mick.
Welcome along gents, no pressure now with such a distinguished gathering
 

Mickc1440

SMF Supporter
Joined
Apr 27, 2018
Messages
4,257
Points
113
Location
Sheffield
First Name
Mick
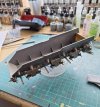
Cracked on with the suspension and a few other additions to the hull. Leaving the wheels off for now to make painting easier. A couple of quite fragile bits gone on the back but invisible repairs carried out on them, looking at the bits to come I’m certain they won’t be the only ones to require surgery
IMG_3268.jpeg
 

Scratchbuilder

SMF Supporter
Joined
Jul 2, 2022
Messages
1,935
Points
113
First Name
Mike
Cracked on with the suspension and a few other additions to the hull. Leaving the wheels off for now to make painting easier. A couple of quite fragile bits gone on the back but invisible repairs carried out on them, looking at the bits to come I’m certain they won’t be the only ones to require surgery
View attachment 504012
Mick, did you glue in the adjuster for the return front idler wheel? Please say no! You can use this to adjust the tension on the tracks - sorry but this slipped my mind.
This is not a disaster as you can remove the arm and drill out the hole and use a piece of sprue or drill through before removal and then once removed use a piece of metal rod to secure and adjust.
 

Mickc1440

SMF Supporter
Joined
Apr 27, 2018
Messages
4,257
Points
113
Location
Sheffield
First Name
Mick
Mick, did you glue in the adjuster for the return front idler wheel? Please say no! You can use this to adjust the tension on the tracks - sorry but this slipped my mind.
This is not a disaster as you can remove the arm and drill out the hole and use a piece of sprue or drill through before removal and then once removed use a piece of metal rod to secure and adjust.
No Mike it’s just pushed in place
 

Scratchbuilder

SMF Supporter
Joined
Jul 2, 2022
Messages
1,935
Points
113
First Name
Mike
No Mike it’s just pushed in place
PHEW!!!!! Sorry I forgot to mention this, I got caught out once with it and on every one after it was a major point I should not have forgotten. But the one I forgot went to the Nationals and I convinced another modeller that the AFV Club one was wrong and mine was right.... Emailed him later that day to correct my mistake - good job I know him.....
 

Mickc1440

SMF Supporter
Joined
Apr 27, 2018
Messages
4,257
Points
113
Location
Sheffield
First Name
Mick
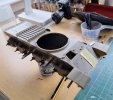
A bit more progress and has Scratchbuilder (Mike) pointed out the grills are a bit fiddly. Still getting used to the way this company has you assemble the kit, quite a few larger parts have no positive locating points but I’m getting there.
IMG_3270.jpeg
 

Scratchbuilder

SMF Supporter
Joined
Jul 2, 2022
Messages
1,935
Points
113
First Name
Mike
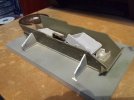
Mick, looking good, the front mud guards may have a downwards slant.
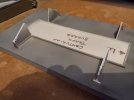
This is the jig I made to make sure the track guards were level...
20240316_165911_HDR.jpg
20240316_165901_HDR.jpg
This allows for any adjustment you need to make. The junk in the lower pic is for a Mk.12 Cent.
 

Jakko

Way past the mad part
SMF Supporter
Joined
Apr 28, 2018
Messages
10,791
Points
113
First Name
Jakko
Another thing to keep in mind with AFV Club is that sometimes larger, flat parts have very big semi-circular nodules on the underside from the ejector pins. Usually you can just leave them be, but some get in the way for fitting the part where it’s supposed to go. Better to always test-fit them to make sure whether or not you need to cut some of those things off.

Yes, fit isn’t Tamiya-like (though it’s never actually bad), but then, AFV Club do give you all the detail that Tamiya thinks is wasted on its customers ;)
 

Mickc1440

SMF Supporter
Joined
Apr 27, 2018
Messages
4,257
Points
113
Location
Sheffield
First Name
Mick
Another thing to keep in mind with AFV Club is that sometimes larger, flat parts have very big semi-circular nodules on the underside from the ejector pins. Usually you can just leave them be, but some get in the way for fitting the part where it’s supposed to go. Better to always test-fit them to make sure whether or not you need to cut some of those things off.

Yes, fit isn’t Tamiya-like (though it’s never actually bad), but then, AFV Club do give you all the detail that Tamiya thinks is wasted on its customers ;)
Those elongated ejector pin marks are something else, a quick snip and they’re in the bin There certainly is a lot of detail I just wish some of it had more positive locating points rather than just an out line where it goes, have to be extra careful when handling the model.
 

Mickc1440

SMF Supporter
Joined
Apr 27, 2018
Messages
4,257
Points
113
Location
Sheffield
First Name
Mick
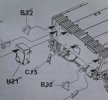
Progress is slow but there’s no real hurry for this build. I was almost caught out by a slightly misleading instruction. Part H21 is clearly shown locating in the oblong mark on the hull, clearly in the next diagram that’s not right but I did notice it. I recently saw a completed model that had been super detailed and looked amazing however I did notice they had managed to install this part upside down
IMG_3271.jpegIMG_3272.jpeg

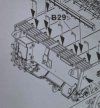
One minor gripe, those little grab handles B29. They are attached to the sprue by the handle part and some of the gates are quite big. They are a bugger to clean up. If I was Scottie they would have all been replaced
 

scottie3158

SMF Supporter
Joined
Apr 27, 2018
Messages
12,692
Points
113
Location
Spalding
First Name
Paul
Mick go on you know you want to. Just drill holes the size of the wire where you want them. Then bend the wire to fit and glue in. They will be good and strong.
 

Scratchbuilder

SMF Supporter
Joined
Jul 2, 2022
Messages
1,935
Points
113
First Name
Mike
Mick go on you know you want to. Just drill holes the size of the wire where you want them. Then bend the wire to fit and glue in. They will be good and strong.
Yeah!!! go on Mick, drill, drill, drill. Or you could order a 3D set from Scorpion Models...
 

Jakko

Way past the mad part
SMF Supporter
Joined
Apr 28, 2018
Messages
10,791
Points
113
First Name
Jakko
B29 is the box that holds both the infantry telephone (to let nearby foot soldiers talk to the tank crew) and the first-aid kit. The handle should be on the bottom like the instructions show it, yes :smiling3: As for the grab handles, I would replace them with copper wire too, like Paul and Mike say. If you do want to use the kit parts, then I’d advise to clean them up but not completely, then glue them on, and once the glue has set, use a sharp knife to clean up the remains of the sprue attachment point. That way you’re not trying to hold a tiny, fragile part in your fingers.
 

Mickc1440

SMF Supporter
Joined
Apr 27, 2018
Messages
4,257
Points
113
Location
Sheffield
First Name
Mick
Mick go on you know you want to. Just drill holes the size of the wire where you want them. Then bend the wire to fit and glue in. They will be good and strong.
oh no I don’t

Yeah!!! go on Mick, drill, drill, drill. Or you could order a 3D set from Scorpion Models...
Too late I’m up for the challenge of sorting them unless they break
B29 is the box that holds both the infantry telephone (to let nearby foot soldiers talk to the tank crew) and the first-aid kit. The handle should be on the bottom like the instructions show it, yes :smiling3: As for the grab handles, I would replace them with copper wire too, like Paul and Mike say. If you do want to use the kit parts, then I’d advise to clean them up but not completely, then glue them on, and once the glue has set, use a sharp knife to clean up the remains of the sprue attachment point. That way you’re not trying to hold a tiny, fragile part in your fingers.
Kit parts are on for now so using your method, let’s see what happens
 

JR

Member of the Rabble and Pyromania Consultant
SMF Supporter
Joined
May 26, 2015
Messages
17,275
Points
113
Location
lincs
First Name
John
Looking good Mick. Lots of interest I see. :thumb2:
 

Mickc1440

SMF Supporter
Joined
Apr 27, 2018
Messages
4,257
Points
113
Location
Sheffield
First Name
Mick
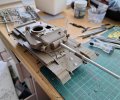
A bit more progress made and getting used to how they design their kits. Bits of cleaning up to do then decided in a moment of madness to remove the moulded on control cables on the turret and replace with lead wire. The clear parts on the glacis plate are where some track links go, no idea why they moulded them in clear, and the driver’s periscopes are also clear so a tiny bit of masking required.
IMG_3278.jpeg
 
Top