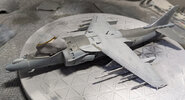
Airfix 1:72 Harrier GR9

Airborne01

SMF Supporter
Joined
Mar 30, 2021
Messages
3,173
Points
113
Location
Essex
First Name
Steve
What's not to love about Harriers (apart from the ugly extended nose)! ... Nice job, and welcome!)
Steve
 

Ed Sunder

SMF Supporter
Joined
Nov 13, 2022
Messages
82
Points
53
Location
Flintstone, GA
First Name
Ed
it ripped the wing clean off the plane

Good grief! I know there are a number of missiles that have used umbilicals over the years. It's a bad day when your wing comes off...

What's not to love about Harriers (apart from the ugly extended nose)!
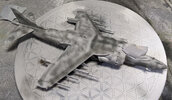
I agree. The proportions for the GR1 just look right. I understand why they lengthened the nose, but the original still looks the best... :smiling3:
 

Ed Sunder

SMF Supporter
Joined
Nov 13, 2022
Messages
82
Points
53
Location
Flintstone, GA
First Name
Ed
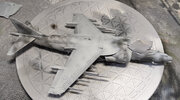
I started with a bit of preshading:
PXL_20221125_214910835.jpg
And then painted the lightest shade - used on the wings and a few other places:
PXL_20221125_220648799.jpg
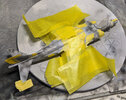
And after letting it dry I did some masking:
PXL_20221126_020807424.jpg
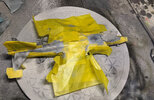
And then I painted the second color, primarily used on the sides and fuselage underside. After that, I masked off further for the third color, which is the final main color.
PXL_20221126_032119297.jpg
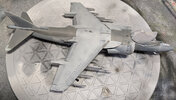
And here it is, unmasked:
PXL_20221126_035339250.jpg
PXL_20221126_035349029.jpg
I have a little cleanup to do - a couple minor masking misses and one area where the tape peeled a bit of paint. I also need to re-mask and paint the area around the intakes - I wasn't going to be able to do that as the same time as the main paint scheme.

Once that's done, I have a conundrum. The front of the wings and the horizontal stabilizers have a tan/yellow stripe on the front and I'm not sure if I should mask and spray or hand paint it. It'll be a challenge either way, specifically on the wings. The part that sticks out (not sure what it's called) that attaches to the second pylon makes it a bit challenging, but I think I can figure it out - I may just have to touch that up after doing the stripe. Well, overall I'm pretty happy with it. I feel like it's really coming alive.
 

JR

Member of the Rabble and Pyromania Consultant
SMF Supporter
Joined
May 26, 2015
Messages
17,275
Points
113
Location
lincs
First Name
John
Ed nice work on the Harrier and the black art of printing in resin .
We were lucky enough to have Harriers based locally until they retired .
1669436978085.png
1669437143035.png
 

Jakko

Way past the mad part
SMF Supporter
Joined
Apr 28, 2018
Messages
10,834
Points
113
First Name
Jakko
I thought you were posting greyscale photos there, until I got to the one with the masking tape on :smiling3:
 

stillp

SMF Supporter
Joined
Nov 17, 2016
Messages
7,228
Points
113
Location
Rugby
First Name
Pete
Could you use a decal for the stripe Ed?
Pete
 

Ed Sunder

SMF Supporter
Joined
Nov 13, 2022
Messages
82
Points
53
Location
Flintstone, GA
First Name
Ed
I thought you were posting greyscale photos there, until I got to the one with the masking tape on :smiling3:
Lots of gray on this one so far - though some of my detail painting this morning added some color...

Could you use a decal for the stripe Ed?
Pete
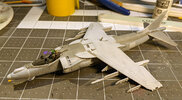
I could, but I think I'd rather paint it. A decal would have to curve around the wing front and it's a pretty sharp curve. Not sure I have enough Micro Sol for that. :smiling3:

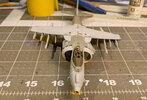
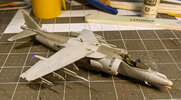
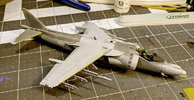
So after further masking and spraying and then some detail painting, here's where I'm at:
PXL_20221126_174343409.jpg
PXL_20221126_174336699.jpg
PXL_20221126_174324017.jpg

Next up is leading edges, clear-coating, landing gear (and other fiddly bits) and decals. I'm leaving clear parts for the end.

I also brush painted the nose because it would have been quite hard to mask, but the paint is a bit thicker than I'd like. Not sure if I can just sand the paint down, but we'll see. It's not terrible.
 

Ed Sunder

SMF Supporter
Joined
Nov 13, 2022
Messages
82
Points
53
Location
Flintstone, GA
First Name
Ed
I decided to mask the top of the wing and hand paint the bottom (who looks at the bottom?) and completely mask off the tail. The weapons pylons made masking the bottom more time consuming than I would like... Note - if you build this model, paint the wing edges before painting the wings and then mask them off for the rest of the painting - it'll be much easier.

PXL_20221126_203459660.jpg

In about an hour I'm going to clear-coat it. Between clear coating the bottom and then the top and waiting for things to dry, it'll be tomorrow at soonest before I'm back on this thing.
 

JR

Member of the Rabble and Pyromania Consultant
SMF Supporter
Joined
May 26, 2015
Messages
17,275
Points
113
Location
lincs
First Name
John
Some fine work Ed.
 

adt70hk

I know its a bit sad but I like quickbuild kits!!!
SMF Supporter
Joined
Sep 4, 2019
Messages
9,506
Points
113
First Name
Andrew
Great work!!

Very well done!!

Andrew
 

Ed Sunder

SMF Supporter
Joined
Nov 13, 2022
Messages
82
Points
53
Location
Flintstone, GA
First Name
Ed
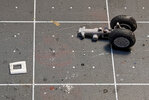
I've started attaching the gear, gear doors etc. and I've found that the main gear is about 0.5mm or so off the deck, with the other gear attached. It's possible I don't have the wing gear down far enough, but I think it's correct. Anyway, that ship has sailed. So I need to push the gear a bit lower. So I made a little shim out of styrene. Here is that shim, along with the gear:
PXL_20221127_215254426.jpg

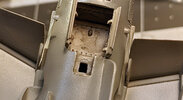
And here is the hole where it'll go:
PXL_20221127_215300853.jpg

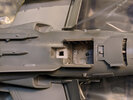
And here it is glued in place:
PXL_20221127_215638734.jpg

Once that dries I'll paint it and put the gear in, along with the rest of the doors. Incidentally, I'm not sure what it is about my phone camera, but I promise you the finish doesn't look like that. It's quite smooth. Of course, these are magnified a ton... Anyway, that's about as far as I'm likely to get today.

I started this build as a, "Hey I'm going to try to build something in a week to get my model mojo back!" project, but then when I got into it I liked where it was going and tried to make it a lot better. As a result I wasn't super concerned with seams and such initially. You can see the area around the lower flap door has some sort of dent where the flap attaches. If I were to build another one of these, there are a lot of things I'd do differently. Ah well... :smiling3:
 

Jakko

Way past the mad part
SMF Supporter
Joined
Apr 28, 2018
Messages
10,834
Points
113
First Name
Jakko
Incidentally, I'm not sure what it is about my phone camera, but I promise you the finish doesn't look like that. It's quite smooth.
Cameras are too good these days … Photograph anything up close and it’ll look a lot worse than it does in real life :smiling3:
 

Tim Marlow

Little blokes aficionado
SMF Supporter
Joined
Apr 27, 2018
Messages
16,797
Points
113
Location
Somerset
First Name
Tim
Cameras are too good these days … Photograph anything up close and it’ll look a lot worse than it does in real life :smiling3:
Some of it is the photo enhancement algorithm the camera applies post shot as well. They “sharpen” the image, which can make flaws much more noticeable, and they saturate colours, which can make the different coloured areas stand out from each other…..
 

Ed Sunder

SMF Supporter
Joined
Nov 13, 2022
Messages
82
Points
53
Location
Flintstone, GA
First Name
Ed
Some of it is the photo enhancement algorithm the camera applies post shot as well.
I have a Pixel 4 phone, which does a lot of enhancement. Normally, that's fantastic, but for these purposes, maybe not as much. :smiling3:
 
Top