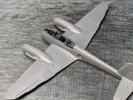
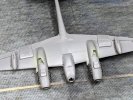
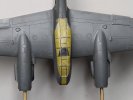
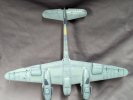
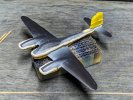
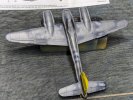
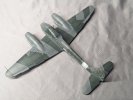
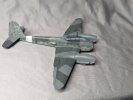
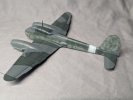
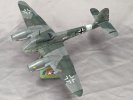
Airfix 1/72 Me410a

Jakko

Way past the mad part
SMF Supporter
Joined
Apr 28, 2018
Messages
10,831
Points
113
First Name
Jakko
It’s not the life raft — that was stored behind the rectangular panel below the rear of the cockpit, just in front of the left gun mount:
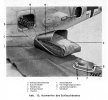
Auswerfen des Schlauchbootes.jpeg

Legend:
a. Inflatable boat container
b. Ejector spring
c. Hand lines
d. Inflatable boat
e. Cover
f. Container lid
g. Locking lug
h. Locating pins
i. Pusher (?)

There were handles on the left side of the cockpit, next to both seats, which would release the raft when pulled.

This is from a PDF of part 9 A: General Equipment auxiliary 1: Inflatable Life Raft of the Me 410 A-1 handbook.

BTW, as I read Andy wants to add the big gun, that’s covered by part 8A :smiling3: It looks like you can only download one file per day from that site, though.
 

Andy T

SMF Supporter
Joined
Apr 26, 2021
Messages
1,971
Points
113
Location
Sheffield
First Name
Andy
Apologies, I've missed this until now!
Coming along excellently,and at a pace too,Andy :thumb2:,
Very nice looking plane that,a shame they don't do it in 1/48, braille scale is too small for me!
Following closely from here on in:cool:.
Cheers Andy. It goes together really well so it doesn't take too long.

As for the scale, I'm finding it a whole lot less fiddly than the 1/48 Bf100!

Cracking start Andy. Reinforces all the good I think the belts things said about these new Airfix kits. That's a great looking cockpit, shows that you don't need aftermarket stuff to get a really good result. Glad the wing root join is good, so often that's where work is needed.
Thanks Jim. I'm very impressed with the kit so far. If someone asked you to build it blind and said it was a Tamiya you probably wouldn't argue.

I think the belts came out a bit chunky but I'm happy with the overall look of the cockpit.

As always with new Airfix, a cracking little kit
The 'problem' though, as you're finding Andy, is the tolerances of CAD stuff. There's no provision for paint 'thickness'!
Still, future modellers, should there be any in 2083, won't need to worry about the mould warping over the next sixty years!
Thanks Steve. Nice tight tolerances where it counts. Now that I know I'll be more mindful of scraping the joints clean.
It’s not the life raft ~
Thanks Jakko, handy link that.
 

yak face

Wossupwidee?
Staff member
Moderator
SMF Supporter
Joined
Jun 13, 2009
Messages
12,414
Points
113
Location
sheffield
First Name
tony
Only just caught this one and its almost ready for paint ! Great work andy , looks a lovely little kit . Cheers tony
 

Waspie

SMF Supporter
Joined
Mar 13, 2023
Messages
2,501
Points
113
Location
Portland - Dorset
First Name
Doug
It’s not the life raft — that was stored behind the rectangular panel below the rear of the cockpit, just in front of the left gun mount:

View attachment 496936

Legend:
a. Inflatable boat container
b. Ejector spring
c. Hand lines
d. Inflatable boat
e. Cover
f. Container lid
g. Locking lug
h. Locating pins
i. Pusher (?)

There were handles on the left side of the cockpit, next to both seats, which would release the raft when pulled.

This is from a PDF of part 9 A: General Equipment auxiliary 1: Inflatable Life Raft of the Me 410 A-1 handbook.

BTW, as I read Andy wants to add the big gun, that’s covered by part 8A :smiling3: It looks like you can only download one file per day from that site, though.
Thank you for posting Jakko. Most interesting, I see the CO2 bottle and see how it was packed. And by the looks of it the inflatable craft was a two seater!!!
Apart from materials, the packing is not dissimilar to how it was done in the 80's/90's. ( I wonder if they used French chalk when packing the rubber elements to avoid them sticking?)
Not being a German speaker I'm unable to determine that from the document.
 

Jakko

Way past the mad part
SMF Supporter
Joined
Apr 28, 2018
Messages
10,831
Points
113
First Name
Jakko
The instructions for folding up the boat (pages 10–13) really only talk about the importance of getting all the air out (including mentioning instead of three or four men lightly pressing the boat flat, a vacuum cleaner can be used for this) and how to fold it. No mention of chalk.

Aha, later on, in chapter IV (p. 22):
Unabhängig davon, ob das Boot im Flugzeug eingebaut oder auf Lager gehalten wird, ist es alle 4 bis 6 Wochen schwach mit Luft aufzupumpen und mit Talkum einzureiben. Es ist ratsam, auch durch das Ventil Talkum einzublasen.

“Irrespective of whether the boat is stowed in the aeroplane or held in reserve, every 4 to 6 weeks it is to be lightly inflated with air and to be rubbed with talcum powder. It is advisable to also blow talcum powder in through the inflation valve.”

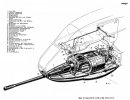
Edit: Just remembered that I can now download part 8A as well :smiling3: No idea what bits of the gun are included in the kit, but for general interest, here’s how it fit in the real plane:

5 cm BK.jpeg

1 5 cm BK [Bordkanone, lit. “[On-]Board Cannon”, more loosely, “aircraft gun”]
2 Front mounting
3 Rear mounting
4 Ring-shaped magazine
5 Weapon mount
6 Fittings on seat and weapon mount
7 Spar reinforcement
8 Hoisting rollers on seat and weapon mount
9 Hoisting rollers on main spar
10 Hoisting rope
11 Hoisting eyes on the weapon
12 Storage tube for hoisting rope
13 Pneumatic belt feed
14 Pneumatic feed
15 Pneumatic charger
16 Fuselage panel
17 Spent-case chute
18 Fittings on main spar
19 Installation plate
20 Strut
21 Transformer for igniter
22 Plug connector P 264/P 800
23 Electrical junction box 5 cm BK
24 SZKK 4 [whatever that may be]
25 Warning light P 267 (now visible symbol connected to SZKK 4)
26 Distributor V 28
27 Circuit breaker P 263
28 Relay P260, P 266 and P 3
29 KG 13 B [?]
30 B-button [firing button, I assume?]
31 3× EPD-101 A [?]
 
Last edited:

Waspie

SMF Supporter
Joined
Mar 13, 2023
Messages
2,501
Points
113
Location
Portland - Dorset
First Name
Doug
The instructions for folding up the boat (pages 10–13) really only talk about the importance of getting all the air out (including mentioning instead of three or four men lightly pressing the boat flat, a vacuum cleaner can be used for this) and how to fold it. No mention of chalk.

Aha, later on, in chapter IV (p. 22):


“Irrespective of whether the boat is stowed in the aeroplane or held in reserve, every 4 to 6 weeks it is to be lightly inflated with air and to be rubbed with talcum powder. It is advisable to also blow talcum powder in through the inflation valve.”

Edit: Just remembered that I can now download part 8A as well :smiling3: No idea what bits of the gun are included in the kit, but for general interest, here’s how it fit in the real plane:

View attachment 496960

1 5 cm BK [Bordkanone, lit. “[On-]Board Cannon”, more loosely, “aircraft gun”]
2 Front mounting
3 Rear mounting
4 Ring-shaped magazine
5 Weapon mount
6 Fittings on seat and weapon mount
7 Spar reinforcement
8 Hoisting rollers on seat and weapon mount
9 Hoisting rollers on main spar
10 Hoisting rope
11 Hoisting eyes on the weapon
12 Storage tube for hoisting rope
13 Pneumatic belt feed
14 Pneumatic feed
15 Pneumatic charger
16 Fuselage panel
17 Spent-case chute
18 Fittings on main spar
19 Installation plate
20 Strut
21 Transformer for igniter
22 Plug connector P 264/P 800
23 Electrical junction box 5 cm BK
24 SZKK 4 [whatever that may be]
25 Warning light P 267 (now visible symbol connected to SZKK 4)
26 Distributor V 28
27 Circuit breaker P 263
28 Relay P260, P 266 and P 3
29 KG 13 B [?]
30 B-button [firing button, I assume?]
31 3× EPD-101 A [?]
,Brilliant Jakko you come up trumps again. Talcum powder/ French Chalk. Same- same.
We used the same technique when packing our rafts. Suck all the air our with a good old ‘Henry’, plug the hole, even if it did have a non return valve!!!
Then French chalk, fold iaw the relevant AP, (aircraft publication). Then try and fit it into a fibre glass shell or canvass back pack.
 

Andy T

SMF Supporter
Joined
Apr 26, 2021
Messages
1,971
Points
113
Location
Sheffield
First Name
Andy
Thanks Ian & Lee. I'll certainly be looking at more of these newer Airfix kits in the future.


I've had a couple of issues today but both were self inflicted. Firstly I broke the side mounted machine guns in half while clipping them off the sprue. I managed to fix one but lost the others barrel, so have added a bit of stretched sprue. Not perfect but they are so tiny I'm hoping no one will notice :smiling5:

Then the biggy. The canopy is in 3 parts and while cementing it together I managed to get a load of gluey fingerprints on the inside!

So that was a couple of hours this afternoon, sanding and polishing. It's looking salvageable as I break for food, will have another go at it tomorrow.
 

Andy T

SMF Supporter
Joined
Apr 26, 2021
Messages
1,971
Points
113
Location
Sheffield
First Name
Andy
The canopy polished up reasonably well. Not perfect but good enough for me and the scale, so I masked it up (after breaking it for about the 5th time) and secured it in place. Fit wasn't the best but given how much I've faffed around that's probably down to me.

1000005700.jpg

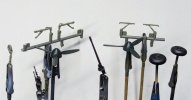
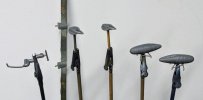
It wouldn't be one of my blogs without some bits on sticks, so here are a few things a painted yesterday. Landing gear, guns and props:

1000005698.jpg

A few bits ready for primer:

1000005699.jpg

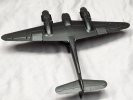
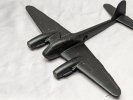
And the aircraft itself primed:

1000005697.jpg

1000005694.jpg
 

Andy T

SMF Supporter
Joined
Apr 26, 2021
Messages
1,971
Points
113
Location
Sheffield
First Name
Andy
A fine bit of airbrushing there Andy
Thanks Garry, I've done a bit more since.

First off was the underside in RLM 76 over black & white preshading:

1000005726.jpg

The a fair bit of masking before the grey:

1000005725.jpg

1000005727.jpg

Then there was even more masking before spraying the green. I don't have a picture of that as I got straight on with the next bit.

The instructions show a much more faded and mottled pattern on the sides than the bf110 I finished recently so I removed the masking as the white tack had produced a harder edge than I wanted, and freehanded the colours, blending down the fuselage sides a little, before adding the mottles in grey and green.

Paints were MRP and S M S lacquers, thinned with Mr Leveling Thinner:

1000005720.jpg

1000005721.jpg

1000005722.jpg

It's now been gloss coated ready for the decals. There are a couple of black green bands for the horizontal stabiliser that come as decals but I may spray those. I should have done it before the gloss really, but I forgot!
 

The Smythe Meister

Born to be WILD....... until about 9pm
SMF Supporter
Joined
Jan 30, 2019
Messages
5,738
Points
113
Location
Devon
First Name
Andy
Not had much time for the site of late Andy,
Just caught up with this though mate... Superb stuff mate:cool:
 

Andy T

SMF Supporter
Joined
Apr 26, 2021
Messages
1,971
Points
113
Location
Sheffield
First Name
Andy
Thank you all for the great comments and positive reactions, much appreciated.

The side mounted machine guns can be made to swivel up & down but I've fixed them in place as I'm not keen on moving features.

Also the chin part is just clicked into place for the moment. The fit is so good it doesn't need cement, meaning I can pop it off later to add the cannon.
 

Jim R

SMF Supporter
Joined
Apr 27, 2018
Messages
13,742
Points
113
Location
Shropshire
First Name
Jim
This is looking superb Andy. Glad you were able to polish out the canopy issue. Neat masking too. Love that paint job. MRP is a great paint. Is that Scale Model Shop paint very similar? I ask because that is what John sells in the shop and I always prefer to support my own where possible.
 
Top