Andrews's 1/48 Eduard ProfiPACK Yak-3

adt70hk

I know its a bit sad but I like quickbuild kits!!!
SMF Supporter
Joined
Sep 4, 2019
Messages
9,517
Points
113
First Name
Andrew
Hi all

So before the next update, a short word on the previously mentioned colour issue.

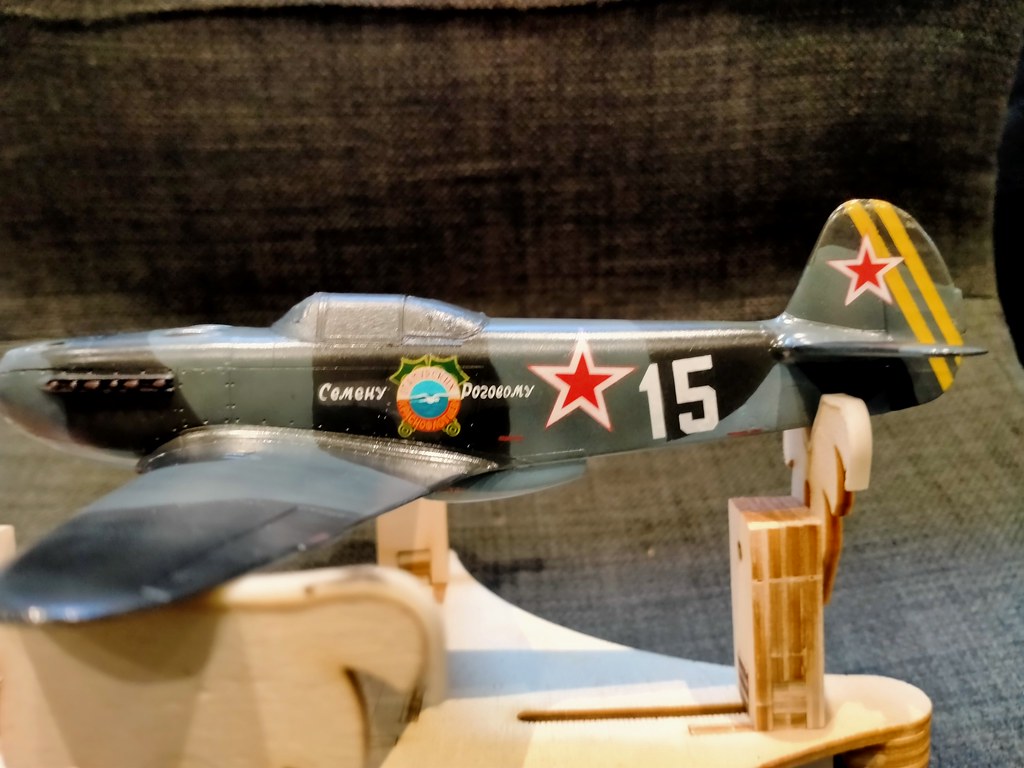
As you know I was worried about the topside greys being too dark compared to every other build I had ever seen.

Well......the reference site I found when researching the cockpit colours also has a section on the general colour schemes. Its colour chips for AMT 11 & 12 both look very close to the AK 3rd Gen colours (as far as you can judge by any laptop screen) but carry the following notes/warning:
  • AMT 7, 11 and 12: Very prone to fading to a lighter shade.
  • Note: from photographic records, it seems that AMT-11 and 12 were subject to quick fading, and repaintings appear much darker than the original camo.
  • Note: according to some sources, in case of lack of AMT-11 and 12 paints, they could have been replaced with a mix of 60% AMT-7 and 40% AMT-6 for AMT-11, and 40% AMT-7 and 60% AMT-6 for AMT-12.
    massimotessitori.altervista.org/sovietwarplanes/pages/colors/color-table.html

So in short my plane will represent one that has either been repainted or more likely not long been out of the factory.

And so onto the next update......

Thankfully, I am nearing the finish line on this. Good job too because the Soviet Wingy Thing GB ends in two weeks!.

Latest progress is as follows:
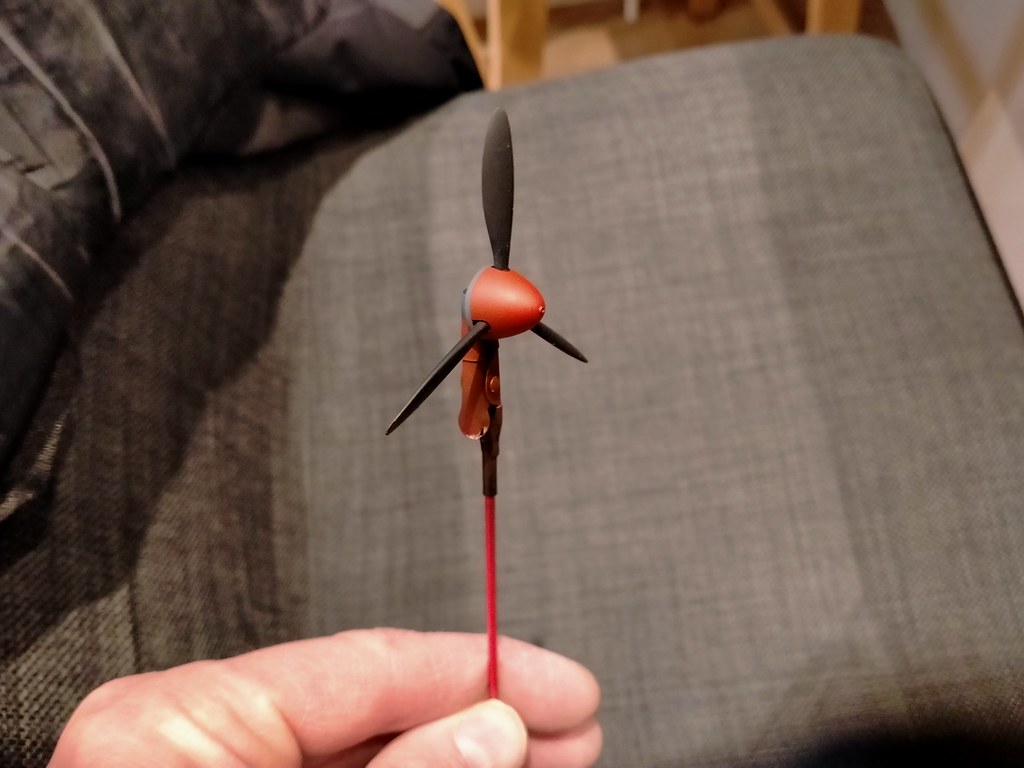
  • Yellow tail stripes painted on rather than use the decals. Coverage was very hard to achieve over such a dark background and so if I do something similar again I might spray them on first over a light primer, mask them over and then to the whole paint job over the top.....certainly a lot less masking to do that way around!
  • Prop and spinner done.....slightly complicated by the fact that the base had to be kept light camo grey.
  • Exhausts painted using my specially patented metal and rust technique and fitted...sorry, hard to get a decent shot with the all the light reflecting off the gloss varnish.
  • A nice and shiny clear coat. Interestingly, this has accentuated the mottling effect a bit!
Next up the decals!!

ACW as usual.

Andrew


Andy T

SMF Supporter
Joined
Apr 26, 2021
Messages
2,024
Points
113
Location
Sheffield
First Name
Andy
Looking very good there Andrew, and I agree with your thoughts. With any bright coloured bands or wing tips, I'll aim to paint them first.

Same with gloss, I find it enhances the contrast, but then it'll dull back again if you finish with a satin or matt varnish.
 

adt70hk

I know its a bit sad but I like quickbuild kits!!!
SMF Supporter
Joined
Sep 4, 2019
Messages
9,517
Points
113
First Name
Andrew
Looking very good there Andrew, and I agree with your thoughts. With any bright coloured bands or wing tips, I'll aim to paint them first.

Same with gloss, I find it enhances the contrast, but then it'll dull back again if you finish with a satin or matt varnish.
A nice tidy paint job there. It's looking really good.
Very impressive Andrew.

Thanks chaps. Glad you're liking it....another update is below.


Andy - This is only the second time I've sprayed on markings like the stripes and hadn't thought ahead. Next time I'll decide before I start what scheme I'm going for, so I don't have the same issue.

In terms of the gloss increasing contrast it's funny how it does that but no doubt there is a scientific reason. As these planes were wood, I'm probably going to go with a semi-satin finish.....for the final coats. I normally use Vallejo's Resin varnish, which comes in gloss, satin and matt. You can mix them without any issues, so you can achieve quite a range of finishes if you want too.

Thanks again chaps!

Andrew
 

adt70hk

I know its a bit sad but I like quickbuild kits!!!
SMF Supporter
Joined
Sep 4, 2019
Messages
9,517
Points
113
First Name
Andrew
Good morning all

So it's amazing what one can achieve when one's far-superior half has to work for half the day and then goes out in the evening too - as happened yesterday!!!

So the latest update is as follows:
  • Decals are on and went down ok but not quite up to Cartograph standards. Surprisingly few decals compared to other wingy kits I have done, including 1/72! Not sure if that was a Soviet thing or just this kit run.
  • Protective clear coat been done over the top ready for the weathering.
  • Undercarriage assembled but still needs a protective varnish coat.
So with a bit of luck, I should have this done by Christmas!

ATB

Andrew


----------------------------------------------------------

Undercarriage
My scratch built support is on the left in both shots. Fortunately, it's not needed for any structural support. It's not perfect but it will pass a brief inspection.


Decals
Oh.....the numbers are deliberately wonky (for once)....as per the destructions! Sorry a couple are a touch out of focus too!


adt70hk

I know its a bit sad but I like quickbuild kits!!!
SMF Supporter
Joined
Sep 4, 2019
Messages
9,517
Points
113
First Name
Andrew
Good afternoon all

So, I am almost there and ready for the final assembly.

Latest work as follows:
  • Flory Wash applied. I think I used the dark dirt.
  • Final clear coat. I went for slightly satin finish - basically 2/3 matt, 1/3 satin....rightly or wrongly I reasoned a wooden plane that had seen some service wouldn't quite have the same sheen as seen on a metal skinned aircraft.
  • Mask pulled off, with no dramas.
  • Exhaust stain applied. I kept it fairly light as this represents a new(ish) aircraft and basically concocted a mix from Vallejo Game Washes (ratio Black 73.201x2, Pale Grey 73.202 x1, Umber 73.203 x1, Sepia 73.200 x1). Next time I'll try weathering pencils.
So, next time you see this, it will be fully assembled and all before Christmas!

ACW as usual.

ATB

Andrew


------------------------------------------------


Ready for the assembly:


Flory wash before and after.
As the topside has far fewer panel lines and virtually none on the wings and it's much darker on the top, it doesn't show as much as the underside, and so I've just done close-ups of the underside!


A reminder of the before.....


Simply slap it all over.....


And then just wipe it off....


The Smythe Meister

Born to be WILD....... until about 9pm
SMF Supporter
Joined
Jan 30, 2019
Messages
5,779
Points
113
Location
Devon
First Name
Andy
Nice one Andrew, just had a very enjoyable catch up... It's looking most excellent :thumb2: ....
That Flory wash is great stuff isn't it?... and SO easy to use:cool:.
Looking forward to seeing it completed. :smiling3:
 

adt70hk

I know its a bit sad but I like quickbuild kits!!!
SMF Supporter
Joined
Sep 4, 2019
Messages
9,517
Points
113
First Name
Andrew
Thanks Andy.

It is so easy too use, so simple and yet so effective! I think it was @BarryW that I first saw use it and then I saw @AlanG use it too and he was good enough to give me some advice on choice and use via PM. So they actually deserve some of the credit!

As for finishing it, I actually managed to get it glued together this afternoon. I'm just waiting for the glue to dry and hopefully better light to take some pictures tomorrow.

Thanks again.

Andrew
 

adt70hk

I know its a bit sad but I like quickbuild kits!!!
SMF Supporter
Joined
Sep 4, 2019
Messages
9,517
Points
113
First Name
Andrew
Hi all

So with my afternoon off yesterday I managed to get the Yak assembled and finally finished.

Below is a teasing shot.....I'll do the obligatory finished thread when I have more time!

ATB

Andrew


Top