Andy T's Faun L900 - Das Werk 1/35

Andy T

SMF Supporter
Joined
Apr 26, 2021
Messages
2,036
Points
113
Location
Sheffield
First Name
Andy
This is a kit I've been watching since it's release. I bought it recently and thought it would be another good candidate for this group build.
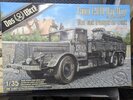
1000004348.jpg

Sprue shots first, starting off with plenty of decals for the numerous paint & marking schemes included, plus tyres made out of six slices, with flat, weighted bottoms:
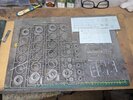
1000004334.jpg

The duplicated A sprues, with 3 types of rear spring to pose the model with different load weights:
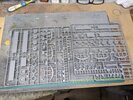
1000004335.jpg

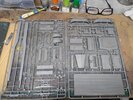
This has most of the cab parts, plus the additional sprue for this updated kit with the hardtop pieces:
1000004336.jpg

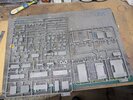
Chassis & load bed mostly:

1000004337.jpg

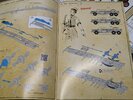
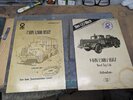
The main instruction booklet. In colour, nicely laid out, with the addendum for the extra hardtop version and some corrections. Also a heap of brass rod to be bent around the included plastic jig to form the hoops for the tilt:
1000004338.jpg

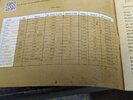
Comprehensive colour listings:
1000004339.jpg
 

Andy T

SMF Supporter
Joined
Apr 26, 2021
Messages
2,036
Points
113
Location
Sheffield
First Name
Andy
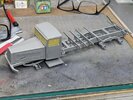
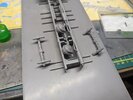
Unsurprisingly the construction begins with the chassis. As usual I built this on my (almost) flat tile to make sure it was flat & square, but given the way it's put together I think it would be nigh on impossible to build it wonky.

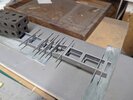
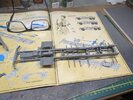
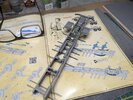
The bed supports are all different. I started out with the best of intentions, laying them out in the correct order on top of their image on the instructions as I tend to do with this kind of thing. I hadn't planned on knocking them all over the desk and mixing them up though!

Luckily the illustration was detailed enough for me to sort them back into the correct order. Note how the upper tabs are all slightly different in size & placement:

1000004343.jpg

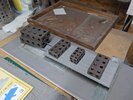
To ensure I'd got them square and in the correct places I popped the load bed on top. Everything lined up perfectly so I needn't have worried, but I kept it in place anyway whilst the cement dried:

1000004342.jpg

The cab side steps are a bit vague with their placement. Tabs & slots are provided but with a little "slop" in each of the joints it would be possible to get them out of line, so I used slow glue and kept adjusting until they looked level, square, and equal:

1000004344.jpg

The looong exhaust, made from a few pieces was added at this point. I'd make assembling the exhaust one of my first jobs if I built this again as it held me up for a while, waiting for glue to dry so I could clean up the seams before fitting:

1000004345.jpg

Then we get to a tricky part. Since there are 3 different springs to show different amounts of sag, it complicates assembly. The axles fit at different angles due to the shape of the springs, so the locating tabs between axle & differential must be cut off for 2 of the versions, leaving you with nothing to line the whole thing up.

Thankfully the manufacturer has realised how confusing this part might be so have included a QR code which takes you to a short video explaining it better:

1000004340.jpg

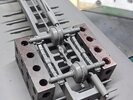
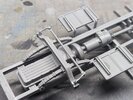
Me being me I chose to differ, assembling the differentials and connecting shaft first, and gluing the axles to the springs to get the correct angle. Note the slot on the diff but no corresponding tab on the axle as I'd cut it off:

1000004346.jpg

I then brought all of this together on the chassis, ensuring the 4 axle ends were square with each other, but the springs are not glued to the chassis, allowing a bit of flex down the line when the front axle & wheels go on, hopefully allowing them all to touch the ground correctly:

1000004347.jpg

Thanks for looking in. More later hopefully.
 

The Smythe Meister

Born to be WILD....... until about 9pm
SMF Supporter
Joined
Jan 30, 2019
Messages
5,788
Points
113
Location
Devon
First Name
Andy
Wow, that's one clear,concise and interesting update there Andy.... you should write for the manufacturers!:thumb2:
Not done,(or even own),a Das Werk kit myself yet, but it certainly looks the part,and is definitely tempting me to get one..... even the instructions look super cool, (especially the pointing guy with the shades!!:tears-of-joy:),and it's a great touch by them to add the QR code bit too:cool:.
It sure does look a beast of a vehicle.... looking forward to the next update :hugging-face:.
 

Ian M

Administrator
Staff member
Administrator
Moderator
SMF Supporter
Joined
Dec 14, 2008
Messages
19,798
Points
113
Location
Falster, Denmark
First Name
Ian
I have this one in the stash together with the low loading trailer... I will be taking notes.
A great start and a well composed build thread.
Got to love the instructions book.
 

Andy T

SMF Supporter
Joined
Apr 26, 2021
Messages
2,036
Points
113
Location
Sheffield
First Name
Andy
Thanks, I haven't noticed any Das Werk kits being built around here so figured I'd add extra waffle to maybe give others an idea what they are like.

No point doing that with my usual Tamiya subjects lol

Instructions seem great so far. There's another video link for the brass bending parts, a simulated coffee mug stain on one of the pages, and even personal email addresses for some of the team at the back. Also a couple of small reference pictures.

7 full colour images of the various military schemes, and 3 more civilian ones in the addendum.

Oh, and I watched a build video by Andy HHQ in the early hours of this morning. His side steps were wonky so it's definitely worth taking that bit of extra time lining them up, or maybe even waiting until the side lockers are on to give a reference.
 

Jim R

SMF Supporter
Joined
Apr 27, 2018
Messages
13,804
Points
113
Location
Shropshire
First Name
Jim
Well Andy what a great introduction to what sounds like a superb kit. I love the look of these heavy trucks - quite brutish. A fine start on the chassis. I suppose you'll be modelling the suspension under load to accommodate the tank.
 

Andy T

SMF Supporter
Joined
Apr 26, 2021
Messages
2,036
Points
113
Location
Sheffield
First Name
Andy
Thanks chaps

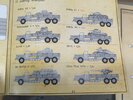
Yes Jim, I've used the most compressed version of the springs. Again, helpfully, the instructions have an illustration of the various possible loads with their weights, to help you choose:

2023-09-1611.12.557448253066750891512.jpg

I did have a minor heart attack when watching the above mentioned video though. Andy had used a differently numbered spring. I was out to the shed in the early hours checking!

It seems his parts & instructions are numbered differently to mine (the video is some years old), so we both got it right.

This morning I've finished the front axle and fitted it in place. I was going to fill the seam but all subsequent illustrations show it visible, so I left it alone:

1000004361.jpg

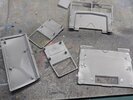
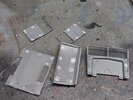
Talking of filling, there are some horrendous ejector scars to deal with in the interior :surprised:

1000004362.jpg

1000004359.jpg
 

scottie3158

SMF Supporter
Joined
Apr 27, 2018
Messages
12,760
Points
113
Location
Spalding
First Name
Paul
Andy,
I am definitely in for this. I like the idea of having a choice of springs. Your off to a great start.
 

Andy T

SMF Supporter
Joined
Apr 26, 2021
Messages
2,036
Points
113
Location
Sheffield
First Name
Andy
Thanks gents.

Busy day today so not much progress. I did however manage to sell my Audi back to the guy I bought it from 13 years ago. For a profit :cool: So the wife & I celebrated with a couple of cold ones at the local pub :smiling3:

I came back and started masking the windows but I'll probably have to do it again tomorrow :smiling5:
 

Lee Drennen

Box Stock Builder with a Twist/ Rabble Member
SMF Supporter
Joined
Apr 29, 2018
Messages
5,773
Points
113
Location
Wortham Mo
First Name
Lee
Nice choice and start Andy. Always thought these were neat trucks
 

Andy T

SMF Supporter
Joined
Apr 26, 2021
Messages
2,036
Points
113
Location
Sheffield
First Name
Andy
Thank you both.

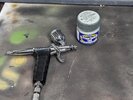
After sorting the ejector marks to a "good enough" standard it was time for some primer. For this I chose Mr Primer Surfacer, put on with my PS-275 airbrush that has just received a new trigger grip. It's even more comfortable to use now. The Primer Surfacer has even better adhesion than the "regular" Mr Finishing Surfacer I use, especially on mixed media like metal & resin:

2023-09-17 09.40.35.jpg

2023-09-17 09.51.43.jpg

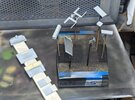
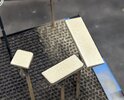
The seats were based up in a light brown then speckled with dark brown. I'm aiming for a cheap black leatherette look where all the surface has worn off, so after this they got some hairspray and a coat of black, which was then chipped off with water and a stiff brush.

2023-09-17 10.01.47.jpg

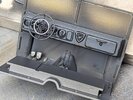
The rest of the interior was sprayed in several shades of grey, received a bit of chipping, a pin wash and later an overall sepia wash to dirty things up a bit. I messed up the dashboard decals by trying to cut them out individually so ended up painting in the clock details:

2023-09-17 14.54.49.jpg

2023-09-17 16.32.27.jpg

2023-09-17 16.32.49.jpg

The cab went together okay but I'd recommend not stopping for a photo shoot halfway, rather get everything ready and put it together in one go while the glue is still soft to give you some wiggle room.

The infill pieces under the cab are a different story though, and those side steps rear their heads again. The pieces needed some trimming to allow the cab to sit down onto the chassis, but then they also fouled one of the side step brackets, meaning I must have fitted it slightly too high. It was an easy fix to relieve a bit out of one, but I think this is the stage where I'd fit the steps in future as you have something positive (the base of the cab) to line them up with:

2023-09-17 18.13.37.jpg

2023-09-17 18.14.21.jpg

The bonnet was also put together. This consists of 5 parts so I carefully put it together, using minimal slow glue just to tack each piece in place, then once it was all lined up & square I went back over all of the seams with fast setting TET:

2023-09-17 18.36.09.jpg
 

therapy

SMF Supporter
Joined
Apr 21, 2019
Messages
886
Points
93
Location
East Anglia
First Name
Nick
Nice progress Andy. It's always a bit nerve-wracking putting the cab together with the interior already painted to your liking, isn't it.....

Nick
 

Allen Dewire

Proud Rabble Member
SMF Supporter
Joined
Apr 27, 2018
Messages
4,120
Points
113
Location
Bamberg
First Name
Allen
My gawd Andy, You sure don't mess around now do you!!! Even with a few niggles, you've got this build down to a science Sir. Fantastic progress in such a short time and I love the innard works too!!! The Faun will definitely be a masterpiece and a great transport for the 38T too!!!

Thanks gents.

Busy day today so not much progress. I did however manage to sell my Audi back to the guy I bought it from 13 years ago. For a profit :cool: So the wife & I celebrated with a couple of cold ones at the local pub :smiling3:

I came back and started masking the windows but I'll probably have to do it again tomorrow :smiling5:
And I take it they were alcohol free cold ones too, huh???......

Prost
Allen
 

Ian M

Administrator
Staff member
Administrator
Moderator
SMF Supporter
Joined
Dec 14, 2008
Messages
19,798
Points
113
Location
Falster, Denmark
First Name
Ian
I do like the way those seats look nicely done.
 

Andy T

SMF Supporter
Joined
Apr 26, 2021
Messages
2,036
Points
113
Location
Sheffield
First Name
Andy
Thanks Nick. I usually end up putting a finger in the wrong spot and ruining the paint, so yes, I took it steady with this.

And I take it they were alcohol free cold ones too, huh???......

Prost
Allen
Absolutely not! :smiling5:

My wife takes meds for rheumatoid arthritis so has to be careful with the alcohol, meaning we always have a few clean drinks in. It's totally against my religion though lol, only the real thing for me ;)

Thanks Ian. I got a bit carried away as it's been a while since I chipped acrylics, they fall off a lot quicker than lacquers!

Happy overall though.
 

Jim R

SMF Supporter
Joined
Apr 27, 2018
Messages
13,804
Points
113
Location
Shropshire
First Name
Jim
Nice looking cab Andy. Good build progress and wrinkles smoothed out. I've not come across that Mr Primer Surfacer.
That trigger grip is nice to use - I love mine.
 
Top