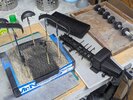
Andy T's Faun L900 - Das Werk 1/35

Andy T

SMF Supporter
Joined
Apr 26, 2021
Messages
2,035
Points
113
Location
Sheffield
First Name
Andy
Thanks Jim. I think I first used this primer on my bendy bus build a few years ago.

If you think lacquers stink, this is on another level, but boy does it stick like the proverbial to a blanket.
 

Tim Marlow

Little blokes aficionado
SMF Supporter
Joined
Apr 27, 2018
Messages
16,839
Points
113
Location
Somerset
First Name
Tim
Excellent work Andy. This is coming together really quickly, and looks superb :thumb2: Pass on your regards to your missus, by the way, we’ve both got the same disease…..and probably have the same meds regime…..
 

Andy T

SMF Supporter
Joined
Apr 26, 2021
Messages
2,035
Points
113
Location
Sheffield
First Name
Andy
Thanks Tim, and I will pass on your regards to Zoë.

I read a post where you mentioned the various treatments you've been through. Luckily she seems to be responding well just to tablets for now, methotrexate & hydroxychloroquine, so fingers crossed.
 

Tim Marlow

Little blokes aficionado
SMF Supporter
Joined
Apr 27, 2018
Messages
16,839
Points
113
Location
Somerset
First Name
Tim
Thanks Tim, and I will pass on your regards to Zoë.

I read a post where you mentioned the various treatments you've been through. Luckily she seems to be responding well just to tablets for now, methotrexate & hydroxychloroquine, so fingers crossed.
That’s very good news. It’s an illness that seems to be treated slightly differently for everyone, and finding the meds combination that works is a bit of a trial and error thing. Mine got away from that sort of regime quite quickly, mostly because I couldn’t be monitored well in the early stages due to covid, and then couldn’t tolerate Sulfasalazin. I was tried on Adalumumab biologics, which work very well for the vast majority, but they just did nothing for me. After the biologics failed I was put on annual Retuximab infusions plus a weekly methotrexate subcutaneous injection. This regime seems to be holding it at last. I’ve found minimising stress and keeping up an exercise regime also helps almost as much as the medication.

I guess what I’m trying to say, in my usual rambling fashion, is if this regime starts failing, don’t despair. There are many others that can be tried, and new ones coming through all the time. Eventually the rheumatology team will hit on the right one and you will get relief :thumb2:
 

Mickc1440

SMF Supporter
Joined
Apr 27, 2018
Messages
4,294
Points
113
Location
Sheffield
First Name
Mick
Andy what do you use to secure the windows? I had some real problems with the truck side ones as the recess for them are quite narrow and I kept pushing them out. I eventually used crystal clear as the guy in the book uses glue and glaze which I read as being the same sort of stuff?
 

Andy T

SMF Supporter
Joined
Apr 26, 2021
Messages
2,035
Points
113
Location
Sheffield
First Name
Andy
Thanks Pete, and yes, she's come on in leaps and bounds in 8 months. Virtually pain free at the moment, long may it last.

Mick - for this I used quick setting TET because I fitted them before paint. For ones I'm fitting after paint I use formula 560, which is similar to the products you mention but I find it's quite robust.

A bit of an update:
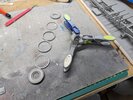
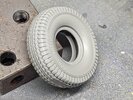
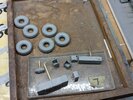
I'm not sure why Das Werk decided to make the tyres out of 6 slices. Personally I'd prefer to clean up 1 seam line rather than 28 gate nubs, but assembly was straightforward and they are nicely detailed. I've since "adjusted" the lettering on the sidewall ;)

2023-09-18 17.10.37.jpg

2023-09-18 18.28.13.jpg

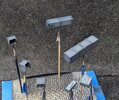
And I've put together a few parts like lockers, fuel tank & the jack.

I'm now at the point where I'm figuring out how much to add before paint. It's always a toss up for me between making access easier now but having a more risky final assembly.

2023-09-18 19.12.13.jpg
 

Andy T

SMF Supporter
Joined
Apr 26, 2021
Messages
2,035
Points
113
Location
Sheffield
First Name
Andy
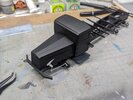
I decided to paint some of the items and get all of the hidden areas primed in black, but got a little carried away!

2023-09-19 15.29.17.jpg

2023-09-19 15.09.24.jpg

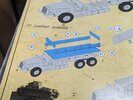
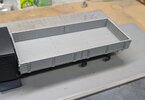
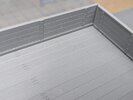
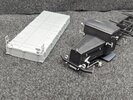
I then moved on to the load bed. The instructions are slightly wrong as parts A1 & A2 are transposed on one side but that was easily spotted on a dry run. Aside from cleaning up the many mould lines, construction was straightforward. I did clip the bed onto its chassis mounts just be be sure everything was flat, but I don't think I needed to bother. I also toyed with the idea of posing some of the sides down, but didn't in the end.

Nice detail and woodgrain finish. Pity most of it won't be seen:

2023-09-19 15.54.41.jpg

2023-09-19 16.12.51.jpg

2023-09-19 16.13.19.jpg

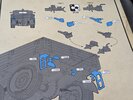
I then added the rest of the knocky off bits and gave it a final prime. There's a slight mistake in the addendum when it comes to assembling either of the towing pintle options (K11 & K13 were numbered incorrectly), but again a dry fit caught that easily.

One thing I didn't spot is the different exhaust tailpipe that comes on the additional hardtop sprue. I wasn't about to start chopping the exhaust about at this stage so I've left the original (straight) one on.

2023-09-20 14.58.34.jpg

2023-09-20 13.30.30.jpg

2023-09-20 14.19.32-1.jpg

So that's the end of the construction phase really, but clearly there's a bit of assembly left to do during / after paint. And no doubt the mirrors will get knocked off again as one has already snapped twice due to me being clumsy.
 

Andy T

SMF Supporter
Joined
Apr 26, 2021
Messages
2,035
Points
113
Location
Sheffield
First Name
Andy
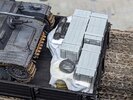
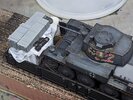
I've started working on some stowage too. That must have been one huge truck if a tank didn't fill the load bed! :surprised:

1000004445.jpg

1000004444.jpg

Some of it is ripped from a previous diorama then I've added a couple of tarps from VMS paper shaper and some value gear crates.
 

Andy T

SMF Supporter
Joined
Apr 26, 2021
Messages
2,035
Points
113
Location
Sheffield
First Name
Andy
Aaarghhh! I knew it was going too well lol

I got the paint on today and was starting to assemble everything. The large side locker only has small mounting points so I decided to reinforce them with super glue. This is where my CA curse bit me.

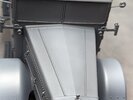
Somehow, after adding a few drops via a rats tail to the underside of the truck I managed to get 4 blobs on top of the bonnet. I've still no idea how it happened! Anywhere else and I could have disguised it with mud or something, but such is Murphys Law.

Anyway, that left me with this mess. Gutted is an understatement:
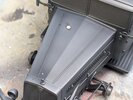
1000004452.jpg

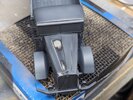
After a good weep, and kicking our imaginary cat all around the garden I set about fixing it.

First off was a good bout of sanding to feather the area out. Starting with 400 and working down to 1500 with my cut down Infini sticks:
1000004453.jpg

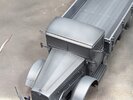
I didn't bother with any masking, I was just careful where I directed the airbrush. I built up the layers of different shades again and was chuffed with the result.

Not perfect but good enough:
1000004454.jpg

1000004457.jpg


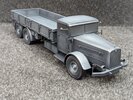
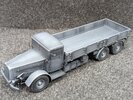
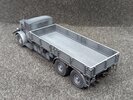
After recovering from that trauma I assembled the rest of it. Now ready for decals etc. It looks a bit light with the black background but it'll darken down with washes and stuff:
1000004458.jpg

1000004459.jpg

1000004460.jpg
 

Andy T

SMF Supporter
Joined
Apr 26, 2021
Messages
2,035
Points
113
Location
Sheffield
First Name
Andy
Thanks all.

I did consider hiding it with a tarp for a moment lol, or there's an aftermarket bonnet blanket available :smiling5:

I've just noticed that the notek light has suffered a bit, another little fix needed. Oh, and the passenger side mirror has been refixed 4 times now. I'm going for a record.
 

Ian M

Administrator
Staff member
Administrator
Moderator
SMF Supporter
Joined
Dec 14, 2008
Messages
19,798
Points
113
Location
Falster, Denmark
First Name
Ian
Great save with that CA blob. We would never had known if you didn't spill the beans. lol.

As for the odd light and mirror getting busted, real life scars on such a big brute of a truck. When I can I always add 'snap offs' right at the end.
 

JayCee

SMF Supporter
Joined
Aug 13, 2019
Messages
1,004
Points
113
First Name
John
Excellent save on the bonnet, Andy. The whole finish is very good.
John.
 
Top