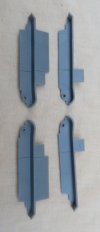
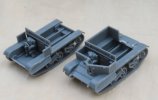
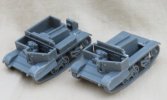
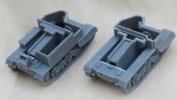
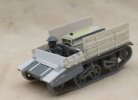
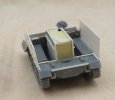
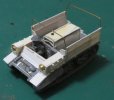
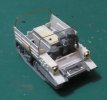
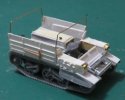
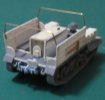
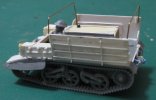
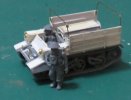
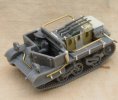
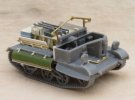
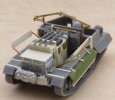
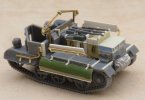
Carrier conversions 28mm

Steve-the-Duck

SMF Supporter
Joined
Jul 3, 2020
Messages
1,128
Points
113
Location
Medway Towns
First Name
Chris
Okay, so do Bren Gun Carriers count as armoured or softskins? Depends on the calibre of the bullet I guess
Well, I'm on a bit of a spurt at the moment, finally getting to some pending projects
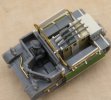
A while back I posted the 28mm Bren Gun Carrier No.2 Mk1, converted out of the Warlord plastic kit. So, now I've finally got around to the two other pre-Universal Carriers, the Scout and Cavalry verfsions
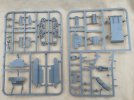
IMG_2171.JPG
This is the basic kit, minus a few bits already used. It's ideal for alteration
 

Jakko

Way past the mad part
SMF Supporter
Joined
Apr 28, 2018
Messages
10,791
Points
113
First Name
Jakko
Fun :smiling3: Some years ago I converted one by Plastic Soldier Company into a Bren Carrier, that was fun, trying to find out how big the side armour is and what stowage goes where. You seem well under way with these.
 

Jim R

SMF Supporter
Joined
Apr 27, 2018
Messages
13,724
Points
113
Location
Shropshire
First Name
Jim
An interesting project. Looks as if you've made a good start on converting the little beasties.
 

Peter Gillson

SMF Supporter
Joined
Apr 27, 2018
Messages
2,153
Points
113
First Name
Peter
Nice progress. Nice to see another carrier fan.

Peter
 

Steve-the-Duck

SMF Supporter
Joined
Jul 3, 2020
Messages
1,128
Points
113
Location
Medway Towns
First Name
Chris
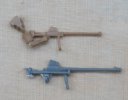
So, next up, the choice of two Boys A/T rifles for the scout. And here we see the differences in two items of the 'same' scale
IMG_2206.JPG
The top is the Perrys Boys, out of their Eighth Army plastics, bottom is the same from the new Warlord set. As you can tell, the Perrys are more properly proportioned, Warlord is chunky, sorry 'heroic'. I'll probably use the Perrys, as that looks closer to the photos, in proportion. I did decide a while back, when I get on to Western Desert to go Perrys for figures. Vehicles, I've an A9, A10 and A13 in the offing
 

Steve-the-Duck

SMF Supporter
Joined
Jul 3, 2020
Messages
1,128
Points
113
Location
Medway Towns
First Name
Chris
Now, because why not, the third Universal I've got is going to be a more elaborate conversion. I was going to use the tracks for the long track-base Vickers Light Mk.VI that went to France, but that's for later, again
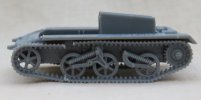
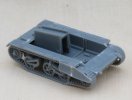
So now, I'm using the kit to do a Dragon Mk.III. Basically the same chassis as the other two, though it's the earlier version with the lower mounted idler wheel
IMG_2204.JPGIMG_2205.JPG
So, I just had to cut the track pieces and swap them around and mount upside down. The gap is covered by the mudguard shields
IMG_2208.JPG
Here's the comparison to my previous Bren Carrier No.2 Mk.I
I COULD have changed the suspension on the Scout and Cavalry, but I've gone for the later versions, where the ride height was increased. Apparently they were slightly faster, but the Dragons didn't pull any better when modified. Almost all the Mk.IIIs (60 or so) went to France, and didn't come back
 

Steve-the-Duck

SMF Supporter
Joined
Jul 3, 2020
Messages
1,128
Points
113
Location
Medway Towns
First Name
Chris
Right, so after all this time with slow progress, I've had a burst of activity while waiting for paint to dry on the Hawker Hector in the biplane GB (and the mis-steps that ensued there!)

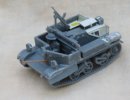
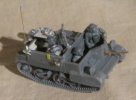
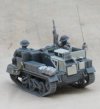
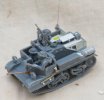
So, the Scout Carrier is built
I was thinking of painting at this stage and adding the rest of the crew afterwards
IMG_2377.JPGIMG_2379.JPG

But then I thought, why not go the whole hog
IMG_2387.JPGIMG_2390.JPG
IMG_2389.JPG
IMG_2391.JPG
Figures are all Warlord plastics, except for the body of the radio op, which is a metal tankie
The radio, just visible, is a slice of a Tamiya German set I had in the spares. When finished, there will a cover over the radio, which was meant to be a rain cover but most often seems to have been used as a map table

Next on to the Cavalry carrier
 
Last edited:

Steve-the-Duck

SMF Supporter
Joined
Jul 3, 2020
Messages
1,128
Points
113
Location
Medway Towns
First Name
Chris
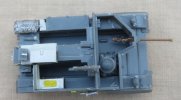
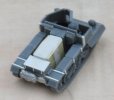
And so, indeed, on to the Cavalry Carrier

IMG_2403.JPGIMG_2406.JPG
That's the main bodywork done. Next to add all the gubbins to the top of the engine compartment

Also:
IMG_2407.JPG
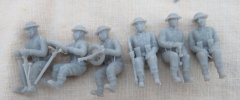
Theses are part of a rather excellent 28mm 3D printed set of seated British soldiers and drivers found on eBay. To fit six in the back will require a little surgery, plus the addition of chest gas-mask pouches
 

Jakko

Way past the mad part
SMF Supporter
Joined
Apr 28, 2018
Messages
10,791
Points
113
First Name
Jakko
Nice conversions, though didn’t the Cavalry Carrier have footrests along the outside?
 

Steve-the-Duck

SMF Supporter
Joined
Jul 3, 2020
Messages
1,128
Points
113
Location
Medway Towns
First Name
Chris
Nice conversions, though didn’t the Cavalry Carrier have footrests along the outside?
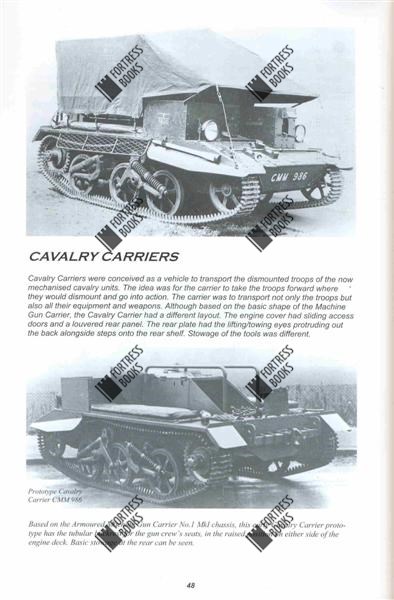
There were grills (Mk.I) or curved covers (Mk.II) over the tracks as splash guards. Although the grills look nice, I'v gone with the Mk_Ii which has the higher position front idler wheel. The passengers faced inwards, with a whopping great adjustable back rest behind them. That's still to be added, along with the collapsible rain cover frame

I suppose I COULD do a Mk.I some time with the top up...
And a Universal at some stage

After my next project which is converting a 28mm Morris CS8 into CDSW
 

Jakko

Way past the mad part
SMF Supporter
Joined
Apr 28, 2018
Messages
10,791
Points
113
First Name
Jakko
There were grills (Mk.I) or curved covers (Mk.II) over the tracks as splash guards.
Ah, yes, that’s what I was thinking of: the Mk. I:

4155173.jpg


I thought they sat facing outward and the grille was a leg protector, but in a photo in AFV Profile 14, Carriers, from ca. 1970 it shows a backrest along the outside — even if the caption for the photo says:—
As the personnel sat facing outwards, safety guards were provided to protect their legs; a hinged hand rail was also fitted.

But that “hand rail” looks very much like a backrest to me, and I think the grilles are more there to prevent equipment hanging down from the passengers’s webbing etc. being caught in the tracks.
 
Last edited:

Steve-the-Duck

SMF Supporter
Joined
Jul 3, 2020
Messages
1,128
Points
113
Location
Medway Towns
First Name
Chris
Jakko, I initially thought the grills were leg protectors, then I got Nigel Watson's Carriers book, which shows the prototype under test, with the very crowded rear compartment

But it does show how documentation and pictures can be misinterpreted, especially scaling where there's no-one standing in the picture

Of course teh intrawebs can be MUCH worse, where one error can propogate out of all proportion!
 

Steve-the-Duck

SMF Supporter
Joined
Jul 3, 2020
Messages
1,128
Points
113
Location
Medway Towns
First Name
Chris
So, here's a couple of the crew figures just placed for size. As can be seen, to get three in the space will require some work
IMG_2411.JPG
I think I'll be making the mudguards out of some aluminium tube I've got lying about, as I've nothing else curvy enough, and I'm not about to warm upsome plasticard just yet
 

Steve-the-Duck

SMF Supporter
Joined
Jul 3, 2020
Messages
1,128
Points
113
Location
Medway Towns
First Name
Chris
So, also where I'm at with the Dragon Mk.III
IMG_2409.JPGIMG_2410.JPG
Still got the seat back-rests, the armoured headlights and the elaborate tow-hook to put on (the latter of which is identical to the one on my Matadors, but I don't have a spare!)
What does get me though, is there seems to be no provision for ammunition storage, so far as my few pics and plans show (a decent rear-view photo would not go amiss). Mk.IIIs were often used as tows for 2 pounders, and that gun doesn't have an ammo limber. So, did the just stack the shell crates on the crews' laps?

BTW, this will be finished as a BEF piece, to go with a 2-pounder I've got. Think I've got a 2-pdr in the boxes. Oh, and almost every one of them was left in France, and yet the Germans don't seem to have re-purposed them, unlike all the Universals and Bren carriers

Hmm...
 

scottie3158

SMF Supporter
Joined
Apr 27, 2018
Messages
12,692
Points
113
Location
Spalding
First Name
Paul
Chris, some great details being added, even better when you realise how small these are.
 

Steve-the-Duck

SMF Supporter
Joined
Jul 3, 2020
Messages
1,128
Points
113
Location
Medway Towns
First Name
Chris
Chris, some great details being added, even better when you realise how small these are.
Many thanks. I need my on stand magnifier permanently on hand
Copious use of 10 and 20 thou plasticard, plus random strip bits go into these!

Forgot to mention, the back plate behind the driver had some surgery done, to turn the seat rest the other way up as it's at the top
The top edge of the side panels may get sum greeblies added, as cover tie-downs. Unfortunately the phot reference show the tilt attached, so I don't know what's there. Even the plans are vague
 

adt70hk

I know its a bit sad but I like quickbuild kits!!!
SMF Supporter
Joined
Sep 4, 2019
Messages
9,491
Points
113
First Name
Andrew
Some great conversion work going on. Really very impressive.

Keep up the good work!

Andrew
 

Steve-the-Duck

SMF Supporter
Joined
Jul 3, 2020
Messages
1,128
Points
113
Location
Medway Towns
First Name
Chris
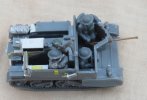
So, the Light Dragon Mk.III is pretty much finished. I will probably do a tilt cover one painted, with the sides up
IMG_2427.JPGIMG_2428.JPGIMG_2429.JPGIMG_2430.JPGIMG_2431.JPGIMG_2432.JPG
The commander figure will be fixed in once everything else is painted. I've used the Milicast 1/76 casting as reference for the rear as still the only phot of the back has an 18/25 pdr and limber being towed, in the way.
All kit parts and figures still Warlord
I had completed the tilt frame, but I thought it looked too tall. Then I found the maker's drawings I've got in the 'Moving the Guns' book have actual dimensions. That, and the photo show the commander head-an-shoulders above the tilt
Cue me removing the brass, cutting the the down, and lowering the tops of the sides by a millimeter. It looks better now, I think. But I could still cock-up the paint job!

Time to complete the Cavalry carrier now
 

Steve-the-Duck

SMF Supporter
Joined
Jul 3, 2020
Messages
1,128
Points
113
Location
Medway Towns
First Name
Chris
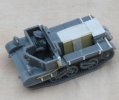
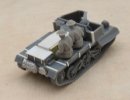
So, here we are, the Cavalry carrier is built
IMG_2457.JPG
Rifle frames and body work added, plus the seat back frames

And so...
IMG_2458.JPGIMG_2459.JPGIMG_2460.JPGIMG_2461.JPG
The pyramid frame at the front is for the tilt cover. Strangely, this was the only variant of the carriers with a tilt cover frame included from the start
Side skirts are from an old MiG-21 fuel pod cut down. I couldn't cut the aluminium tube easily enough, so just a bit of scraping and shaping

The crew are going to require some major surgery, so I may do some undecoating of all three first before THAT exercise

Still tempted to do a Mk.I, as the mesh side-skirts do look better
 
Top