Geoffers
SMF Supporter
Cheers ScottieGeoff,
Looking good mate. The engine really looks the part.

Thank you AndySome nice work on the fiddly stuff there Geoff,the seatbelts look pretty good from where I'm sitting.
Good stuff mate!
The seatbelts aren’t bad but I expected a bit more body to them. I suppose they would look out of scale if they were too thick

Cheers DougVery nice. Looking forward to watching this one progress.

Thanks TimComing on nicely Geoff.
Geoff.


 .
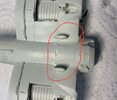
. ) after knocking off and losing the forward antenna. I gave up looking in the end and made a new one from a section of square stryrene rod.
 ,
,")
 .
.


