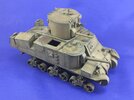
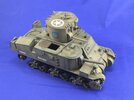
Grant CDL in 1:35

Jakko

Way past the mad part
SMF Supporter
Joined
Apr 28, 2018
Messages
10,846
Points
113
First Name
Jakko
You haven’t seen the taillights, then :smiling3:

306FAFCE-1542-4B4D-BE32-31181BC25E49.jpeg

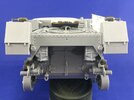
When I put them on, I found they didn’t want to fit as I thought they should. I looked more closely, and it turns out I was trying to put them on upside-down compared to how the instructions and locating pins want them …

But every time I looked at them, I felt there was something not quite right. Eventually I got a book out, and lo and behold: Takom has you install them upside-down compared to the real tank :rolling: A quick two cuts with a knife and I could stick them back on the right way up:
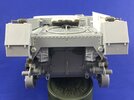
6C8940C7-4A41-4684-B808-973D9E94254C.jpeg

That is to say, the way I wanted to have them when I wasn’t paying attention to the instructions but to how I thought they should go :smiling3:

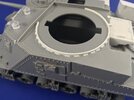
Grants and Lees, including apparently many CDLs, were sometimes refitted with a bullet splash ring around the turret. The British had wanted the Americans to add this to the tank, but they had declined, so eventually they added their own. It’s really just a simple partial ring, made from a number of segments, welded to the hull roof around the turret ring:
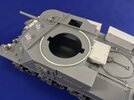
2BFEF739-2914-44E6-9933-E814D7167348.jpeg

In 1:35, it looks to be about 1.5 mm high and 0.75 mm thick, but as I didn’t have any strip like that, I had to cut some from 0.75 mm plastic card. I then just bent it round most of the way by pulling it around the edge of my workbench, put it on the model so I could mark where to cut it to length, and glued it on. Once the glue was dry, I cut it into segments with a chisel-bladed hobby knife — far easier than making the segments first and trying to line them all up.

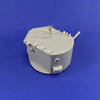
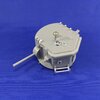
The turret is also mostly finished now:
C0883FEB-49FC-4600-A5B7-E3E00DF31F60.jpeg5784159E-69C1-461B-9EF4-3C617843DA27.jpeg

I think I already mentioned that one of the roof fixtures jumped from my tweezers, never to be seen again, so I made a replacement. I also filed the bolt heads from all the others, because they each had a mould part line and a sprue attachment point directly on them, so I replaced them with new bolts made with my hex punch-and-die set. This also ensured all six are the same size.

The aerial bases come from the spares box. Takom just gives you the rod for the one in the centre, but not the protective ring around it; I replaced the rod by a different, thinner one that fits inside the ring I also found in the spares box. I had to semi-guess at the location for the conical one, but there is a little round lid on the roof that seems to have no other purpose, so I cut it away and glued the aerial base over it.

Finally, the rack on the left side has two bits of plastic strip in it, because Takom gives etch for that but it’s quicker and simpler to cut two pieces of plastic strip, than to clean up the etched parts :smiling3: You also get two etched parts that the instructions tell you to fit vertically between the turret and the rack, which I’ve left off entirely. From the parts, you would never guess that in the real world, those were webbing straps … I get the impression nobody designing the kit realised that :smiling3: Not sure yet if I’ll put anything in the rack, and whether I’ll add the straps, though.
 
Last edited:

Jakko

Way past the mad part
SMF Supporter
Joined
Apr 28, 2018
Messages
10,846
Points
113
First Name
Jakko

Tim Marlow

Little blokes aficionado
SMF Supporter
Joined
Apr 27, 2018
Messages
16,801
Points
113
Location
Somerset
First Name
Tim
Great extra work on this Jakko. Another great build for your shelf coming up…..
 

Jakko

Way past the mad part
SMF Supporter
Joined
Apr 28, 2018
Messages
10,846
Points
113
First Name
Jakko
Thanks, I think I’m mostly done — I want to add some weld seams to places like the bullet splash ring, but I’m still debating how, and need to build the tracks, but other than that, I don’t think there is much left to do.
 

adt70hk

I know its a bit sad but I like quickbuild kits!!!
SMF Supporter
Joined
Sep 4, 2019
Messages
9,508
Points
113
First Name
Andrew
Yet again great work Jakko.

ATB.

Andrew
 

Jakko

Way past the mad part
SMF Supporter
Joined
Apr 28, 2018
Messages
10,846
Points
113
First Name
Jakko
Weld beads, like I said:

31818020-05EC-41F5-B667-A98AF0578801.jpegD7BD7523-10AF-4D62-9F6C-D375829D6425.jpeg

I tried using very thin rolls of two-part epoxy putty, but that stuff sticks to everything except when and where you want it to, so that was not a success. Instead, I eventually settled on the Steve Zaloga method: soaking thin plastic rod or stretched sprue in solvent (I put the rod on a pane of glass and put the solvent on with a brush) so it gets soft, then cut off a bit and place it on the model, where I put on some more solvent and made it into a weld bead with a sharp sculpting tool. You could use a knife blade, but I find that too sharp.

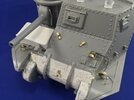
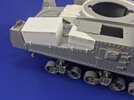
A few still need to be done, but I had had enough for today :smiling3: I then added the even more fiddly bits that needed doing, the bolts that hold the bins to the tabs welded to the hull:
9697FFAB-C8D0-4714-9D43-7F553BE72767.jpeg

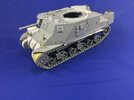
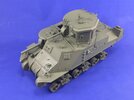
These are 0.5 mm discs punched from 0.25 mm plastic card … another job I’m happy that it’s done :smiling3: I made sure to do the welds on those tabs first, though, so the solvent wouldn’t melt the bolt heads.
 

Jakko

Way past the mad part
SMF Supporter
Joined
Apr 28, 2018
Messages
10,846
Points
113
First Name
Jakko
On the final stretch towards the finish line now …

3B128148-B6FB-495B-BD65-271AD60A4635.jpeg

The kit has link-and-length tracks, but it reminded me why I prefer workable tracks nowadays. I’ve decided to build the tracks as removable so I can actually paint them and the suspension, which meant making them into two sections (one over the drive sprocket and down to the last roadwheel, the other the top run from the drive sprocket over the idler and to the last roadwheel too).

This was fiddly to do because the links kept coming apart in one or two places, and when I did get it all on, I found I was one link short. This could well be because the separate links butt up against each other quite closely, while the lengths have the links slightly further apart. That is to say: I suspect that if you were to space the loose links the same way as in the lengths, you would have precisely enough. But good luck doing that, and having a track that doesn’t fall apart (if you glue them on the tank before painting, it’s probably doable, though). Luckily, D sprue has four extra links (eight, actually, of two types) that the instructions don’t mention at all, so I pinched one of those to make up the bottom run.

The sections are held together by tape, as you can see, and I needed to somehow push them down onto the return rollers as well, because the top run kept springing up off that. A rolled-up piece of paper did the trick, luckily.
 

Jakko

Way past the mad part
SMF Supporter
Joined
Apr 28, 2018
Messages
10,846
Points
113
First Name
Jakko
The other track has been built too, I added the couple of weld beads I didn’t feel like anymore the other day, and I put in a MiniArt figure:

F14497EB-003C-4127-9E88-E50B8AAD7563.jpeg8AF076AB-D991-4548-B782-D593DC9315CA.jpeg5C376C58-6279-4FD8-8B25-60DAA910F4B2.jpeg1D63724F-D040-420D-894F-CD544097A95B.jpeg

Now I think I’ll prime the new metal bits with Mr. Surfacer, and then I can spray the tank.
 

Jakko

Way past the mad part
SMF Supporter
Joined
Apr 28, 2018
Messages
10,846
Points
113
First Name
Jakko
And here it is with some paint on:

0BB36B48-FE3A-49A0-9DD9-35FBB2D0D35C.jpeg

This should be British SCC 15 olive drab, mixed from Tamiya acrylics according to a recipe by the authority on the subject, Mike Starmer, from five parts XF-81 RAF dark green, one part XF-58 olive green and one part XF-71 Japanese cockpit green. This results in a paint that’s a little lighter and greener than the Mr. Aqueous Hobby olive drab I normally use for American vehicles.

For those interested, I mixed this by first cleaning out a Tamiya paint jar, the large kind holding 23 ml, and then putting in 10 ml of water using a graduated syringe, then putting a piece of masking tape on the side, level with the surface of the water. I next added 2 ml more and stuck on another piece of tape, offset from the first, and then did that again. After pouring out the water and drying the jar, I took a new 10 ml jar of XF-81 and poured all of it into the empty one, which nicely got up to the first piece of tape. Then I poured in the other two colours, one at a time, until the level reached the next piece of tape. All that remained was to stir thoroughly with an ice lolly stick to get an even colour.

But, of course, the paint in the airbrush ran out before I had completely painted the sprockets and idlers, and I didn’t exactly feel like putting one drop of paint in the airbrush in order to finish spraying, so I’ll do them by hand later. I’ve got a lot of the mixture left — hopefully enough for my next tank, that will also be British :smiling3:

One thing I’m not that happy with, is that the turret rubs the paint off the splash ring, as you can see by the bit of white on it. I think I’m going to cut the tabs off the turret so it can simply be put into any position without needing to actually turn.
 

Jakko

Way past the mad part
SMF Supporter
Joined
Apr 28, 2018
Messages
10,846
Points
113
First Name
Jakko
And some more paint:

9D5773BD-5470-4C54-AE53-C5AF25B319CD.jpeg

This is highlights in the panel centres from Mig 0068 IDF Green, followed by a wash made by thinning Army Painter Soft Tone about 1:1 with water, and once that was dry, a drybrush of Revell 45 Light Olive.

The inside of the loader’s hatch is now Mr. Aqueous Hobby H78 Olive Drab (2), to indicate it’s the original American olive drab to contrast with the British repaint of the rest of the tank.
 

Mini Me

SMF Supporter
Joined
Jun 1, 2018
Messages
10,161
Points
113
First Name
Rick
Totally agree with Scottie on this....well done :thumb2:
 

Allen Dewire

Proud Rabble Member
SMF Supporter
Joined
Apr 27, 2018
Messages
4,105
Points
113
Location
Bamberg
First Name
Allen
I'm still with this here, Jakko. Top work and a fine paint job too. I do hope you add that figure when she's finished as it looks perfect in the hatch. It's always tea time, you know!!!...

Prost
Allen
 

Jakko

Way past the mad part
SMF Supporter
Joined
Apr 28, 2018
Messages
10,846
Points
113
First Name
Jakko
The suspension is now mostly done too:

BCED2AAA-DCBC-4DEB-8DA6-E918DCCFBD73.jpeg

What the photo doesn’t show well is that I painted the wheel rims as bare metal:

BF0B2663-3572-4DBC-B3DE-759E2DCA5572.jpeg

This because the paint rubbed off them in the real world pretty easily because of all those track teeth, but most black-and-white photos don’t show that well, or at all.
 

Jakko

Way past the mad part
SMF Supporter
Joined
Apr 28, 2018
Messages
10,846
Points
113
First Name
Jakko
And markings on:

C0C26112-4DE5-4854-9AC9-E97E72CC4D6E.jpeg

Unfortunately, Takom took a shortcut here as well :sad: They appear to have looked at this well-known (series of) photograph(s) of Giraffe:
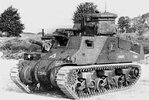
F0C066B8-FBE4-40F9-B919-1754E7FEA626.jpeg

… and took all marking options from its mould too. The kit does provide those for Giraffe, but also five others that only differ in name, census number and squadron symbol — when in fact Giraffe has a number of anomalies in these, like having the census number and squadron symbols on front and rear. Takom oddly also give you two bridge classification discs, one for the front and another for the rear, which is completely odd. It’s almost as if they didn’t realise what that yellow disc signifies.

I applied the markings for Badger, except for the ones I don’t think should be there. It also seems the squadron symbol (the blue square) is spurious, but I only found that out after applying it, and I’m not making a model of a specific vehicle anyway, so I’ll leave it.
 
Top