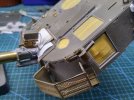
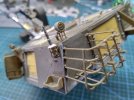
They look great. What do the colors signify?
- Home
- Forums
- Military Vehicles
- Military Vehicles Under Construction
- Armoured Vehicles Under Constuction
You are using an out of date browser. It may not display this or other websites correctly.
You should upgrade or use an alternative browser.
You should upgrade or use an alternative browser.
IDF M109 'Doher'
- Thread starter Scratchbuilder
- Start date
Scratchbuilder
SMF Supporter
- Joined
- Jul 2, 2022
- Messages
- 1,938
- Points
- 113
- First Name
- Mike
Scratchbuilder
SMF Supporter
- Joined
- Jul 2, 2022
- Messages
- 1,938
- Points
- 113
- First Name
- Mike
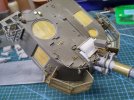
Morning Paul,They look great. What do the colors signify?
Colours of the ammunition - this varies with the mission profile ie Illumination, Penetration, Air Burst etc and the shells themselves are colour coded for example Light Blue for Illumination.
Now the containers (Yellow) we are talking about ONLY contain the propellant charge, so you get your shells (above) delivered seperately and then along comes another delivery of the charge and in different sizes. The power of the charge is printed on the canister and label (as per my models) and each charge is selected to go with whatever you are firing at. Except, the Light Blue canister contains not only the charge but also the parachute, and the whole is screwed to the top of the shell where you would normally put the fuse. In the Illumination setting the fuse comes in the Light Blue canister, but all other fuses come on seperate boxes.
The Olive Drab canister contains a Marker, to aid in air to ground operations, so the artillery mark the area with their smoke (Red, Yellow, Green) and the FAC (Forward Air Controller) can then come in and identify the target and call in the respective air response. But again the Marker needs a shell (Dummy) to add weight to the projectile. And the Black canisters are again charge bags for the shells.
This info comes from my friend in the IDF, hence the slow reply..
Cheers
Mike.
Great info., thanks Mike.
Scratchbuilder
SMF Supporter
- Joined
- Jul 2, 2022
- Messages
- 1,938
- Points
- 113
- First Name
- Mike
Neil Merryweather
SMF Supporter
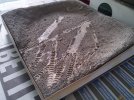
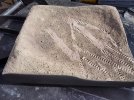
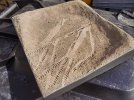
...but the wheelie bin doesn'tLooks better in natural light....
Mike.

scottie3158
SMF Supporter
Nice base mate.
Scratchbuilder
SMF Supporter
- Joined
- Jul 2, 2022
- Messages
- 1,938
- Points
- 113
- First Name
- Mike
That was the threat - either you look good or in you go.......but the wheelie bin doesn't
Scratchbuilder
SMF Supporter
- Joined
- Jul 2, 2022
- Messages
- 1,938
- Points
- 113
- First Name
- Mike
Update,
Work on the front of the hull has finally been completed...
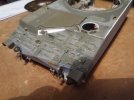
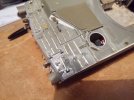
The 'new. fire control computer is also now fitted into the turret and the turret masked ready for primer and paint once the hull is complete...
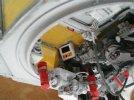
The rear door for the hull has been altered to the correct one for a Doher and not the M-109 (US etc)...
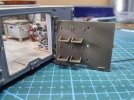
The kit version....
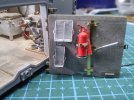
The IDF version - the fire extinguisher will be repainted and securing straps will be fitted.
All the pallets are now finished and waiting for the stowage racking.
The tracks have had some work progress, but no rush on these as a fair way to go yet.
Cheers
Mike.
Work on the front of the hull has finally been completed...


The 'new. fire control computer is also now fitted into the turret and the turret masked ready for primer and paint once the hull is complete...

The rear door for the hull has been altered to the correct one for a Doher and not the M-109 (US etc)...

The kit version....

The IDF version - the fire extinguisher will be repainted and securing straps will be fitted.
All the pallets are now finished and waiting for the stowage racking.
The tracks have had some work progress, but no rush on these as a fair way to go yet.
Cheers
Mike.
scottie3158
SMF Supporter
Superb mate.
That is some incredible detail work in that fighting compartment!
Scratchbuilder
SMF Supporter
- Joined
- Jul 2, 2022
- Messages
- 1,938
- Points
- 113
- First Name
- Mike
Update.
So to the rear - Number plate added, rear idler attachments now in place as are the anchor blades....
The two tool boxes were the next to go on, with one open to show a few tools...
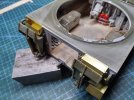
And next it was onto the rear mud guards....
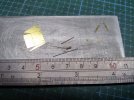
These are the etch parts and the other parts that will be added....
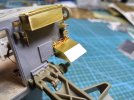
Just got to add the release pull in the slot you can see, and then it will be onto the next one. This first one took me about 2 hours to put together and mount in place.
More later,
Cheers
Mike
So to the rear - Number plate added, rear idler attachments now in place as are the anchor blades....
The two tool boxes were the next to go on, with one open to show a few tools...

And next it was onto the rear mud guards....

These are the etch parts and the other parts that will be added....

Just got to add the release pull in the slot you can see, and then it will be onto the next one. This first one took me about 2 hours to put together and mount in place.
More later,
Cheers
Mike
scottie3158
SMF Supporter
Superb skills as always.
Scratchbuilder
SMF Supporter
- Joined
- Jul 2, 2022
- Messages
- 1,938
- Points
- 113
- First Name
- Mike
Cheers Paul.Superb skills as always.
Scratchbuilder
SMF Supporter
- Joined
- Jul 2, 2022
- Messages
- 1,938
- Points
- 113
- First Name
- Mike
Update,
Just a few more pics of the progress....
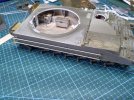
Work has started on the side stowage rails, I replaced the kit offerings with brass etch attachment brackets (Voyager M-109) and the rails with 1mm aluminium tube, two more brackets to add this side.... And nearly forgot the new filler cap....
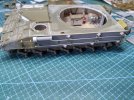
Left side completed with the 'bucket' stowage for the cleaning rod. bracket for holding spare track links and clamps complete with new 'butterfly' fasteniers for the tow cable.
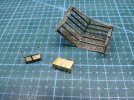
Then it was back to the turret to start finalising the outside. First come the two front stowage baskets, above is the left hand one waiting to be cleaned up and then have the ammo box rack and the jerry can holder added....
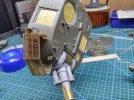
This is the right side one attached showing the jerry can holder....
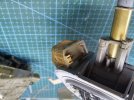
And this is the tool holder at the front, just got the pin and chain to add to the top bracket.
And that is it for now
Cheers
Mike.
Just a few more pics of the progress....

Work has started on the side stowage rails, I replaced the kit offerings with brass etch attachment brackets (Voyager M-109) and the rails with 1mm aluminium tube, two more brackets to add this side.... And nearly forgot the new filler cap....

Left side completed with the 'bucket' stowage for the cleaning rod. bracket for holding spare track links and clamps complete with new 'butterfly' fasteniers for the tow cable.

Then it was back to the turret to start finalising the outside. First come the two front stowage baskets, above is the left hand one waiting to be cleaned up and then have the ammo box rack and the jerry can holder added....

This is the right side one attached showing the jerry can holder....

And this is the tool holder at the front, just got the pin and chain to add to the top bracket.
And that is it for now
Cheers
Mike.
scottie3158
SMF Supporter
This is modelling at its very best.
Scratchbuilder
SMF Supporter
- Joined
- Jul 2, 2022
- Messages
- 1,938
- Points
- 113
- First Name
- Mike
Thanks Paul, there I was patting myself on the back and congratulating myself that the turret was now finished, but in the back of my mind was that niggle that something was missing - oh! it was missing alright - it was all the fittings and the stowage baskets - now that was a real Simpsons moment....
I'm guessing it was not "Oh! Doughnuts!"now that was a real Simpsons moment....
Scratchbuilder
SMF Supporter
- Joined
- Jul 2, 2022
- Messages
- 1,938
- Points
- 113
- First Name
- Mike

