IDF M109 'Doher'

Scratchbuilder

SMF Supporter
Joined
Jul 2, 2022
Messages
1,935
Points
113
First Name
Mike
Wow Olderthanme!!! You're making fantastic progress on the dough thang Sir. I been following along from my sick bed cheap seat in the back and really enjoying this. A bit too modern for me, but the details are one-of-a-kind Mike!!! It's almost a shame to cover all that work with primer though. Keep it coming my friend and I'll try and keep up now...

Prost
Youngerthanyou
Hello Youngerthanme,
Hope you are on the mend.
Actually looking forward to putting the interior in primer and paint, then I can get on and actually build the kit....
You are safe in the cheap seats the plastic off-cuts do not fly that far.
Ordered one of those bibs that have a drool tray for Neil....
Prost
Olderthanyou
 

Scratchbuilder

SMF Supporter
Joined
Jul 2, 2022
Messages
1,935
Points
113
First Name
Mike
Update,
Little bit more work on the turret inside (gun sight mechanism) will put pics on later.
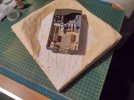
Now about to start carving up the base....
20240228_112151_HDR.jpg
This is a first for me - normally it would have been all wood and plaster. But I obtained a foam cutter and played around with it to get the feel of using it. I also tried out the Deluxe Materials Aliphatic Resin wood glue opposed to the normal PVA and it does what is says on the bottle - it sticks....
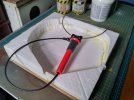
20240228_112216_HDR.jpg
So I am now about to be let loose with my second foam cutter, the first being a standard table version, but this is the hand held version, so armed with protective armour and cod piece the fun will begin - more later...
Mike.
 

Scratchbuilder

SMF Supporter
Joined
Jul 2, 2022
Messages
1,935
Points
113
First Name
Mike
Update,
So the wire cutter worked well and all my bits are still attached and where they should be - although I nearly forgot and tried to take a bit of foam off the hot wire a couple of times....
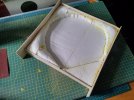
20240229_113954_HDR.jpg
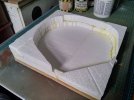
So after the shaping of the foam, it was time to add the Balsa edging to the base....
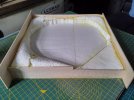
20240229_114005_HDR.jpg
Everything stuck as advertised and I then went to work after allowing the base to sit overnight with the sharp new blade to trim down the Balsa....
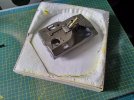
20240229_121047_HDR.jpg
It was then time to take the bull by the horns and open the pot of 'Foam Putty' from Woodland Scenics - first job was to get the top of, after a few minutes struggle it was out with the flat blade screwdriver and lever it off, top flew away and I expected to get covered - but no, there it was sitting in the pot just like Angel Delight.... So armed with a spoon, I scooped out spoons of the material and worked it around the base, I then followed up with a dry sponge tapping the foam and adding a texture finish... Last job was to add the track marks and put the base away to dry out fully overnight... I will be using this material again (still have half a pot left) instead of tons of plaster based material.
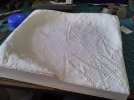
20240301_145138_HDR.jpg
20240301_145155_HDR.jpg
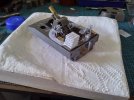
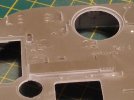
So, back to the Doher - I made up two brackets to hold the periscope when not in use, but as they do not use the periscope but a computer the brackets are left empty.
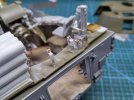
20240301_145042_HDR.jpg
A little blurred but at 8mm tall....
20240301_144922_HDR.jpg
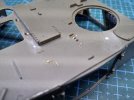
I have also started to install all of the tie downs, sorry for the picture quality, I tried....
More later.
Mike.
 

scottie3158

SMF Supporter
Joined
Apr 27, 2018
Messages
12,692
Points
113
Location
Spalding
First Name
Paul
Mike, how do you go about making your tie downs. I can make good ones but they take for ever.
 

Scratchbuilder

SMF Supporter
Joined
Jul 2, 2022
Messages
1,935
Points
113
First Name
Mike
Mike, how do you go about making your tie downs. I can make good ones but they take for ever.
I have a small plastic jig made up and use copper wire pressed into it. I flatten the ends off and trimmed to length... Will bring it along and show you at the show.
BUT!!! on this build I am cheating, these are from the Black Dog M-109 resin set that comes with some etch...
Aber and Accurate Armour do etch sets as well.
 

scottie3158

SMF Supporter
Joined
Apr 27, 2018
Messages
12,692
Points
113
Location
Spalding
First Name
Paul
I have a small plastic jig made up and use copper wire pressed into it. I flatten the ends off and trimmed to length... Will bring it along and show you at the show.
BUT!!! on this build I am cheating, these are from the Black Dog M-109 resin set that comes with some etch...
Aber and Accurate Armour do etch sets as well.
Ok mate I look forward to seeing it. I have etch ones but they never look right to me to flat.
 

Jakko

Way past the mad part
SMF Supporter
Joined
Apr 28, 2018
Messages
10,791
Points
113
First Name
Jakko
Same, and I never manage to bend them into shape correctly anyway, being so tiny. Bent copper wire I can do, though, or a couple of punched discs plus a bit of thin rod or stretched sprue. I’ve been meaning to make a jig like the one Mike mentioned above (and has before) but as per usual, I never remember to when I’m in my modelling room :smiling3:
 
  • Like
Reactions: JR

Jim R

SMF Supporter
Joined
Apr 27, 2018
Messages
13,724
Points
113
Location
Shropshire
First Name
Jim
That foam putty stuff looks to have worked well. Unlike plaster based products I suppose there is no shrinkage or cracking. Will it need sealing before paint?
 

JR

Member of the Rabble and Pyromania Consultant
SMF Supporter
Joined
May 26, 2015
Messages
17,275
Points
113
Location
lincs
First Name
John
Excuse me Wibble .
That foam putty stuff looks to have worked well. Unlike plaster based products I suppose there is no shrinkage or cracking. Will it need sealing before paint?
Jim I've used their foam putty , it's really good. Seals XPS foam .Used it on a dio and just varnished the surface .Dries very hard.Strange as it's so light.
 

Scratchbuilder

SMF Supporter
Joined
Jul 2, 2022
Messages
1,935
Points
113
First Name
Mike
That foam putty stuff looks to have worked well. Unlike plaster based products I suppose there is no shrinkage or cracking. Will it need sealing before paint?
The blurb on the tub says you can paint over it, but being the coward that I am I will put a coat of acrylic over it as a base, and then a test on a piece to see how it reacts to lacquers.
 

Scratchbuilder

SMF Supporter
Joined
Jul 2, 2022
Messages
1,935
Points
113
First Name
Mike
Excuse me Wibble .

Jim I've used their foam putty , it's really good. Seals XPS foam .Used it on a dio and just varnished the surface .Dries very hard.Strange as it's so light.
I tried eating it, well I was hungry and it really looks like Angel Delight, that and the Prunes went down a treat - no reaction so far....
 

Scratchbuilder

SMF Supporter
Joined
Jul 2, 2022
Messages
1,935
Points
113
First Name
Mike
Update,
So had a serious play with the water trap bucket and spray booth and must say all went better than expected, no fume or nasty smells - except for one thing - after I had finished priming and cleaning up, throwing the used kitchen towel into the recycle bin I could smell the fumes from the thinner and laquer.... What I had forgotten to do was after spraying one item I should have moved it to the shed to dry and not leave it in the room (idiot).... But I did what I should have done when putting the top coat on and no smells at all...
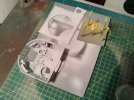
20240305_192305_HDR.jpg
The Yellow items are the fire extinguishers in undercoat - red on tomorrow...
The tie downs are all done...
20240305_192429_HDR.jpg
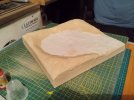
The base has had a coat of pva on the white 'floor' and the outer bank and sides are covered in wood sealer...
20240305_192340_HDR.jpg
20240305_192402_HDR.jpg
Once I start to add the 'earth' mixture then the whole sides and floor will be blended in together....
And that is it for now.
Cheers
Mike.
 
Top