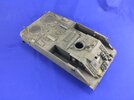
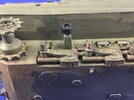
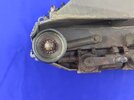
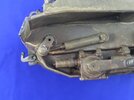
JPK 120 in 1:35

The Smythe Meister

Born to be WILD....... until about 9pm
SMF Supporter
Joined
Jan 30, 2019
Messages
5,749
Points
113
Location
Devon
First Name
Andy
That's looking superb Jakko, quality painting on the vehicle and really fiddly/impressive decal work. :smiling3:
I know what you mean about figures,one thing I do bear in mind when looking at someone's pictures of them is....take into consideration just how they tend to completely obliterate how they actually look to the naked eye,I've often been quite pleased with a figure I've done,taken some pics,zoomed in and thought "bloody hell, what's that" !!! :sad:.... Hence I don't zoom in on other's pics.... Your chap there seems to be developing well to me ;)
 

Jakko

Way past the mad part
SMF Supporter
Joined
Apr 28, 2018
Messages
10,839
Points
113
First Name
Jakko
Thanks :smiling3: Seeing a model much larger than it actually is usually shows up all kinds of defects, yes — I’m fairly happy with the figure’s paintwork when I look at the real thing, but not when I see those photos :smiling3: Though it’s not helped by, as I said, the difficulty of taking photos of a figure using my iPad, as it tends to wash out all the shaded and highlighted colours into a single one. Maybe I should see if there’s camera software for it that doesn’t try to improve the photos for me.
 
  • Like
Reactions: JR

Jim R

SMF Supporter
Joined
Apr 27, 2018
Messages
13,756
Points
113
Location
Shropshire
First Name
Jim
Despite the limitations of the photos all looks very good. Decal chopping up has worked neatly. As for the figure I reckon he's pretty good.
 

Jakko

Way past the mad part
SMF Supporter
Joined
Apr 28, 2018
Messages
10,839
Points
113
First Name
Jakko
Thanks, it still needs some work but I’m slowly getting there … Part of that has been giving the whole model a wash of Revell dark earth, kept thin so it doesn’t look too dirty:

IMG_9704.jpeg

I made it thicker on the underside, wheels and tracks so those look dirtier.

After that I wanted to put on those wheels and tracks, but encountered a problem I should have seen coming: the poly caps don’t want to fit over the axles that I thickened with copper wire. They went on fine when I tested them initially, but I now realise that was because I pushed/twisted on the cap on with my fingers — but now, they’re inside the wheels where they can turn freely, so it’s impossible to twist them onto the axles :sad: I think I may have to take the wire off and put a thinner one on.
 

Jakko

Way past the mad part
SMF Supporter
Joined
Apr 28, 2018
Messages
10,839
Points
113
First Name
Jakko
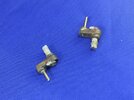
The solution to fitting the wheels seems to be to remove the copper wire I wound around the axles and replacing it by something thinner:

IMG_9707.jpeg

On the left the original wire, which is 0.6 mm thick, and in the right the replacement of 0.4 mm. Unfortunately it’s very hard to wind it on neatly because there is hardly any room to do that in, but the test wheel fits on the axle and stays on it better than with no wire, so I guess I’ll have to trust in glue to do the rest.

And another mistake I should have spotted earlier:

IMG_9705.jpeg

I had moved the idler wheel mounts forward, but did that too far: there is hardly any room between the wheel and the mudguard, so the track won’t fit. Here, I decided to drill through the arm’s pivot point and into the hull:

IMG_9706.jpeg

That done I carefully broke them off the hull and installed brass pins:

IMG_9708.jpeg

Now all I need to do is cut back the piston rod (that I forgot to paint silver so far) so the arms can be turned downward enough so there’s room for the track.
 

Jakko

Way past the mad part
SMF Supporter
Joined
Apr 28, 2018
Messages
10,839
Points
113
First Name
Jakko
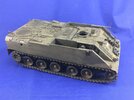
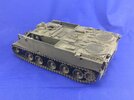
Well, that was a struggle :sad:

IMG_9710.jpegIMG_9711.jpeg

The wheels didn’t really want to go on well at all, but I got them to fit eventually. I also had to take a link out of each track because it was a bit too loose, but that’s one of the advantages of using workable tracks.

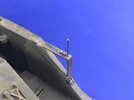
On top, I replaced the mirror stays by 0.5 mm brass rod:

IMG_9712.jpeg

The one on the right of the vehicle had already broken off, that on the left snapped part of the way through tonight, though I had already decided to replace them both some time ago. With the plastic parts cut off, I drilled though the mounting brackets from front to back with an 0.55 mm drill, bent the rod into two L-shapes of the same size as the plastic parts, and glued them into the drilled holes. The mirrors themselves will only be added once the guns are in, because the mirrors get in the way of those.
 

Jim R

SMF Supporter
Joined
Apr 27, 2018
Messages
13,756
Points
113
Location
Shropshire
First Name
Jim
Glad you managed to sort the issues. It's always difficult to put things right at such a late stage in a build.
 

Jakko

Way past the mad part
SMF Supporter
Joined
Apr 28, 2018
Messages
10,839
Points
113
First Name
Jakko
Thickening the axles for the wheels would have worked perfectly, had I used thinner wire from the start. As it was, I couldn’t wind the new wire on neatly, so it was much harder to make the wheels go on right. My advice to anyone else needing to make axles thicker is to assemble a whole wheel first and use that to see if your method works, rather than testing with just a poly cap like I did.
 
Top